Showing posts with label organization. Show all posts

2.22.2016

Favorite Find {Organization}: IKEA TRONES

If you've been around this blog for any length of time, you know I love me some good organization. When we moved into our new house around Thanksgiving, we were suddenly faced with something we had never had before: tons of storage space! Since we have fairly large closets in each bedroom, a linen closet in the bathroom, an unfinished basement and a garage, we haven't been very efficient or thoughtful about storage organization. We were desperate to get everything out of boxes and out of sight when we moved in, so we haphazardly threw things in closets upstairs and whatever didn't have a home there got demoted to the basement - not so good! All this disorganization been starting to bug me lately, and I'm hoping to get on the organization train soon. I figure if I write about it here, y'all might help keep me accountable :).

One place we've struggled with since day one in this house has been shoe storage, so I did what any normal human on the hunt for organization inspiration would do - headed to Pinterest. There I found my new love: the IKEA TRONES. I had noticed it in store before, but after seeing them in real folks' homes, I've become a big fan. It's a versatile little guy that provides great storage for shoes, but can also be used to store a variety of other small items as well. It blends in nicely with many decor styles.

Let's take a look at a few examples, shall we?

Entryway:

 {Stadshem via Elvira Spekulerar}
{Nalle's House}

Bedroom:

{Decor8}
{Dos Family}

Bathroom:

{IKEA}
{Bright Nest}

Office:

{Hey, Let's Make Stuff}

Gosh, the possibilities are endless! I can see these being used in so many ways other than shoes. Also, did I mention the price? $39.99 for a set of three boxes. Unbeatable! 

Do you have any of these in your house? If so, what do you use them for?

Enjoy what you read today?  Enter your email address below to subscribe to May Richer Fuller Be!  Delivered by FeedBurner

Pin It!

1.12.2015

Quick Organizing Tip: Label Cords With Washi Tape


Sometimes it's little things that can make a BIG difference in keeping our lives in order. Today I want to share an organizing tip with you that has kept my husband and me a little more sane when it comes to cords and chargers. We have what seems like an endless amount of these in our house - is that true for your home as well? iPhones, Kindles, iPads...the list goes on. Each one of those has a charger to go with it and it's easy to lose track of which one belongs to which device (or whose device), especially when many look identical.

So I thought to myself, wouldn't it be great if there was a way to easily tell them apart? 

Then it hit me: washi tape! Why not assign a pattern to each person and/or device? That way, you always know who that iPhone charger belongs to that's plugged into the living room wall, or whose earbuds are sitting on the kitchen counter without even having to ask. My husband used to accuse me of stealing his earbuds all the time (in jest...mostly :)) before we started labeling them and now it's easy to tell which ones belong to each of us.


All I did was add a little washi tape "flag" to the cord area and now it's easily identifiable. We even have a couple of extras that don't belong to anyone in particular and they have their own pattern.

The photos in this post show two examples. In the one below, the two on the left with the stripes are mine, and the two on the right with the gold are extras.


This washi tape labeling system is also really, really helpful when you're traveling, especially if you're staying at someone's house or traveling with others. No more questioning whether that iPhone charger belongs to you or if you're accidentally stealing it from your host! That can get awkward real quick... ;)

So that's my quick organizing tip to kick off the week. Do y'all have any little tricks like this that make a BIG difference to your lives?


Enjoy what you read today?  Enter your email address below to subscribe to May Richer Fuller Be!


 Delivered by FeedBurner

Pin It!

9.03.2014

11+ Creative Uses For 3M Command Strips


I hope y'all had fantastic Labor Day weekends. Can you believe it's already September?! (Pssst - Don't forget to download the September iPhone calendar here!I decided to savor every last bit of my day off, so there was no post ready to go up yesterday - oops - but I'm here today and I've got a good one for you!

To me, September signals the transition from summer to fall. The change in season, plus the whole "back to school" thing that's happening right now gives me an itch to get organized and get our house in order. A fresh start, if you will. Anyone else feel that way? And you know what one little thing can be super helpful in getting organized? 3M Command Strips*. They can be used in all sorts of ways all over the house and can be especially handy in rentals and dorm rooms since they won't damage your walls or other surfaces. I love these little guys and a whole bunch of 'em just arrived on my doorstep last week - can't wait to put them to good use!


Pin It!

8.13.2014

Mini Bulletin Board Makeover with Custom Pushpins


A few days ago, I did a mini project for the office that's helping keep me a little more organized. I gave a small bulletin board that used to hang in our DC apartment's kitchen a quick makeover and made some custom pushpins to go with it.  If you are a very observant reader, you might remember it was covered in dandelion fabric, which I actually thought was pretty, but it didn't fit with feel I'm going for in my office here.

Here's what it looked like:


Pin It!

3.06.2014

Best of February Roundup

My how time flies! I just looked back and realized I didn't do a favorite posts round up for December or January - eek! So we'll just pretend that didn't happen and start again with February, mmk?

In case you're new around here, once a month wraps up, I always like to take a quick look back and highlight some of my favorite projects. It's nice to see where I've been up to, and it also makes it easy for y'all to catch up on any posts you may have missed.

Let's take a look back at February!

I had fun experimenting with and repurposing plastic spoons to create this Valentine's Day heart garland. If there's a next time, I think I'll actually buy plastic spoons in the appropriate colors to avoid the mess of having to paint plastic (or buy some spray paint made for plastic). Hand painting was fine for this project, but if it needed to be durable or "chip-proof" at all, this certainly wouldn't have been the right paint!


I flexed my typography muscles and created some DC-shaped art for the city I love and will be leaving all too soon! If you love DC too, you can buy one of the prints from my Etsy shop.


Speaking of leaving DC, I detailed our next adventure in this state of the blog address. We're headed to Philadelphia this summer! Hello cheesesteaks and American history!


Y'all seemed to dig this round up of photography tips I pulled together in February, so I'll keep my eye out for more of those for a future post. I'm always eager to learn more and improve my skills, and apparently y'all are too!


I love the little West Elm-inspired makeover I gave my bedside table for the Be Bold Challenge. I'm so glad I took a risk on making the little wood tiles - they turned out even better than I imagined!


And finally, I showed off one of my tricks for keeping my office organized and my workflow efficient: magazine files! These little things are really hard workers in my tiny office area.


That wraps up February's favorite posts! I'll be back tomorrow with my favorite links from around the web this week!


Pin It!

2.25.2014

Magazine Files {My Secret Weapon for Office Organization}


This post was supposed to go up on the heels of last week's office update post, but got a little delayed over my excitement about being in a magazine (eek! still freaking out). So here we are today, picking back up where I left off last week!

I showed you this photo of my "grasscloth" upholstered Expedit and talked about how these magazine files that are up on the top row of cubbies are my secret weapon when it comes to keeping the office organized. They used to actually hold magazines, but since I hadn't looked at a single one since I stored them there, I figured it was time to toss those into the recycling bin and find a new use for these guys. Turns out they're perfect for storing some miscellaneous office supplies that I need to have handy everyday, but that I don't want to have to see all the time - ya know what I mean?

Concealed storage = less visual clutter.

So if I'm not storing magazines in here, what am I storing?

Well, in one I keep two reams of printer paper. I go through a lot of paper for my job (sorry environment!), but since I'd rather not keep a big ole industrial-sized box of it out and visible, I keep two reams handy in one of the magazine files. When I finish one off, I replace it with another from the larger box.


When my printer runs out of paper, it's really easy to reach behind me (since the Expedit sits behind my desk) and grab a stack to reload it. This is much more efficient than having to get up and retrieve the paper from the big box that's stored elsewhere in our apartment. 

The second thing I store in one of these files is blank charts (manila folders). Just like a doctor's office, I have a chart for each patient I see. Similar to the printer paper, I've got a whole big box of these elsewhere, but it's much easier to keep a bunch nearby that I can easily grab on the fly when I need them. 


And lastly, working from home means that I've become BFFs with my FedEx Express man. I pretty much run a tiny FedEx Office out of my apartment since I have to ship stuff to my boss or our home office almost every day. It was driving me nuts not having a good, easy-to-access place for all my envelopes and shipping supplies when I first started working from home (picture shipping labels and tracking receipts scattered all over my desk area!). Then one day it hit me that I could store my supplies in one of the magazine files and voila! Problem solved.


They're easy to pull out with one hand and grab what I need. Sometimes I even pull out a couple of them at a time and sit them on the floor next to my desk. At the end of the day, back they go into the Expedit, which helps me keep my work area clutter-free.


Oh, and in case you were wondering, they used to be plain white, but I added a strip of white and yellow washi tape along the top and bottom to jazz 'em up a little bit.


Using these magazine files for non-traditional purposes is one of my absolute favorite ways I've come up with to keep my home office organized. I even have three empty ones in the next door cubby that I'm figuring out how to make more useful for storage. Love having room to grow! Any of y'all use them not for magazines?

So that's my secret weapon for keeping a crucial part of my home office organized and improving my workflow. 


Pin It!

2.19.2014

Working From Home: Two Months In


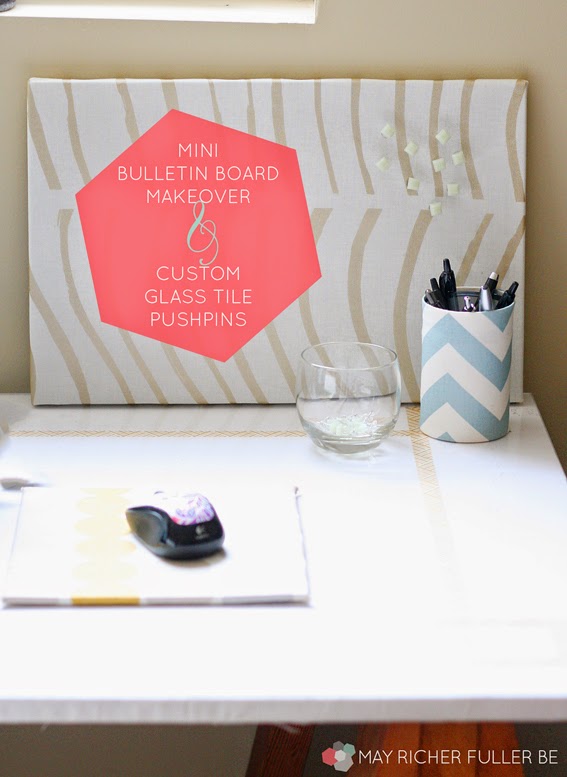
Welcome to my office! I've been working from home with my new job for just over two months now and I'd say it's been working out quite nicely overall. I thought I'd give you a "real life" glimpse into what working from home looks like today and how my home office space has evolved. Now that I've adjusted and gotten into more of a daily rhythm, I figured an update was in order.

The picture above gives you a good idea of my setup - I purposely didn't try to pretty it up too much to keep things real with y'all. I even left my fabric stash in its regular home under my desk - the horror! :) As much as my goal was to have a light and bright office when I took on the office mini-makeover project, there are some work-issued items that I can't change that don't fit that look that I use every day. I'm talking about YOU, ugly laptop, massive black printer and shredder. Oh how I wish all electronics came in white...le sigh. I must say, they do their job beautifully though. I'm thankful for electronics that make my job easier!

So while I can't change those things, I've tried to make the rest of the space something I love to be in since I spend oh, eight hours a day in there (plus the eight hours I sleep since the office does reside in the bedroom!). That's a lot of time, y'all.

Exhibit A: My new desk chair that I scored on Craigslist. Boy do I love that thing - although I'd take anything over that kitchen chair I was using before. I was starting to think I'd need to see a chiropractor since it was so uncomfortable to sit in all day!

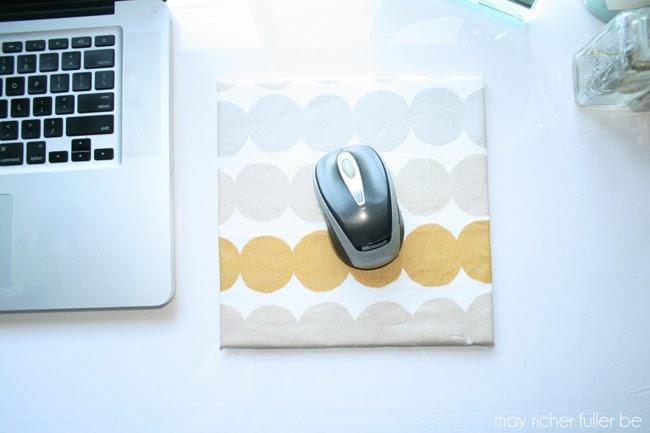
Exhibit B: My DIY gold and silver metallic mousepad. Goes to show that it's the little things that can make all the difference. {Oh, and I made this before I started working from home, so that's my personal computer next to it - just in case you're really observant and notice that it's not the same as the ugly black laptop in the first photo...}


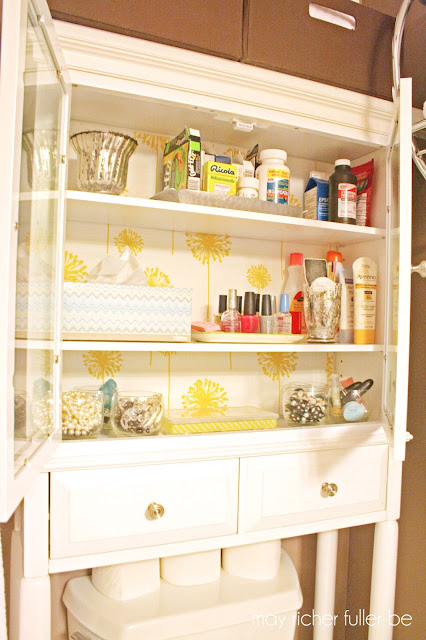
Exhibit C: Desk organizer and file box. Since I have a lot of paper to keep track of with my job, it was essential to have a good, practical file system in place. I learned that without one, a hefty stack of disorganized papers ends up on one side of my desk and I can't find anything I need. That leads to major frustration, things getting lost and then I lose precious time during the day trying to find what I need.

{Oy, please don't look too closely at how dirty the window is...unfortunately we can't clean the outsides since we live on the 6th floor of our building!)

The file box is from Target, and it's super functional and pretty. I love the bold green and white quatrefoil pattern (I can't find the exact one I have online, but these are similar if you're in the market). I can easily grab anything that I need from my chair, and at the end of the day, every paper has a place to go. I love having a clean desk when I "leave work" at the end of the day.

The desk organizer is something I've had forever - I think it was from TJMaxx? I slapped a piece of washi tape on the front just for fun, and to match the next thing I'll show you below... go ahead, call me matchy matchy. Anyway, the desk organizer corrals all of my miscellaneous office supplies like paper clips, tape, information pamphlets, and oh yes, pregnancy wheels. Have I mentioned I work in the prenatal world? Those wheels tell me how many weeks pregnant my patients are based on their due date. Fun fun!

I digress.

Back to my one last pretty and functional office related item...

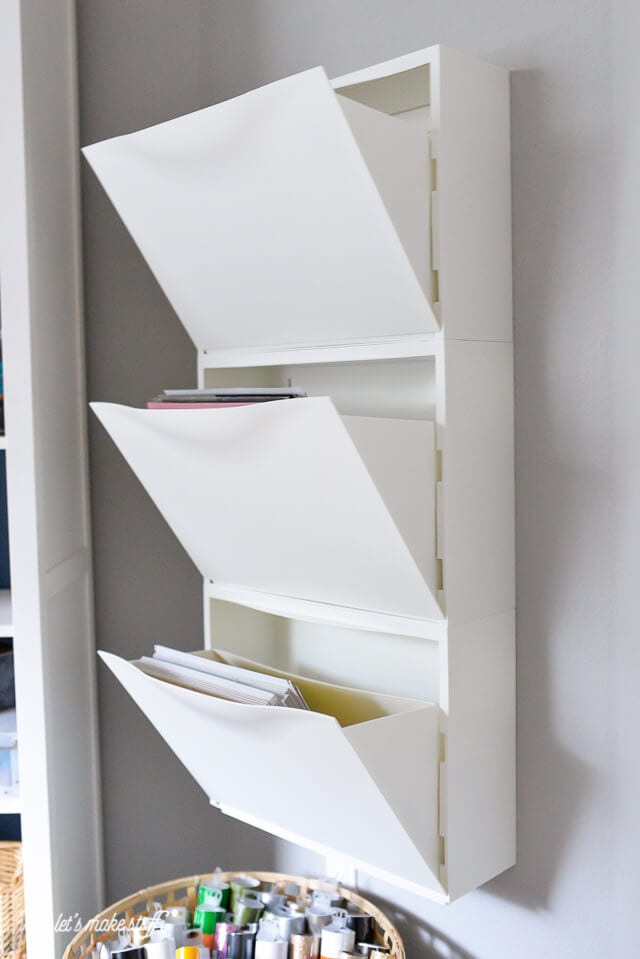
Exhibit D: Magazine files that...wait for it...aren't holding magazines! Ooo, exciting right? Well these magazines files are my secret weapon when it comes to home office organization. They're old versions of these from IKEA and they're awesome. I'll be sharing all about them tomorrow. I know, I'm such a tease. If you squint real hard, you may be able to read what they store, but I'll leave the details for the next post!


All in all, I'd say I've adjusted to working from home pretty well and have ironed out most of the kinks that come with it. My job is going really well, although I must say I do miss having co-workers to hang out with and see every day. But, this job is perfect for this time in my life for a lot of reasons. One major one is that I can take it with me when we move to Philadelphia this summer!

Do any of y'all work from home? What have your experiences been like making the switch from an office (if that's what you were doing) to being home all day? I'm always curious what it's like for other people!

Pin It!

1.22.2014

Church Storage Closet Organization

A couple of months ago, I got recruited to help organize my church's storage areas. Being a lover of organization, I was thrilled to be asked to be involved! We're starting the planning process now so we're currently figuring out what the needs are and how to best use the space that we have. I've never organized a communal space like this before, so I've been spending a good chunk of time brainstorming to make sure I don't miss anything and that I'm considering all the needs, wants, and desires of all involved parties.

Our church currently rents space from another local church (they meet in the mornings and we have the sanctuary for the evenings), so our storage space is a little crazy and scattered there. We have a funky-shaped closet and two large metal cabinets to hold everything we need for the service each week. Also, different people set up and tear down every week, so the storage system has to be super user-friendly and well-labeled. It's certainly a unique project, and the storage is tight, but I'm excited about it!

To kickstart my planning, I've been brushing up on organization tips and tricks as well as scouring Pinterest and the web to find inspiration. One of my favorite sets of practical closet organizing tips came from the RedEnvelope blog. Though it's clothing-related, rather than storage-related, the tips are really great, so check it out if you're planning a closet-related organization project of your own!

Here are some of the inspiration photos I've found for closet and shelving storage:

{Pink Suede Shoe via Flickr}


{IKEA via DigsDigs}


I feel like I've already learned a ton in planning for this unique project. To make it a little more manageable, I've come up with a few ways to streamline the planning process and hopefully make the end result a huge success when it's all said and done. So far I've:

  • Acquired a list of important contact people who use and are in charge of these items each week. Our church has different teams such as hospitality, music, children's ministry, etc. and each of those teams has a leader. 
  • Asked for a list of every item that needs to be stored - from sound equipment down to the paper plates we use for after church feasts.
  • Created a survey for each team leader to fill out with things such as their wants and needs, what's currently working well and what's not, and where they want their items to be stored (e.g. in the metal cabinet vs. the closet).
Next, we're planning a "clean out the closet" day for the near future, and then it'll be onto the real hands-on part - the organizing!

We will definitely be needing some new, sturdy storage bins, but we're on a tight budget. If any of you have any ideas on where to get durable, inexpensive, preferably clear tupperware bins with lids, I'm definitely open to ideas!! Shoot them my way, please :).

Have any of you ever undertaken a major community-oriented project like this? I'd love your wisdom if you have. Hopefully I'll be able to snap some photos and report back on the progress of this project soon!


Pin It!

1.21.2014

Pantry Organization {Take Two}

Last week I mentioned how I had failed needed to revisit some of the areas I organized in our home last year. One of those lovely areas was our pantry - or should I say, half a cabinet in our kitchen. It was tough to keep everything we needed in such a small area, and if we ever acquired anything larger than a box of Triscuits from the grocery store, we were in trouble.

Here's what it looked like for a few months after I organized it the first time:


Clearly there wasn't a lot of wiggle room in there, and it was soon apparent that the "system" I put in place wasn't working.

The cabinet (and surrounding countertop area) looked like this before I got to working on it over the weekend:


Not terrible, but as you can see, we were storing bags of chips and other snacks on the counter since we had no other room - not ideal. It was time for a change. I somehow needed to increase the size of our pantry without really changing much else in the kitchen.

So I did what I always do when I first start an organization project...EMPTIED EVERYTHING. Then I did some brainstorming and space planning.


{By the way, I cannot tell you how much it bothers me that the cabinets in our rental are yellowy-white while the trim is pure white and the white in the granite is also pure white...could they not have painted the cabinets the same color as the trim? The photo above shows how nicely it clashes, so I thought I'd take a moment to point that out :). }

The wine glasses I kept in the top right of the double cabinet got relocated since we hardly ever use them (we typically use our stemless glasses that live in the secretary-turned-bar). They were taking up prime real estate that I knew would be better utilized as food or other storage for oft-used items. That little change made a huge difference in my organization strategy.

In order to make more room I did some other creative rearranging as well including cleaning out the little double cabinet above the fridge (no photos of that, sorry! It was boring anyway...) and this cabinet to the right...


Out came the mixing bowls, strainers, and other random bowls and containers. Once I was done emptying out, I was left with these gloriously empty cabinets ready to be filled up again.


Meanwhile, all the stuff from those cabinets ended up here:


...and here. Ack.


{Oh hello $6 rug. I heart you.}

After a little strategy session with myself, a little purging and a little consolidating, everything went back onto the shelves. I adjusted the heights of said shelves to better utilize the available space and commandeered one additional shelf for food items in the double cabinet. Also, the mixing bowls, measuring cups and strainers moved from the cabinet to the right to this double cabinet. And look! There's nothing on the counter anymore! Victory.


The pantry shelves have some room to spare now. I can bring groceries home and have somewhere for them to go!


Drinking glasses (along with a couple of other items) did a switcheroo to the cabinet to the right. They're still just as easy to access and are less crowded on these shelves than they were before. 


There's way more breathing room now, and there's even room to grow a little bit. It may not look like Martha Stewart, but hey, function is the key here, right? Here's to hoping this new system works out better than the previous one!

So that's the story of my failure-turned-turned victory in the pantry department.

I hope this is encouraging to y'all and shows you that just because you organize something in your home once, that doesn't mean that it will work perfectly. In fact, sometimes it just doesn't and you have to start over again. I'm ok with that. Organization, just like most things in life, has its ups and downs. You just have to be willing to admit that something isn't working and try again!

Pin It!

1.14.2014

Operation {Re}Organization: What's Working and What's Not


If you've been following the blog for awhile, you may remember that last year, one of my major goals was to get a few "problem" areas in our apartment organized. I took on a new area of the house almost monthly, and the hard work really paid off! As I've been thinking about new ways to get organized this year (isn't just about everyone thinking about that right now? ha!), and what I want to work on, I've also been reflecting a bit about what I did last year that worked, and what might need some tweaking.

Before we get going, I want to say one thing: once a space is organized, that doesn't necessarily mean it's done forever and that the system will always work perfectly. For example, perhaps you purged and organized your pantry. You put a system in place, gave everything a home, gave yourself a big pat on the back for a job well done, and then came to realize a short while later that, oh shoot, this isn't working. You know what? That's ok. Seriously ok. I consider myself to be a pretty organized person, and my systems fail too. I still have clutter, even when I spent what feels like a year going through most every space in our apartment.

But guess what, my friends, all that work is not, I repeat, IS NOT worthless. Organization is a continual process. It takes time and effort, and I hope that some of my projects have inspired/will inspire you to get (back) on that organization horse. Writing these words is going to help keep me accountable as well. I've got some project ideas up my sleeve, but before I start again, let's take a look back at three of last year's major problem areas that I detailed in this post...

Problem area #1: Front Hall Closet


Overall Grade: A-

This closet has come a long way, baby! It serves all of it's (many) purposes well, including storing coats, athletic gear, tools, paint, utility-related items, wrapping paper, vacuum and dog supplies. It pretty much looks just like this photo does now after living with it for nearly eight months.

My only complaint is that the wrapping paper can be a little tricky to get to with all the coats in place. Thankfully, I don't have to get it out very often, but when I do, it's a little annoying to shove the coats to the side and pull a roll down.

To read more about this space, take a look at the inspiration, the before, and the after.

---------


Overall Grade: C-

Alas, the "pantry" area (we have a small cabinet in the kitchen and one small piece of free-standing furniture we use as pantry storage) has really gone downhill. It's not a total fail, but not everything fits anymore, and the use of space doesn't totally make sense anymore in the kitchen cabinet area. I think I'm going to clean out and start over there. I'm brainstorming some alternatives, so I'll let you know what I come up with soon.

On the bright side, the storage system in the free-standing piece of furniture has worked really well. It holds all the extra/overstocked and baking-related items still looks very much like this photo below:


To read more about the pantry organization, check out these posts: before (and a little progress)after, and DIY pantry labels

---------

Problem area #3: Bathroom


Overall Grade: B+

The bathroom is certainly a success story. I'm proud to say that the over-the-toilet storage has worked really well as it looks above, and that I've only made a few very minor changes since tackling that project back in March. 

The place that could use a little bit of work is the storage under the sink. It's nothing major, but I think it's time to clean out the clear storage bins and baskets, take inventory, and figure out what we need to stock up on. I hate it when we suddenly run out of shampoo or some other item, and I have to buy it full price! I'd much rather shop the sales, use coupons, and store the items in the bins for later, but in order to fully utilize that kind of system, I need to know what I have! Plans are in the works to make that a reality...

To read more about the bathroom organization project, check out these posts: introduction, before, and after.


So that's where I am today on some of the major organizing projects from the past year. I need a little kick in the pants to get going, so I figured sharing a little bit on the current state of these projects would help! A little bit at a time...

What are you hoping to organize this year? Any help or tips I can give to kickstart the process?

Pin It!
Related Posts Plugin for WordPress, Blogger...
Blogging tips