Showing posts with label wreath. Show all posts

10.02.2013

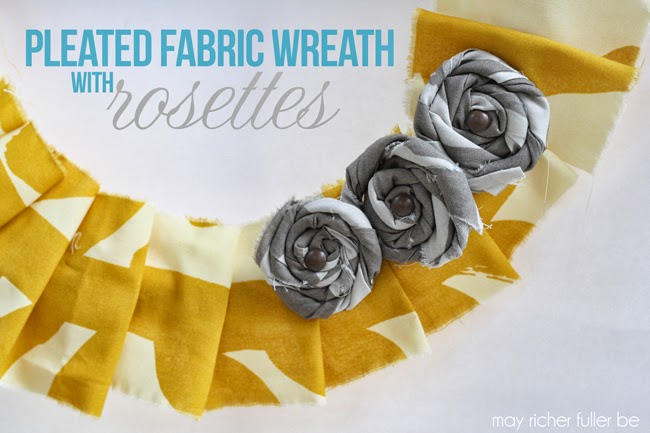
Pleated Fabric Wreath With Rosettes {31 Days: Day 2}


I love fabric. I also love a great deal on fabric. Combine those two things with an awesome discount fabric store and I'm in major trouble. I've accumulated fabric faster than I can use it in the past few years and therefore I've got a nice lil collection stockpiled in this cute striped bin.
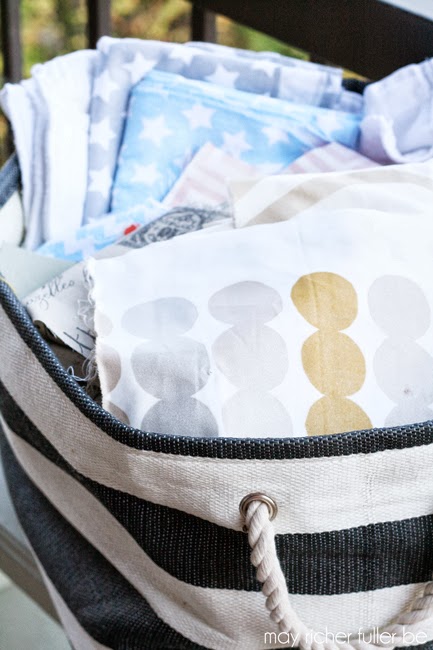

It's high time to use some of this fabric, and I'm starting this 31 Days series by making a fall wreath out of some remnants. I love making wreaths, and I've actually been using the same wreath form for about two years now. (I know. I know. So clever of me...) Why waste a perfectly good wreath form? The cost of buying a new one for each wreath can really add up!

It's the same one I used for these three fun ones:


This time I used some mustard yellow and cream Marimekko fabric I got from a remnant bin at Crate and Barrel outlet (it was $0.99/pound - yes, a POUND - how could I pass that up?) to make a simple pleated wreath. I also tacked on three gray fabric rosettes I made for a little something extra. A quick tutorial for those is at the end.

Making this wreath is really simple, and I actually made it harder than it needed to be because I wanted to be able to reuse my wreath form again (and again) in the future. Here's how I did it...

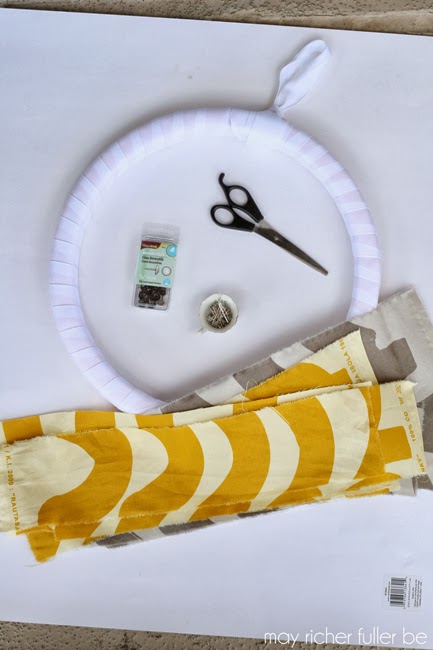
Supplies needed:
  • Wreath form (mine's a rubbery ring)
  • Strips of fabric (the widths should be approximately the same, but the length doesn't matter)
  • Double stick tape or hot glue
  • Straight pins

Step 1: Pin down one end of a strip of fabric to the wreath form and start pleating, adding a small strip of double sided tape under each pleat to keep it together. The double stick tape provides just enough hold, but keeps it looking loose and relaxed as well.


Step 2: Pin the pleated strip to the wreath form on the underside. I used one pin on about every other pleat. This secures it pretty well, but use as many as you need. You can also just hot glue your pleats to the wreath form if you're not in the business of reusing your wreath form :).
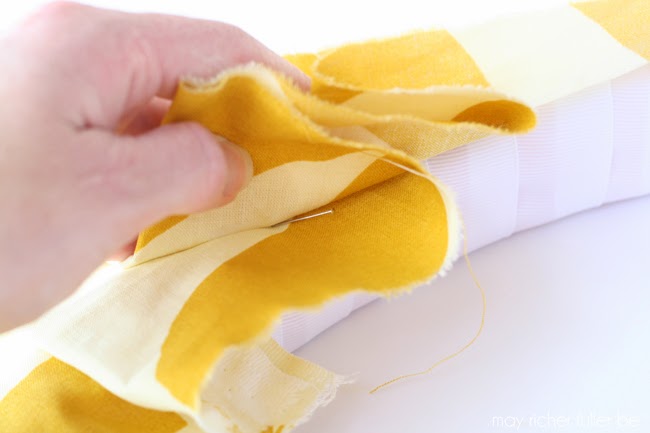


Step 3: Keep going until you run out of fabric, then add the end of your next strip of fabric under the last pleat you made to hide the raw edge. Repeat steps 1 and 2 until your pleats have gone all the way around the wreath form. The pleats will look like one continuous circle once complete.


You're done!

Then, to make the little pleated flowers/rosettes, all you do is twist a strip of fabric tightly and wind it around itself, hot gluing it as you go. It's fairly self-explanatory, but if you want a full step-by-step, learn from the best with this tutorial. This is what mine looked like in process:
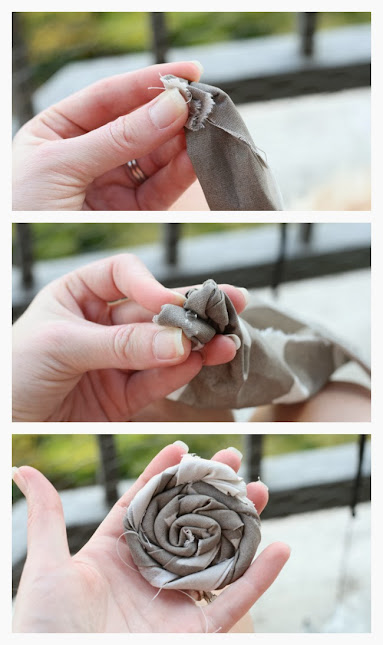


Attach the flowers to the wreath with straight pins and put an upholstery tack in the middle of each to mimic flower centers (optional step).


The finished wreath will look a little something like this:
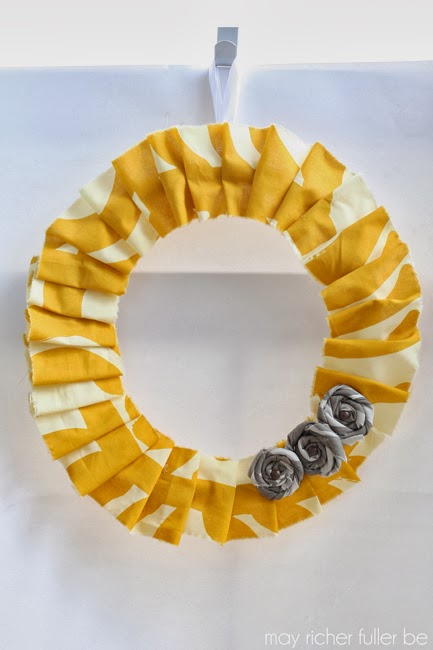

Tada!

I love that I had a chance to use some of my pretty fabric to make this fall-looking wreath! That's one project down using things I had on hand, many more to go :). I've got another fabric project coming on Friday, so get ready.

Tomorrow is an exciting day - it's my blog's one year anniversary! I've got some reflections on what this past year's been like, as well as a few goals for the future. I hope you'll join me for that!


Read the series from the beginning...
---------


Pin It!

8.15.2013

Book Page Wreath {5 Days of Book Page Crafts: Day 4}


Well hey there! Happy Thursday! We are moving right along in the "5 Days of Book Page Crafts" series - I can't believe it's already day 4. That means only one more day of book page crafts!

If you missed any of this series, catch up here: day 1 (cone garland), day 2 (flower pouf), and day 3 (pleated tassels).

Today's craft - a book page wreath - is another simple one (I'm sensing a trend here...) that doesn't take much time or "craftiness," but has a big impact. It just takes a little bit of practice to make the cones look consistent, then you're good to go.

This one might even have the fewest steps (winner!).

Supplies Needed:

  • Book pages
  • Tape
  • Hot glue gun (and glue)
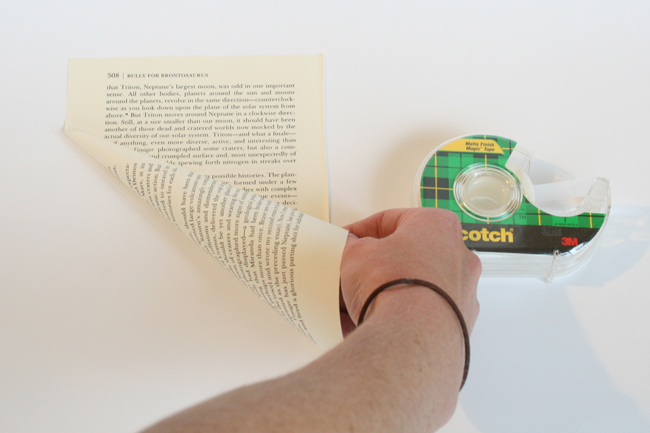
Step 1: Roll book pages into cones.


This is fairly self-explanatory. Just roll it up slightly on the diagonal and it should roll right up into a cone. Put a piece of tape on the end that sticks out to hold it together. You'll end up with a bunch of cones that look like this:


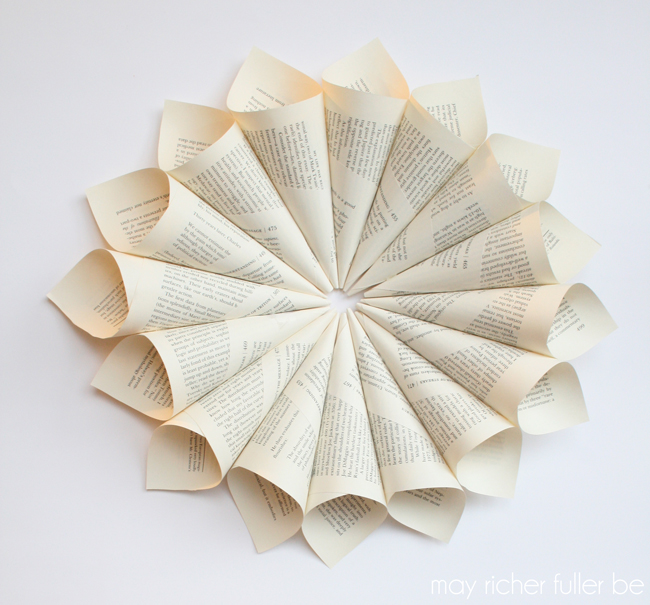
Step 2: Hot glue cones together.


Place a bead of hot glue along the whole exposed long edge of one cone and then stick the next one to it. Easy, easy.

And voila! You don't even need a wreath form to put it all together. The cones lend themselves to forming a circular shape, so as long as you're hanging this on a surface of some sort, you're good. They'll stay in that wreath shape.

I like this one in its simplest form. No embellishment or additions need. But, if your center doesn't turn out perfectly round (like mine), you can always add something to it. For instance, a plastic spoon flower...


Cute, huh? The how-to on that pretty coral lady is right here if you're curious.

And that's how you make a book page wreath! If you want to make it fuller (like adding a second layer of book pages), all you'd have to do is trim your book pages a bit before rolling them into cones and then glue those guys to the bottom layer.

Have y'all made one of these before? If so, how did you use it in your house?

// Click here to go to Day 5's project! //


---------


Pin It!

4.15.2013

Pleated Paper Wreath


Last week, Emily (jones design company) wrote up a week of pleated projects for her blog. All of her projects were so cute and easy, I decided to take on a pleated project myself - a pleated paper wreath.

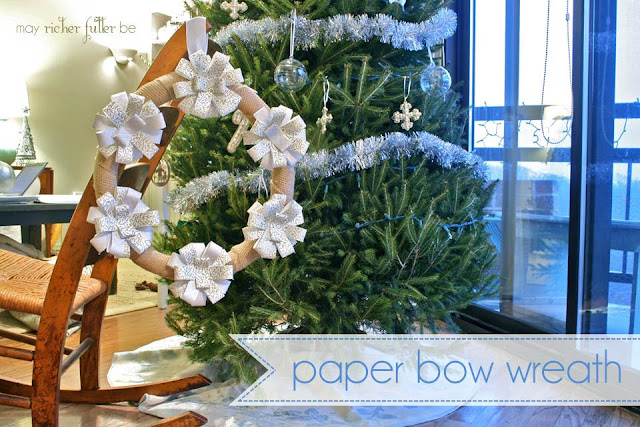
As a new season rolls around, I love to change up my wreath. You've seen a couple of them here on the blog, including one made from burlap with ribbon rosettes and one with paper bows. This is a fun, budget friendly way to change up a bit of decor with the seasons. I like to use inexpensive materials and I actually use the same wreath form each time to save a trip to the craft store (and a few dollars).

I didn't write up a real tutorial for this one, because a) it's pretty straightforward and b) I made this one on a whim late one night when I just wanted to make something and not get the camera out to document it - i.e. I was feeling lazy. I know, bad blogger (you can shake your finger at me if you want). I blame the lack of good photo-taking light :). But, I will give you a few "hints" if you'd like to make your own.


The first step is to cut long strips of paper - I used brown craft paper in varying lengths - and pleat them. Second step is to run those pleated pieces through your sewing machine. I loosely used Emily's tutorial for pleated stationery as a guide for these first two steps, so if you're looking for good detail on how to do this, check that out. The third step is to arrange them on your wreath form and pin them down. Easy, right?

Your finished wreath will look something like this:


From far away, you can barely see the subtle stitches holding the pleats together. I like the irregular arrangement of the pleated pieces - it gives it a little bit of whimsy, yes? Like it doesn't take itself too seriously :).


If you look up close, you can see I used pink thread down the middle of each piece, and I added orange thread to some of them as well. Fun for spring!


This wreath is really simple, and I like that about it, but you could definitely embellish it too. A ribbon perhaps? Or maybe throw in a few colorful pleated papers in place of some of the brown craft paper?

Have you made any fun wreaths lately? Or did you read Emily's series of pleated projects last week and do a project of your own? Share please!

If you'd like more wreath inspiration, I've got a Pinterest board dedicated to pretty ones I've found. Follow it or others here.

Have a great Monday!

---------


Pin It!

1.07.2013

Project: Wood Wreath

Warning! Photo-filled post today! Read on if you're ready for it :).

A couple of weekends ago while we were visiting my in-law-family, my father-in-law asked if I'd like to help him with a little project he'd dreamed up. He advertised power tool usage and blogging material, which was all it took for me to want in. I heart power tools. And blogging. Done. My father-in-law knows a thing or two about making stuff because he's a builder (including of houses - which is what he did/does for a living), He owns many, many tools that I don't have access to on a regular basis. Itty bitty city apartments just aren't conducive to that, ya know?

So as you may have guessed from the title of today's post, the project he dreamed up was a wood wreath. I took quite a few pictures throughout the process so that I could share a step-by-step tutorial with you in case you'd like to take on this kind of project yourself. Let's get started, shall we?


Supplies needed:
  • Logs of various widths and sizes
  • Circular saw
  • Wreath form (I'll get to what we used for that in a moment. You'll need some additional supplies if you make one like we did.)
  • Heavy duty glue (We used construction adhesive.)
  • Polyurethane (optional)
  • Paintbrush (optional)
Annnd we're off! You can see I was ready to get started. Ha.


Grab one of your logs and set it up on your circular saw so that when make a cut, the piece will end up being about one inch wide. Repeat this process with logs of various shapes and sizes. Exactness isn't important here - you want some variation. 


Continue this process until you have enough pieces to fill your wreath form. Here's what we ended up with after slicing and dicing.


Next, my handy father-in-law created the form for our wreath out of a scrap piece of plywood he had sitting around (again, the advantage of doing projects with people who have these kinds of supplies on hand!). If you decide to make your wreath form too, here are some steps to follow. Consider this a "sub"-project. If you already have a wreath form you can use, you can just skip this section.

The supplies needed for this part of the project are:
  • Plywood
  • Hammer
  • Nail (any kind)
  • String
  • Pen/pencil
  • Jigsaw
  • Drill with a wide bit (optional)

To start, draw out a circle that you can use as a guide to cut out the wreath form. You could do this freehand, but I'd suggest a more exact method. You don't want a wonky circle! An easy way to do this is to use a nail, string and writing implement. Begin by hammering your nail into the center of your plywood.


Take a piece of string that is the length of what will be the radius of your circle, plus a few extra inches. Make a loop on both ends. Place one of the loops over your nail, and put your pencil/pen through the end of the other.


Use the pencil/pen to pull the string taut and begin tracing a circle. As long as the string remains taut, you'll be able to easily draw a perfect circle around the plywood.


Next, decide how wide you want the wreath to be and shorten the length of the string so that you can draw another smaller circle inside the larger circle. You can do this by tying another loop in the string on either end. Ours ended up being about five or six inches wide.


Trace the inside circle using the same process as before.


This is what it should look like once you're done tracing. You can remove the nail in the center if you're satisfied with it.


Now here comes the fun part - jigsaw time! Carefully maneuver the jigsaw along your pencil/pen line to cut out your circle. Be careful!


{Yes, yes, I know. Construction faux paus not wearing eye protection. Please forgive me!}

Once you've cut the outer edge of the circle, you need to access the inner edge - without cutting in from the outer edge. You don't want to ruin that circle you just made! To do this, we drilled a hole along the inner line with a drill bit that was wide enough to fit the jigsaw blade.


You'll end up with a hole like this.


Insert your jigsaw into that hole and cut along the inner line of the circle.


Once you're done, you'll have yourself a nice wreath form. Since the jigsaw can leave some rough edges, take a minute or two to sand them down. Here's one of my sisters-in-law doing a lovely job sanding.


Onto the fun part... laying out your wood pieces! Just go at it until you're happy with the way the pieces look together. Make sure to vary the shapes and sizes. It might feel a little bit like random chaos as you're doing it, but the end product will be great.


If you find that one of your pieces doesn't quite fit like you want it to, you can use a small axe or hatchet to trim off an edge. Again, be careful! No lost fingers, ok?


Once you're satisfied with the layout, you need to secure the pieces to the form. We tried hot glue...


...but found that construction adhesive worked better since the pieces are pretty heavy. (Note from my father-in-law: we used white adhesive since he had it on hand, but suggests you go with clear. This is so that if you have any adhesive peeking out from the edges, you won't see it.)


Allow it to set. (The time will depend on what kind of glue/adhesive you use. Check the label to determine how long you'll need to wait.)

Optional step: take cute pictures of your dog peeking through the fence while you wait for the adhesive to dry.


Ok, that was a fake optional step. A real optional step is to coat the wood with polyurethane if you want to protect it. This is the kind we had, but you can use any brand you'd like. The wood will take on a slightly different color, so make sure you like it before coating the whole wreath. You can test the "look" on a scrap piece first.


When you're confident the adhesive is dry, hang your wreath and admire your handiwork. We drilled a hole in-between a couple of the wood pieces so that we could hang it from a nail.

{please excuse the weird shadows. we were losing our light!}


This was a really fun project. I've got to give credit to my father-in-law for dreaming it up, and allowing me to be a part of it. Also, thanks to my sister-in-law for taking many of the pictures while I got to use the power tools. She did a great job!

Pin It!
Related Posts Plugin for WordPress, Blogger...
Blogging tips