Showing posts with label 31 Days. Show all posts

11.04.2013

October Project Round-Up


Man, October was one crazy month! As you may have read in my closing thoughts on my 31 Days series, I loved doing the series, but I'm so glad it's over! It's always fun for me to look back at the projects I've done over the course of the past month though, and I think this one might take the cake for most projects completed in a month. That's what writing for 31 days straight will do for ya :).

Before we get too far into November, I want to take take a few minutes to round up a few of my favorite projects from my series on using and loving what I have. If you missed any posts from the series, this is a great time to catch up!

This pleated fabric wreath has to be my favorite wreath I've made so far. The pleats are so feminine and that mustardy yellow remind me of fall.


I'm happy to report that Jackson loves the toys I made him. He has tried really hard to undo the knot in the middle of that coral and gray polka dot one, but has been unsuccessful so far (that's a win in my book!).


The enormous chalkboard I made using Annie Sloan Chalk Paint was a fun experiment. I tried out hand-lettering for the first time and was pretty happy with how it turned out. It's hard though y'all! I truly admire people who do that kind of stuff well.


I finally put together a home tour for the blog. I'd love to add more to it and flesh it out a little bit, but now you can catch a few glimpses of our itty bitty city apartment in an easy to scroll through format. :)


Reusing and making items I already own better is one of my favorite things to do (duh, that's part of why I did my 31 Days series on that...) and that's exactly what I did with these appliqued pillows. They've taken the place of those gray, white and yellow pillows you see above on our couch for the fall season.

appliqued bird silhouette and fall leaves pillows

Who loves a trash-to-treasure story? I do! The base of this side table is an old wire trash can, so yes, there's a literal trash-to-treasure element to this one!

trash can turned side table

Felt and fabric came together beautifully to make a set of gold and white coasters for a friend of mine. I'm definitely going to be making more of these soon - Christmas is coming!

gold and white coasters made from felt and fabric

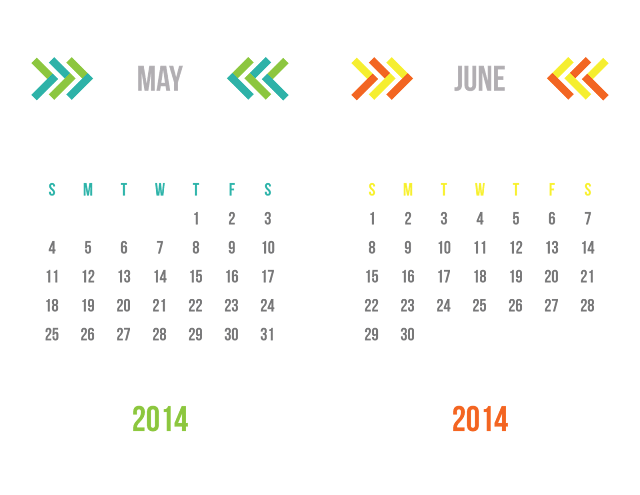
I introduced my 2014 desk calendar that's now available in my Etsy shop. Head on over and get yourself one! Here's a sample of a couple of the months. It's an instant download (which equals instant gratification :)).

My car needed some love, and I finally cleaned it and got it organized this month. I've now got a designated box for all the items I regularly keep in the car. It makes me so happy to not have clutter everywhere!


My ho-hum, blah roller shades got a Greek key treatment this month. I'm still working on finishing all of them, but they look so much better now with that little extra something on the bottom edge.

greek key trimmed roller shade

I styled up the shelving in our front hall, and I still smile every time I walk by it.


This new system for storing our dog, Jackson's leashes is working great so far. I love not having them scattered all over the top of that piece of furniture in our front hall.

organizing dog walking supplies

And last, but not least is this scrap wood turned votive holder I made using my new drill. I'm thinking I'm going to need to make a few more of these and put a few more scrap pieces of wood to work!

scrap wood turned votive holder

So goodbye October, hello November! Off to do some more projects! :)

Pin It!

10.31.2013

Closing Thoughts {31 Days: Day 31}


Wow, y'all. I can't believe that this is the final post of my very first 31 Days series! I thought I'd share a few closing thoughts today, and also hear from you! Did you love it? Hate it? Like certain kinds of posts, but not others? I'm all ears. I know a few of you are new around here, so I hope you'll introduce yourself and stick around past this series as I get back to my more normal Monday to Friday posting schedule and content. This series has been fun, but it's definitely worn me out!

Thought #1: I love a good challenge.

Writing for 31 straight days is hard - at least it was for me. I'm definitely a take-the-weekends-off from blogging kind of gal. BUT, I'm always up for a good challenge. I tend to be pretty competitive, especially with myself, so when the writing got tough or I was behind on projects, that competitive spirit definitely came in handy for pushing on through. And what an accomplishment to say I did it!

Thought #2: Setting up limitations for myself helped me be more creative.

Huh, kind of strange right? It's true though. Limiting myself to using (mostly) what I had on hand forced me to be more creative with what I had and I actually found that to be a really fun exercise. If I'd been doing my normal blogging thing, would I have ever thought to do something like use embroidery thread to stitch a greek key pattern on my roller shades? Maybe, but I'm guessing I might have been more likely to come up with a solution that involved a trip to the craft/fabric store and money. After writing this series, I think I'll be more apt to use what I already have before jumping in the car to grab supplies for a project.

Thought #3: Life still has to happen (and may even steamroll you in the process) during a series like this, and even the best laid plans will likely have to change.

I'm a planner by nature, and before I started this series, I brainstormed ideas like crazy then made an editorial calendar with a post for each of the 31 days. I had it all planned out and thought I had a nice, manageable schedule with a mix of simple and more complicated posts, and "use what you have" and "love what you have" posts.

Well, the first two weeks went off without a hitch, then the second two weeks were a bit of a mess. You probably didn't notice, but behind the scenes, my editorial calendar was collapsing in on itself. Turns out, I didn't get far enough ahead on some of the bigger projects I had planned and then we were out of town for two weekends (one of them a long weekend) in the middle of the month, so they didn't get done. Since I work full-time, weekends are really my only good time work on projects. I had to change my plans, shuffle the post schedule around, and even nix some of my favorite ideas. At first I was mad at myself, but then I realized that it didn't really matter because, golly, it's only a blog series. Why give myself such a hard time?

The good news about that is that I still plan to do some of those nixed projects in the future, and they'll probably turn out better since I won't be as rushed to just get. them. done. for the sake of the series.

Thought #4: I'm not willing to sacrifice time with friends or family for the sake of the blog.

So you know how I wrote a few posts specifically on the "loving what I have" theme? I realized something as I wrote them (especially this onethis one and this one): relationships are very important to me. I'm not willing to prioritize the blog over enjoying friends, family and life. Blogging takes a lot of time, and while I love it, I want to make sure that my attention isn't so focused on it that I miss out on important things like listening and engaging fully with people. Life is about relationships, and to love people well, you have to give those relationships the time and attention they deserve to grow. Be present. I only have so much of me to give, so I need to give to the things that matter most. That's why I take time off from the blog at Thanksgiving and Christmas. I want to focus on the ones I love most!

Thought #5: I can't wait to get back to posting on more of a variety of subjects!

By focusing my series on using and loving what I have, I've missed posting about other things that I love like interior and graphic design, round ups of favorite projects from around the web, and my regular Friday series - Lovely Links. While the subject matter of this series didn't stray too far away from what I normally post on, I didn't get to talk about my usual wider variety of subjects.


Needless to say, I learned a lot about myself and how I like to blog during this series. I had a blast and am so ready to be done, ha! Also, thanks to the Nester's categorized list of participants, I found a few new fun reads in the process. I love finding new blogs. Will I do it again? Probably. I hate missing out on fun things like this, even if it was a serious challenge!

Thanks for reading - I'm really so glad you're here. Oh, and Happy Halloween!

Did you participate in the 31 Days series this year? How did it go for you? 


Read the series from the beginning...

Pin It!

10.30.2013

Husband {31 Days: Day 30}

Today marks the last "real" post for my 31 Days series and it's a good one. I'll have some wrap-up thoughts for you tomorrow, but I want to unofficially end my series with one last post on loving what you have - and what I have is one amazing husband. (Hey C! He subscribes by email, so I know he'll see this post :)). I can't go through this series without mentioning him!

{love this photo of us from a dear friend's wedding}

Charlie is my biggest fan and my greatest encourager. He helps me dream big, and he's with me every step of the way. He supports my adventures with this blog even though 90% of its content doesn't interest him one bit. I'm totally ok with that, because part of why this blog exists is so that he doesn't have to hear me blabber on and on about my next awesome craft or graphic design project. I may not talk about him much here at MRFB, but I really don't think I'd have kept up with this blogging thing without him behind me, cheering me on. He cares about it because it matters to me. And that's not just when it comes to the blogging thing - it's every aspect of our lives. We're in this thing called life together. We're a team. I support him 100% in what he does now and what he wants to do in the future. He does the same for me. That's love, baby. :)

We're going to be going through some major transitions over the next twelve months and I'm so glad we've got each other to lean on through that process. We trust that the Lord has great plans for our lives, but I can't say they're exactly the clearest at this point. I know it'll all shake out eventually and then it'll be onto another great adventure. These past three and a half years have been wonderful, and I can't wait for many more to come.

Cheers to loving what you've got!

Read the series from the beginning...


Pin It!

10.29.2013

Scrap Wood Turned Votive Holder {31 Days: Day 29}


For my birthday this year, I asked for a drill. Yep, looks like I'm solidly in the DIY blog camp now that I own my very own power tool. (Picture me smiling BIG over here.) For my first project using this new toy, I decided that I couldn't just use it to screw something together, I had to do something creative. That "something" became a pretty super project that I'm excited to show you today: a votive holder made from scrap wood.

I certainly can't claim to have invented this idea - I've seen versions of these guys in lots of places! - but I was excited to try my hand at one since I had a few leftover pieces of 2x4 from my upholstered headboard that were in the "use it or lose it" category of things I've saved from other projects. It was either use them for something ASAP or they were going in the trash. I'm definitely on a "toss it" kick right now when it comes to clutter so nothing is safe :).


This project is super simple if you have the materials and equipment on hand and about ten spare minutes.

Supplies needed: 
  • Piece of wood
  • Power drill
  • Spade bits (Spade bits are handy little things to have around for drilling holes or circles into wood. I'm pretty sure their original purpose wasn't to make votive holders, but that's what I'm using them for today!)
  • Votives/tea lights
  • Paint or stain (optional)
The first thing you need to do is measure out the diameter of your votive candles and make sure you have a spade bit that's a tiny bit wider than that. Turns out I didn't - oops! 1 1/4 was just a tad too small.


I have a lovely solution for that little problem that I'll get to in a second that doesn't involve going out to Home Depot and buying another spade bit. FYI, the spade bit set I have is similar to this one(*affiliate link)

Once you've made sure you have the right spade bit (*ahem*), measure out where you want your circles to go. I had a pretty short piece of wood, so I decided on three evenly spaced circles (hint: odd numbered groupings are visually appealing). I found the middle of the 2x4 piece first, marked it with a pencil, then measured out three inches in both directions and marked those spots as well.


Then it was time for drilling. I decided to make my circle holes on the shallow side so you'd be able to see the tops of the candles. You could also make them deeper if you like that look.


Once you're through drilling, all you have to do is stick your votive candles in and you're done! So easy, right? But wait, remember how I said that my spade bit wasn't wide enough for the diameter of my votive candles? So how in the world did I manage to make them fit in the holes?

Enter the vegetable peeler.


I used it to shave off some of the candle wax to shrink its diameter. It was so, so easy to do, and even though the candle may not be perfectly round anymore, it saved me a trip and some dollars on supplies I didn't have to have for this project. I made do with what I had and I'm totally happy with the result!


I also added an optional step at the end to make that 2x4 look less like a 2x4 - I whitewashed it. I mixed up a little white paint and water and brushed that baby quickly with a small art paint brush. I wiped off the excess paint with a paper towel and voila, whitewashed wood.


It's a subtle, but well worth it, optional step. I like the beachy, bleached look. Once the paint was dry, I plopped the newly sized-down votive candles into the holes and called this project done.


This little votive holder would make an awesome addition to a table centerpiece or a mantel. It's simple, clean-lined and a little rustic, but pretty cute too if you ask me!


Now, before you go off any make one of these I need to throw in an obligatory warning since these are candles and they're in close proximity to wood. DO NOT, I repeat, DO NOT leave burning candles unattended. If I were to light these babies, I would put a piece of tin foil around them before placing them in their holders to make sure the flame doesn't come anywhere near the wood. I had to take them out of their original tin cups to make them fit, so I'd need to replace those with some other form of fire protection.

Ok, all done :). Now go make yourself a cute little votive holder from some scrap wood!


Pin It!

10.28.2013

Organizing Dog Walking Supplies {31 Days: Day 29}


We sure do love our little dog, Jackson (meet him here and here), but he comes with a lot of stuff! I've got most of his supplies under control in his designated bin in the front closet, but one thing I've never attempted to corral are his supplies for walks. It wasn't until I saw this post that I realized how much it bothered me that they didn't have a true home in our entryway. Sometimes, spending a few minutes organizing the little things makes all the difference, so that's what I did.

The furniture piece in our entryway (the same one that I styled the shelves of last week) often becomes a dumping ground for random paper, mail, keys and Jackson's leashes.


I decided that one thing I could easily clear off of it would be his leashes and the towel we use to wipe his paws. I had those two small metal buckets (from the Target dollar section a few years ago) and a couple of extra command hooks on hand, so I used those two things to make a little holding station.

In order to keep them accessible at the front door, I placed the two command hooks on the side of the furniture piece that faces the living room. That way, you wouldn't see them from the front door, but they're right where I need them to be.


I gave the adhesive on the hooks time to "cure" before hanging the buckets (they recommend an hour in the instructions) and I do find that that helps make sure they're secure. On an occasion or two in the past, I've been a little too eager to hang things on them before that hour is up and it's never worked out well!

I hung the buckets and placed Jackson's two leashes (one retractable and one short one) and his harness in one bucket, and the towel in the other. They're the perfect size for those items and nothing more! No chance to clutter up those buckets!


I'm so thrilled with how this worked out. Nothing like a little creativity and using supplies you have on hand to come up with a simple organizing solution. And the great part about using command hooks here is that we can always remove them later with no damage to that piece of furniture. Here's to hoping we keep this mini-system up!


Read the series from the beginning...


Pin It!

10.27.2013

Family {31 Days: Day 27}

There's nothing like a series on loving what you have to remind you of family - I couldn't resist a post with a couple of photos! And if I can brag a little, I must say I've got some of the best. There's the family I was born into (plus my sister-in-law on the end there)...


...and then the one I married into...


(P.S. I can't believe these wedding pictures are now three and a half years old! Time flies...)

I'm grateful for each one of them and the relationships we have with one another. They aren't just people I'm related to by blood or marriage, they're my friends and I love spending time with them. Not to get too cheesy, but I seriously cannot wait to see what God has in store for each of their lives. There are quite a few exciting changes going on for several of them - lots to look forward to in the coming year! I'm pumped about getting to spend time with both of these families over Thanksgiving and Christmas. Hooray!


Read the series from the beginning...

Pin It!

10.26.2013

Using What You Have to Refresh Your Home {31 Days: Day 26}


This 31 Days series on using and loving what I have has been super fun and stretched me to be more creative with the ways I think about and approach our the decor and function of items in our home. Most of the projects I've done have been very specific to things that I have on hand, but today I want to generalize the principles about using what you have and give you some ideas on how you can refresh or transform what you have so that your home can be a place you love even more!


First, switching out pillow covers is one of the easiest, low commitment things you can do. If you're like me, you probably have a yard or two of extra fabric laying around that you could make a simple envelope pillow from, or you may just have extra pillow covers buried deep in a closet somewhere. If you want to learn how to sew, an envelope pillow cover is a great place to start. There are tutorials all over the web for that, but the dog bed I made for Jackson is actually an envelope pillow cover, so if you want some simple instructions (albeit, for something much larger than a throw pillow!), take a look at that post.

If you don't have fabric to make a pillow cover or you don't have any extras buried in a closet, the other option is to steal pillows from another room in your house. I recently stole a ruffly pillow off our bed and used it on our living room couch and I love it there!


Second, shifting furniture around can have a huge impact on a space. It can be as simple as switching out an end table or as complicated as changing the whole arrangement of your living room. Maybe you've always been frustrated with how a room "flows" - if that's the case, move things around! One suggestion? Sketch out what you have in mind with rough measurements first before you break a sweat trying to move a huge piece of furniture.

Try it out, and if you don't like it, good news - you can always change it back!


Third, break out that paint! Raise your hand if you have a half-empty can or two of paint in a closet or garage somewhere? Oh good, me too. Don't you dare step foot into a paint store until you've assessed the colors and amount of paint you already have on hand. Do you need to paint a room or a piece of furniture? If it's something small, I'll bet you've got plenty of paint to work with on hand. If it's a room, make SURE you have enough of that color or you'll find yourself in the sometimes painful situation of trying to have the guy at Home Depot match the paint you bought there five years ago (bad idea).

Paint is also a low-commitment change (though more permanent than switching out a throw pillow) that can completely change the look of an area of your home. It's usually totally worth the couple of hours you have to put in!


Fourth, another very low commitment way to refresh your home is to change up the accesories you have around the house. Most of us have a tendency to leave things in their places once we put them there (broad generalization, but I think it's mostly true), but how boring is that? Rearrange your bookcases, style that console table with things from the living room, pull a decorative bowl or two from the kitchen and fill it with pinecones. Be creative! Change things up seasonally or whenever you feel like it. Try something new!


Fifth, mix up the contents of your picture frames. Gallery walls are PERFECT for this. Have a favorite card you want to show off? How 'bout a piece of art? One of the millions of free printables out there? Grab a frame off the wall that has that ten year old picture in it and change things up. You can always put its original contents back in it later.

Another idea is to move frames around the house. Move your wedding photo from the entryway to your bedroom, or move that big piece of art from the dining room to over the sofa in the living room. Again, the theme of this post is to try something new! Refresh things without spending a cent!


And here's a Pinterest-ready graphic in case you want to pin these tips for future reference!


Happy weekend!


Read the series from the beginning...


Pin It!
Related Posts Plugin for WordPress, Blogger...
Blogging tips