Showing posts with label how-to. Show all posts

4.20.2016

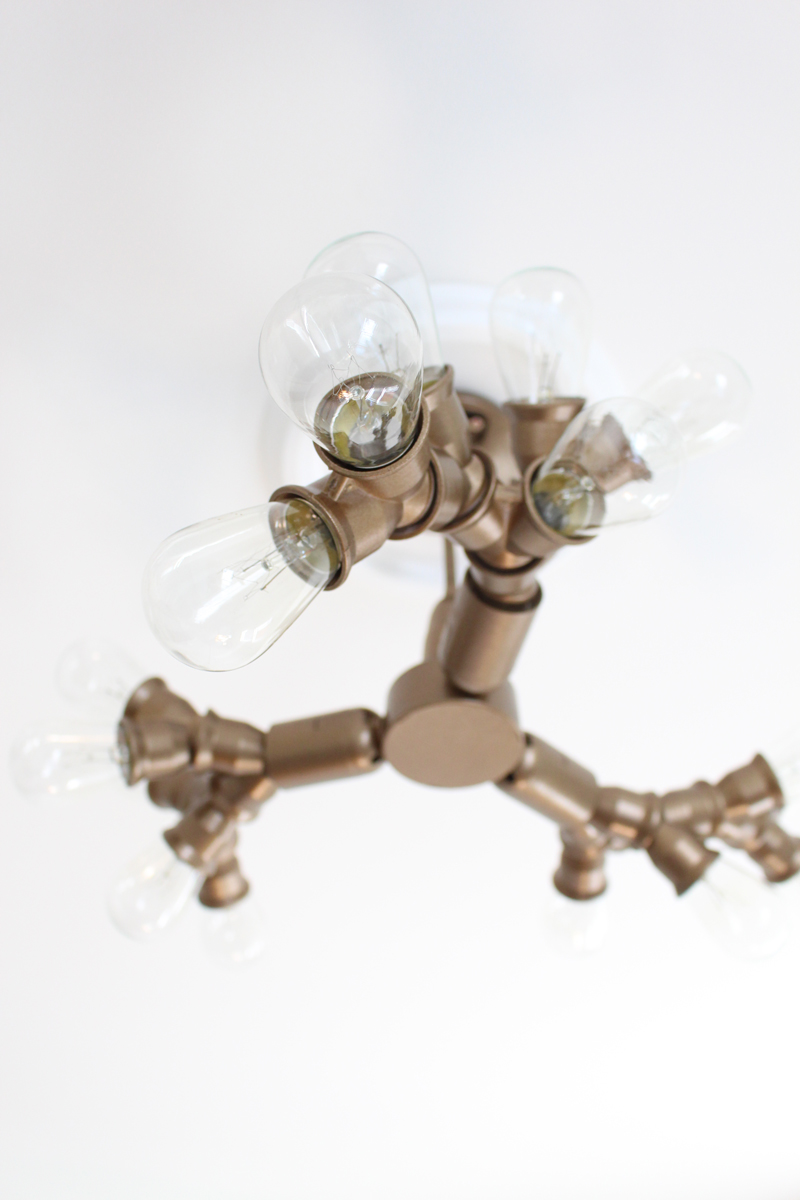
Make It: DIY Sputnik-Style Light Fixture

*Psst! Thanks to everyone who entered Mix & Match Design Company's e-design giveaway! I'm hard at work going through the submissions and it's going to be SO hard to choose just one. Y'all have such awesome homes and I can't wait to work with one of you!


If you saw my Instagram from last week, you'll know I've been working on a fun little DIY light fixture for my office. It's been way too long since I've DIY'd something and shared it here, so I figured it was high time to get 'er done to show y'all!

https://www.instagram.com/p/BEHbwwQyWE7/?taken-by=mayricherfullerbe

I've been a fan of Sputnik-style light fixtures for awhile now. They're modern, kinda funky and fixtures with exposed bulbs are definitely "in" right now. I needed a ceiling fixture to replace a sad-looking fan in my office, but wasn't ready to commit to spending the big bucks on a new fixture just yet.

Then on Pinterest (of course!) I spotted Little Green Notebook's DIY branch light and I thought a variation on that would be the perfect thing! I made a couple of modifications to make it work for my space and the step-by-step is below in case you want to make one yourself.

Supplies needed: (* Denotes an affiliate link. That means I get a tiny commission when you purchase through my link. There's no cost to you - thanks for supporting this little blog. :))


Putting this light together is a little bit like building with legos - it's super straightforward and you really can't mess up. You get to be as creative as you want!

Start with the 3-in-1 socket adapter and screw a Y socket splitter into each end.


Keep adding additional Y socket splitters to open ends until you get to the look you want. I ended up using 15 and gave it a pretty symmetrical look. What can I say - I like balance!


Once you finish attaching the Y splitters in a pattern you like, add lightbulbs to the remaining open sockets. You'll take these out to paint the fixture (unless you want to leave it white, which is pretty too!), but I liked seeing how it would look in its final form before heading to that step.


Finally, screw on the flexible extender and outlet box mount to finish the assembly before painting. Here it is before I got my spray paint on.


Before taking it out to paint, I installed it temporarily to make sure I was really happy with the scale and amount of light it gave out. My office isn't huge, but I found that with my original design, it wasn't quite bright enough. No big deal - I just added a few more Y splitters and bulbs to increase the amount of light.


Onto the painting!

But, here's one other pre-painting step that's very important!! Make sure to stuff the sockets with some newspaper to protect the light bulb contacts. It would be a shame to finish painting, screw in those bulbs, and then have the fixture not work!


I decided to spray my fixture metallic coppery-gold and since it was a tricky fixture to paint, I used a cardboard box as a makeshift paint shed - it worked perfectly to prevent overspray from getting on the concrete and helped it stand up for painting and drying purposes. I made sure to use multiple light and even coats and rotated the fixture several times to make sure all surfaces were well-covered.


(Side note: for those who are wondering about priming prior to spraying the metallic paint...I skipped that step. Should I have? Probably not, but since this fixture is installed on the ceiling, durability isn't an issue and I decided to be a total rebel and not prime. Many of these pieces are plastic though, so it will chip if you scratch at it. So far so good though!)

Now let's get to the good part - seeing it after installation! (Outlet mount boxes are super easy to install - just follow the directions in the box. If you don't feel comfortable with that, definitely hire an electrician!)


I added a ceiling medallion to really finish it off around the outlet box and I think it looks great. Here's how it looks with my office area in the background:


Love all those fun bulbs!


I'm thrilled with how it turned out. It brings such unexpected personality to the room!


Hooray for successful DIY projects! What have you been DIYing lately?


Enjoy what you read today?  Enter your email address below to subscribe to May Richer Fuller Be!  Delivered by FeedBurner

Pin It!

3.09.2015

Projects and Tutorials Page Updated!


In this week's edition of behind the scenes blog updates...

The Projects and Tutorials page has been updated! If you saw last week's post, you may remember that the Home Tour page page got updated to show our current home and I've been hard at work getting the projects and tutorials page up to date as well. It's got a brand new, streamlined look, so even if you've been over there before, I hope you'll stop by and see it. I added lots of new ones to the list since I realized that many of my favorites from the past year weren't there (boo!). It's always fun to comb through the archives, and now that I've been at this blogging thing for about 2.5 years, there's a lot to see!

In other news, I also added a new category in the navigation bar called Freebies. If you click on that, you can find all the free downloads I've posted over the years including the newest March wallpapers.

We're headed out on vacation this week, so I'll be popping in every now and again, but I'll mostly be unplugged. :) Enjoy the archives and I'll be back next week!


Enjoy what you read today?  Enter your email address below to subscribe to May Richer Fuller Be!


Delivered by FeedBurner

Pin It!

1.29.2015

Turning Photos Into Paintings Using Photoshop


It looks like this week is turning into a graphic design-focused one, huh? In case you missed Monday's post, I shared some pretty cute desktop and iPhone wallpapers for the month of February. You can check those out here!

Today I wanted to share a nifty little trick on how to turn your photographs into painterly-like works of art. It's no secret that that look is popular right now. A couple of weeks ago, I ran across this post from The Painted Hive that listed several ways to do just that to your photos. The results she showed were so neat that I decided to try my hand at one of the methods myself. I used Photoshop, which I know not everyone has access to, but if you DO, stop what you're doing right now and go play with some of your photos. It's kind of addicting once you get the hang of it. Read on to see how I gave that farm truck its painterly look.

In Photoshop, under the menu bar titled "Filter" there's an option called "Filter Gallery" that houses all kinds of effects that you can add to photos (most of them are terrible, FYI - yikes!). I tried all of them and my favorite, by far, to get the look I was going for was one called "Palette Knife."

For the tutorial, I'm going to use this landscape photo I took on our trip to Napa Valley a couple of summers ago. It was so beautiful there! Here's the original after I pulled it into Photoshop:


Then I pulled up the Filter Gallery and selected the Palette Knife filter. On the right side, there are three sliders that you can adjust to change the look of the filter. For the photo below, I chose 50 for the stroke size, 3 for the stroke detail and 0 for the softness.


After clicking OK, Photoshop took me back to the normal window with the new filter applied. I played around with the saturation to make the colors deeper and more exaggerated to add to the painterly effect. I love to use the Pioneer Woman's Photoshop actions for this. They're a free download and I use them all the time in my regular photo editing. For this photo, I used "boost" at 50% opacity.


That's it! Photoshop does most of the work for you and you can adjust the settings however you want to get the look you're going for. Here's a side-by-side before and after of the Napa Valley shot above so you can see the difference:


Pretty cool huh? Here are a couple more examples from some other photos - all using the same technique...

The old farm truck (this one might be my fave!):


And some lovely tomatoes from the farmer's market. Can you believe all those colors?


I'm no Photoshop pro, but I had a blast using it to turn these photos into paintings. I'd love to have a few of them printed out on canvases. If you find a good deal on those, this would be an inexpensive way to add some beautiful (and personal!) art to your home.


Enjoy what you read today?  Enter your email address below to subscribe to May Richer Fuller Be!


Delivered by FeedBurner

Pin It!

1.15.2015

Himmeli Hearts: A Valentine's Day Craft {Blog Hop!}


Hello, friends! Today I'm joining five of my blogging buddies for a fun post on Valentine's craft ideas. We're just under a month away from this holiday of love, so we thought it would be fun to share a few of our ideas with y'all. Thanks to Linda (from It All Started with Paint) for organizing this!


As you can tell from the title and the opening photo of the post, I made a couple of Himmeli hearts for my craft. Are y'all familiar with Himmeli-style art? I'm kind of obsessed with it right now, and this was my first time making something in that style. It's a type of geometric art made of straws that originated in Finland, and is typically used to make simple Christmas ornaments. People have started becoming more and more creative with their Himmeli crafts and I've definitely noticed it's trending in the design world! The possibilities are endless. I'm not big on seasonal decorating for the little holidays like Valentine's day, but this modern take on the quintessential VDay symbol? Yes please.

Here's what you need to make these hearts:
  • Straws (I picked these cute striped ones from the dollar section at Target)
  • Thin wire (all I could find was the green floral wire below. I removed the green plastic to expose the wire. It was a pain - so if you can find thin wire, use that!)
  • Scissors
  • Ruler

Once you get the hang of how to do this, they're really easy to make. I followed this amazing tutorial from Oleander and Palm that was posted on Vintage Revivals, and I'm not going to reinvent the wheel today and rewrite my own. She does a much better job than I could do, and so if you like what you see today, head on over to Vintage Revivals and get the full details. Consider this post a birds-eye-view summary of how to make these Himmeli hearts :).

It's handy to get your straws in order before you starts so they're ready to go. You'll need 12 straws cut in half (so that's 24 total after cutting them), six full-length ones, one 2 inch straw and one straw with about an inch cut off the end.


As you start to put the heart together (following the directions above), it will start to take shape:


And eventually, it will look something like this!


Halfway through my first attempt at one of these, I was getting really concerned that it was going to look all janky and weird, but in the end, it all worked out. Phew! I was so proud of my handiwork that I made one more big one (like the one above) in black and another tiny one in red. 

I think they look mighty cute together, don't you?


Now I want to Himmeli all the things! Perhaps a wreath? Or a light fixture? It would be fun to make something that can hang around all year round!

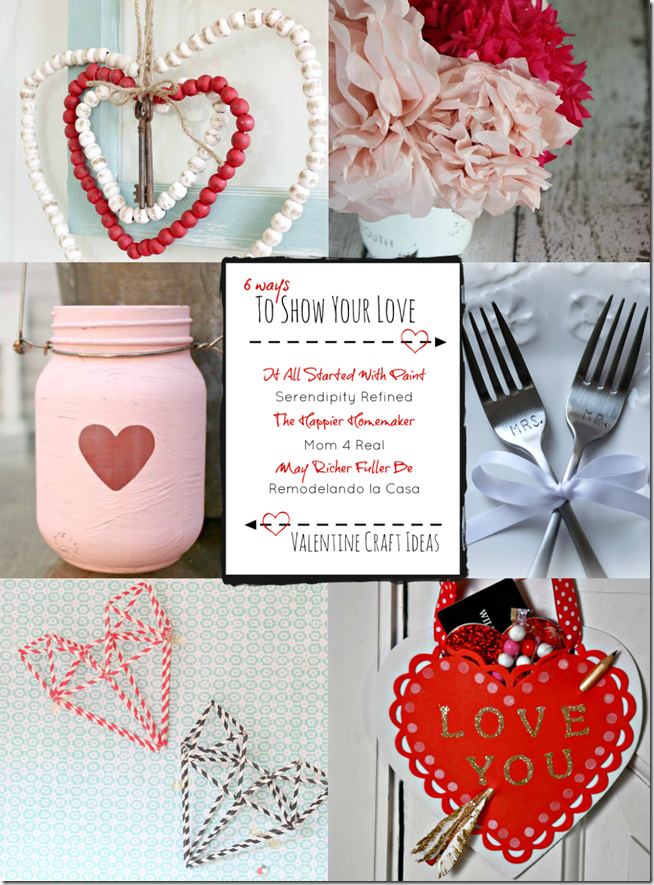
Be sure to check out the other projects from these lovely ladies below!

valentine-craft-ideas
Recycled Beaded Hearts by Remodelando la Casa
Paper Flower Bouquet by The Happier Homemaker
Mr & Mrs. Stamped Forks by It All Started With Paint
Easy Non-Candy Valentine by Serendipity Refined


Enjoy what you read today?  Enter your email address below to subscribe to May Richer Fuller Be!


Delivered by FeedBurner


Pin It!

12.04.2014

Silver Ornament Advent Calendar {Christmas Traditions Blog Hop}


Happy Thursday y'all! Today I'm participating in a Christmas Traditions blog hop hosted by Rachel from Like a Saturday. If you're hopping over from House by Hoff, welcome!


Christmas is definitely a holiday that lends itself to lots of traditions - and we certainly have a few! One of my favorites is an Advent calendar. When I was a kid, we used to buy those cardboard ones that had a toy or a piece of chocolate behind a numbered door, and I loved it. There was always great excitement about what would be inside those little doors. 

As I've gotten older, Advent has come to mean so much more than counting down to Christmas day via chocolates and toys. It's a season of anticipation of Jesus's birth and Christians all over the world participate in this time of waiting for the four weeks leading up to Christmas. I love having a time that's set-apart each year to step back and remember the significance of why we celebrate his birth. If you're curious about this idea or want more information, I encourage you to check out this little booklet that a pastor, John Piper, has put together. This year, I'm using the SheReadsTruth Advent series as a guide as well.

Now back to the tradition of the Advent calendar! This year, I decided to make my own that can be pulled out year after year (new tradition!) using my collection of silver ornaments. My parents gave me a silver ornament each year for Christmas and I thought it would be fun to number them for each day of Advent and then put them up one at a time on our tree.

To make the calendar, I used:
  • 2'x3' rug
  • Piece of scrap moulding
  • Ribbon
  • Embroidery floss (and needle)
  • Small white paper bags
  • Large kraft paper tags
  • Pinking shears
  • Number stamps
  • Gold ink
I picked up this cute cable knit rug from West Elm a few years back and it never found a good place in our home so I decided to use it for this project.


I secured a piece of scrap moulding along what would become the top using a few stitches. They're hard to see here since I used white embroidery floss, but I just alternated long straight stitches with stitches over the top. Using a piece of moulding allows this calendar to hang like a tapestry on the wall. You'll see how in a minute :).


Then I made my "ornament holders" using a kraft paper tag and a small white paper bag.


First I cut down the height of the bags using pinking shears so that the kraft tags would stick up out of the top of them.


Then I tied the ornament to the hole in the kraft tag. Makes for quite a cute little package, huh?


Then it was time to number the bags 1-25 for the calendar.


Once I finished numbering them, I sewed them onto the rug by hand using embroidery floss. To hang the calendar, I attached a big green grosgrain ribbon to the edges of the moulding and hung on a big Command hook I had attached to the wall.

Now for some beauty shots of the finished calendar!


I really love how it turned out! Now all my pretty silver ornaments are out on display until they are removed one-by-one, day-by-day.


You can see where it's hanging in our living room on my Christmas home tour from Monday.


Thanks for hopping over to hear about one of my favorite Christmas traditions today! Now it's time to hop on over to Run to Radiance and hear about hers!


Pin It!
Related Posts Plugin for WordPress, Blogger...
Blogging tips