Showing posts with label light fixture. Show all posts

4.20.2016

Make It: DIY Sputnik-Style Light Fixture

*Psst! Thanks to everyone who entered Mix & Match Design Company's e-design giveaway! I'm hard at work going through the submissions and it's going to be SO hard to choose just one. Y'all have such awesome homes and I can't wait to work with one of you!


If you saw my Instagram from last week, you'll know I've been working on a fun little DIY light fixture for my office. It's been way too long since I've DIY'd something and shared it here, so I figured it was high time to get 'er done to show y'all!

https://www.instagram.com/p/BEHbwwQyWE7/?taken-by=mayricherfullerbe

I've been a fan of Sputnik-style light fixtures for awhile now. They're modern, kinda funky and fixtures with exposed bulbs are definitely "in" right now. I needed a ceiling fixture to replace a sad-looking fan in my office, but wasn't ready to commit to spending the big bucks on a new fixture just yet.

Then on Pinterest (of course!) I spotted Little Green Notebook's DIY branch light and I thought a variation on that would be the perfect thing! I made a couple of modifications to make it work for my space and the step-by-step is below in case you want to make one yourself.

Supplies needed: (* Denotes an affiliate link. That means I get a tiny commission when you purchase through my link. There's no cost to you - thanks for supporting this little blog. :))


Putting this light together is a little bit like building with legos - it's super straightforward and you really can't mess up. You get to be as creative as you want!

Start with the 3-in-1 socket adapter and screw a Y socket splitter into each end.
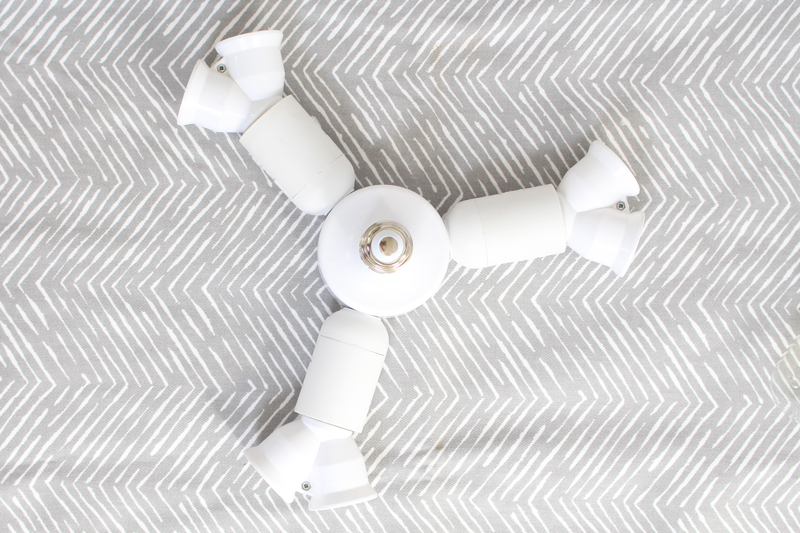

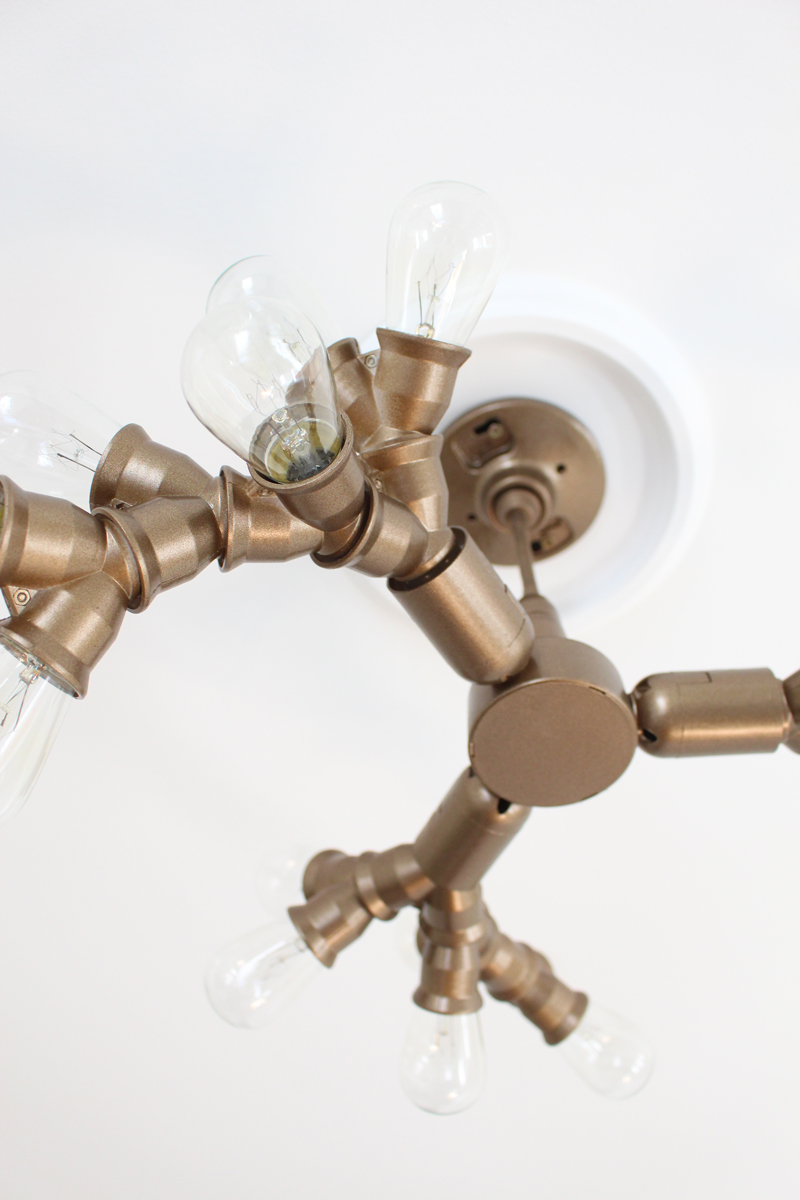
Keep adding additional Y socket splitters to open ends until you get to the look you want. I ended up using 15 and gave it a pretty symmetrical look. What can I say - I like balance!
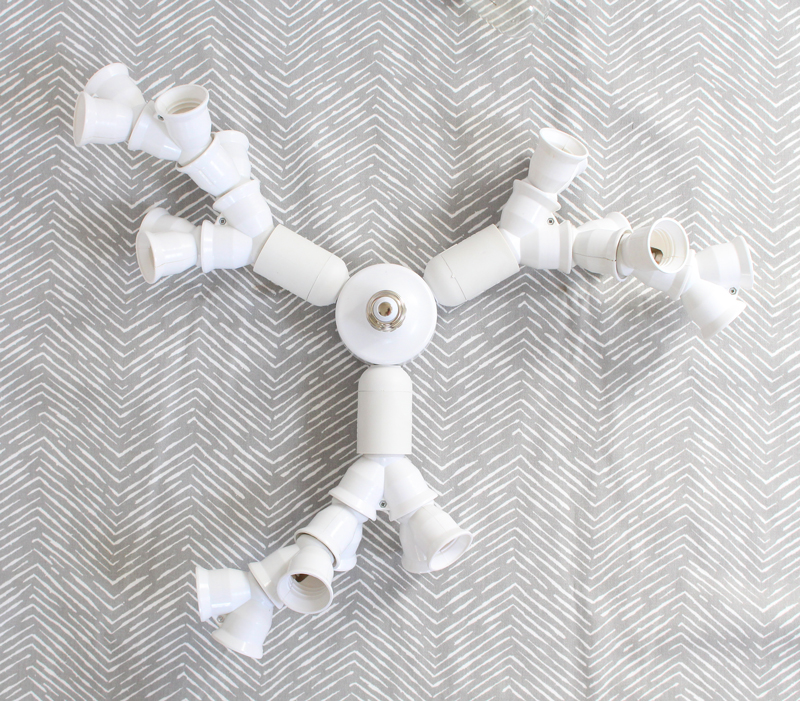

Once you finish attaching the Y splitters in a pattern you like, add lightbulbs to the remaining open sockets. You'll take these out to paint the fixture (unless you want to leave it white, which is pretty too!), but I liked seeing how it would look in its final form before heading to that step.
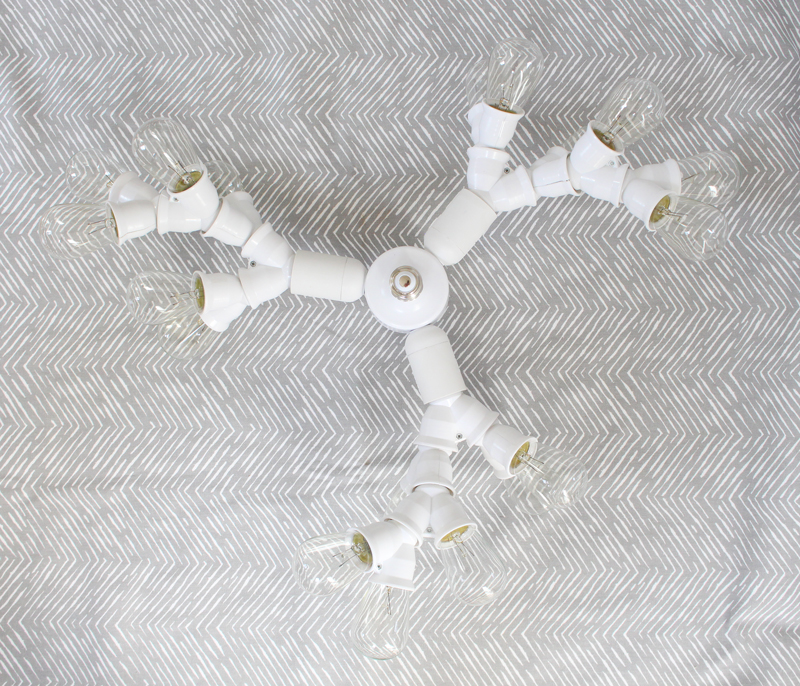

Finally, screw on the flexible extender and outlet box mount to finish the assembly before painting. Here it is before I got my spray paint on.


Before taking it out to paint, I installed it temporarily to make sure I was really happy with the scale and amount of light it gave out. My office isn't huge, but I found that with my original design, it wasn't quite bright enough. No big deal - I just added a few more Y splitters and bulbs to increase the amount of light.

Onto the painting!

But, here's one other pre-painting step that's very important!! Make sure to stuff the sockets with some newspaper to protect the light bulb contacts. It would be a shame to finish painting, screw in those bulbs, and then have the fixture not work!
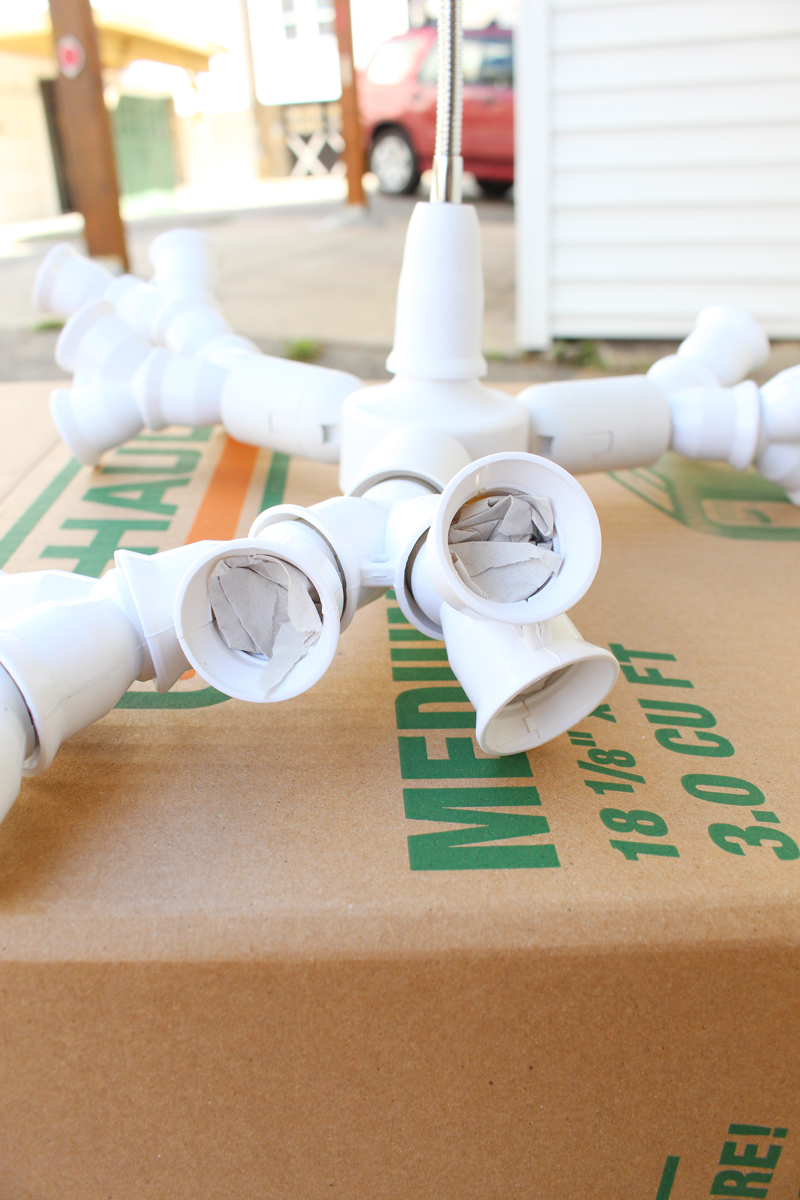

I decided to spray my fixture metallic coppery-gold and since it was a tricky fixture to paint, I used a cardboard box as a makeshift paint shed - it worked perfectly to prevent overspray from getting on the concrete and helped it stand up for painting and drying purposes. I made sure to use multiple light and even coats and rotated the fixture several times to make sure all surfaces were well-covered.
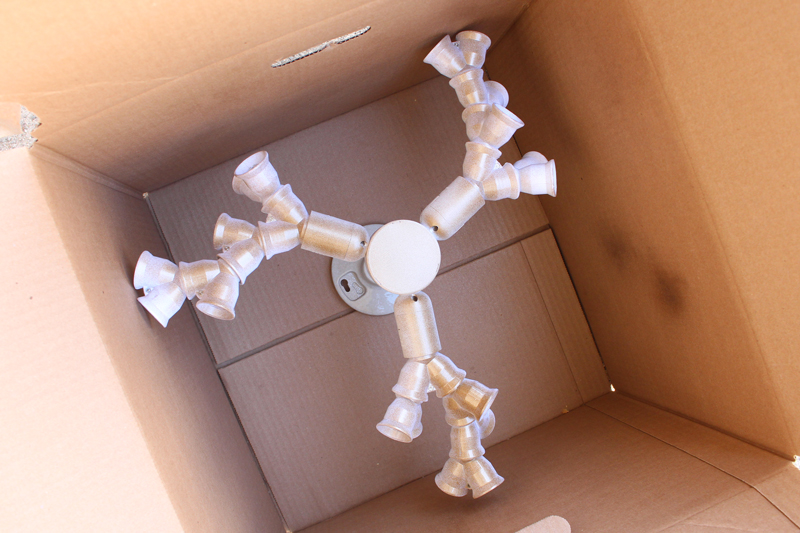
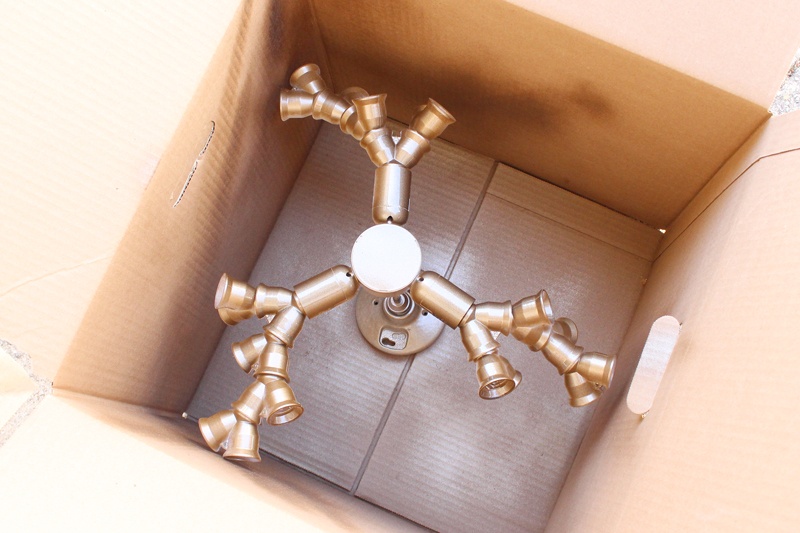

(Side note: for those who are wondering about priming prior to spraying the metallic paint...I skipped that step. Should I have? Probably not, but since this fixture is installed on the ceiling, durability isn't an issue and I decided to be a total rebel and not prime. Many of these pieces are plastic though, so it will chip if you scratch at it. So far so good though!)

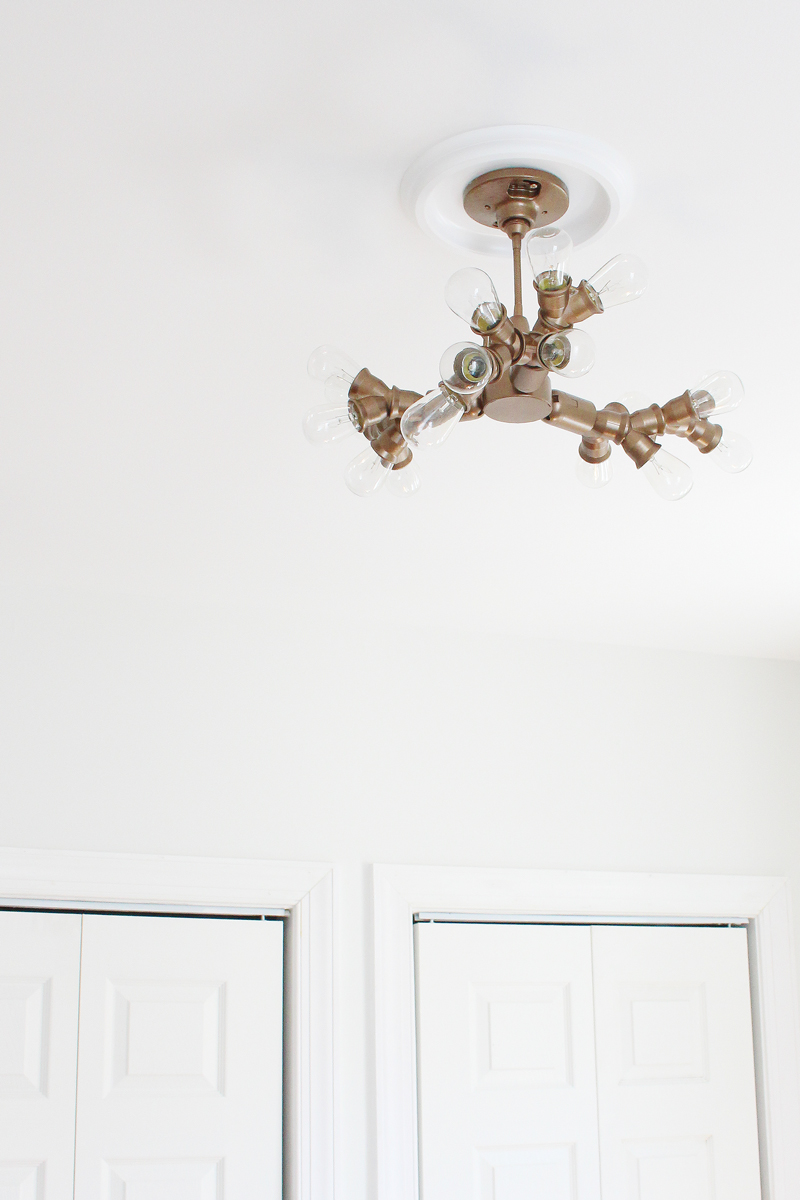
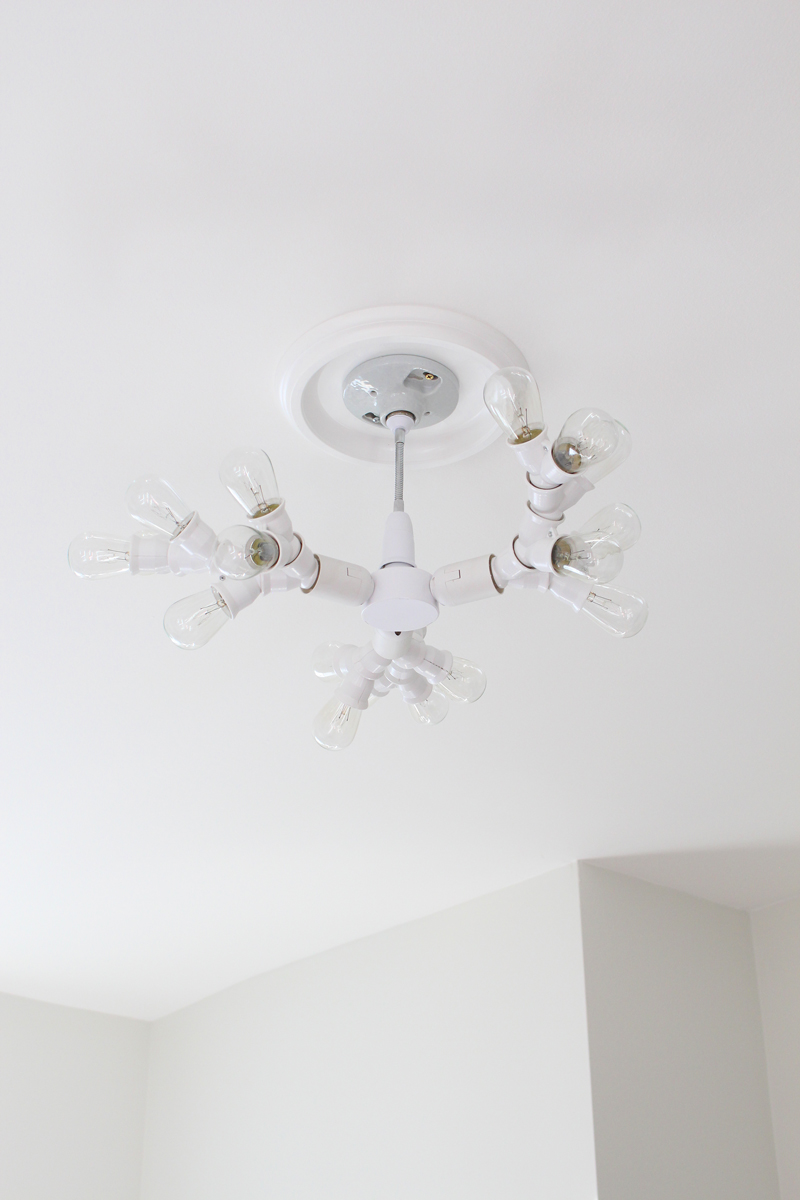
Now let's get to the good part - seeing it after installation! (Outlet mount boxes are super easy to install - just follow the directions in the box. If you don't feel comfortable with that, definitely hire an electrician!)


I added a ceiling medallion to really finish it off around the outlet box and I think it looks great. Here's how it looks with my office area in the background:
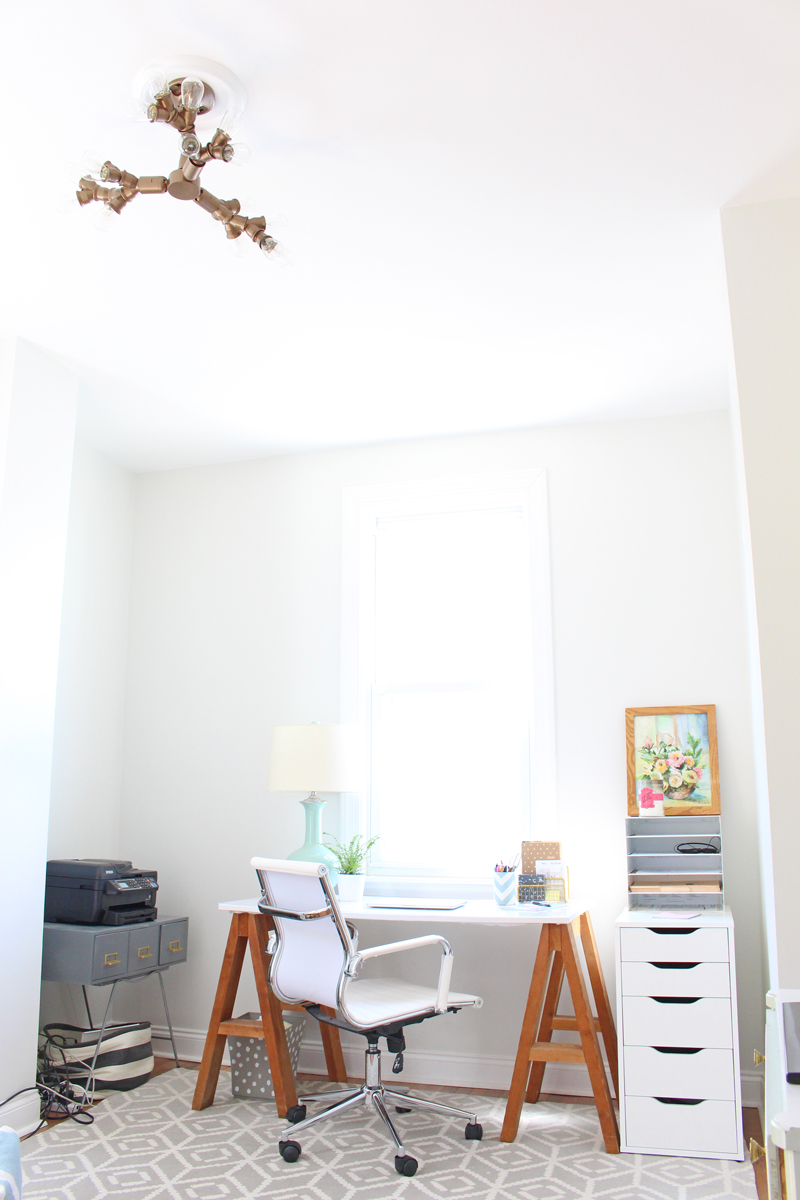

Love all those fun bulbs!
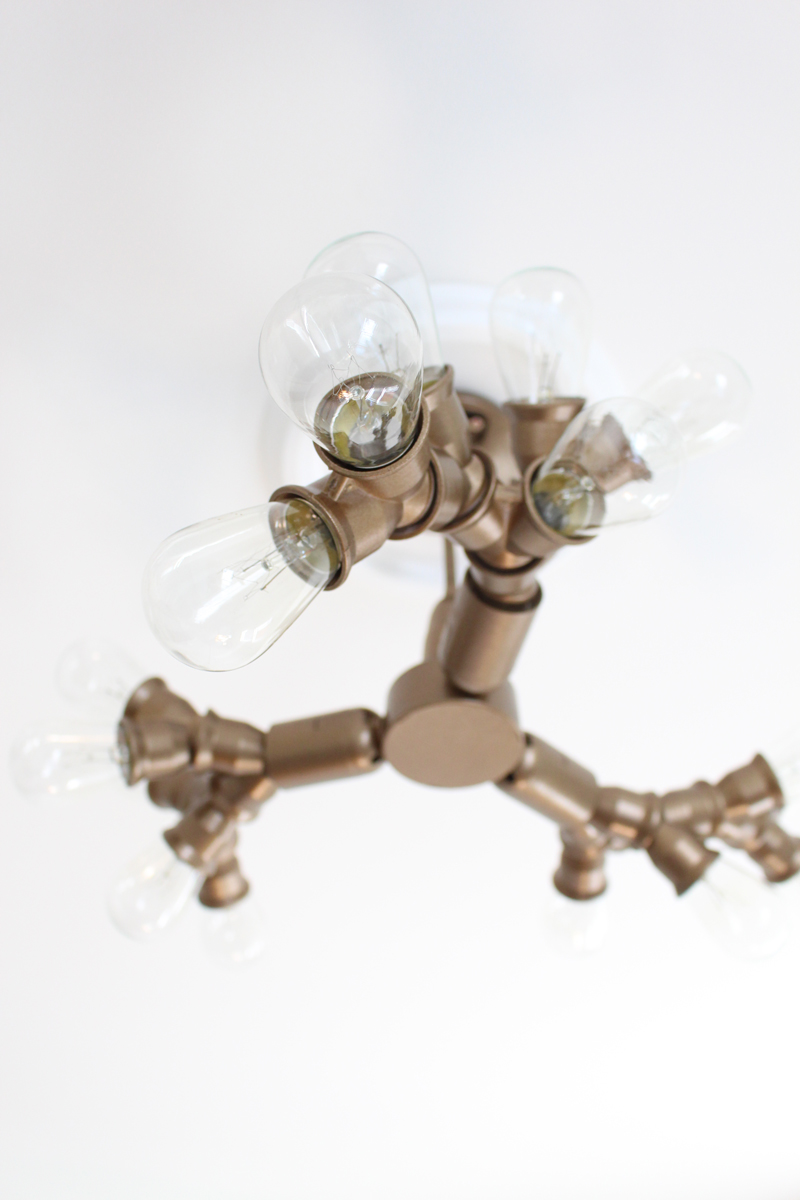


I'm thrilled with how it turned out. It brings such unexpected personality to the room!


Hooray for successful DIY projects! What have you been DIYing lately?


Enjoy what you read today?  Enter your email address below to subscribe to May Richer Fuller Be!  Delivered by FeedBurner

Pin It!

3.14.2016

Favorite Finds | Modern Dining Room Light Fixtures

We've been slowly chipping away at pulling our dining room together (can't wait to share some progress soon!), and one item we haven't figured out yet is the light fixture. I've heard it said before that light fixtures are like the jewelry of the room and I think I have to agree. They can add such spunk and personality to a room.

Since we just forked over a significant chunk of change for a new-to-us dining room table, I'm a bit reluctant to purchase a light fixture at the moment, but that hasn't stopped me from window shopping my way through Google, Etsy and Pinterest. If you're in the market for a new modern chandelier, I've found some really awesome options for you to check out! Or, if you're like me and not quite ready to make that purchase, but appreciate great lighting design, you can just ooo and ahh over the ones below like I have. You'll notice I have a tremendous affinity for brass and black fixtures - I make no apologies for that, ha!

Here are my favorite finds:


1 | 5 Orb Chandelier by Lucent Light Shop via Etsy
2 | Vega 5 Chandelier by Schoolhouse Electric
4 | Pelle Chandelier Gooseneck by West Elm
5 | Vintage Metal Large Chandelier* by Unitary via Amazon
6 | Cabildo Chandelier by Sazerac Stitches
7 | George Kovacs Pontil Chandelier* by Kovacs via Amazon

Which one is your favorite?


* Denotes affiliate links. When you purchase an item using my link, I receive a small commission at no cost to you. Thanks for helping support this little blog!

Enjoy what you read today?  Enter your email address below to subscribe to May Richer Fuller Be!  Delivered by FeedBurner

Pin It!

1.21.2015

Pretty Alternatives to the Not-So-Pretty Boob Light

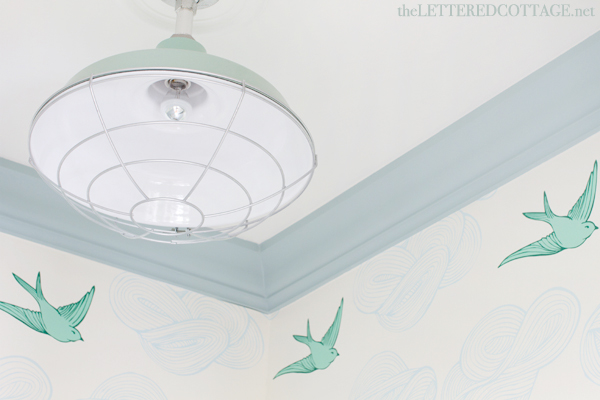
So, you know those lists that pop up on blogs and your Facebook newsfeed like 10 of the Hottest Design Trends for 2015? Well, you know what I never see make those kinds of lists? Something affectionately known as the boob light. It appears in homes all over America and has sneakily become the go to flush mount ceiling fixture. In case you're unfamiliar with this style of ceiling fixture, here's a lovely example:


We have a total of have five - yes, five! - in our little rental. Oy. Since we rent, we're not allowed to take them down, so I'm just happily ignoring them, but that doesn't mean I can't dream about the pretty fixtures I'll put a future house someday :).

(P.S. No offense if you have these and like them! They're just not my favorite. To each his own, right?)

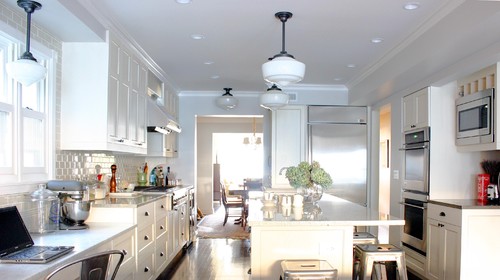
Many of us need to have flush mount or semi-flush mount ceiling fixtures in our homes, and I've got some good alternatives to the boob light to share with y'all today. Here are some of my favorites:


What do you think? Does seeing these make you want to replace the boob lights in your home? There are some real beauties out there and they can add such great style to a space!
Enjoy what you read today?  Enter your email address below to subscribe to May Richer Fuller Be!


Delivered by FeedBurner

Pin It!

8.12.2014

Wall Sconces {Design Ideas For Small Spaces}

Whew! This weekend flew by waaay too fast. SO fast in fact, that I didn't have time to get this post together on Sunday for my usual Monday post day. Oh well! Such is life. Moving on.

Y'all remember this photo of our bedroom from my little post-move-in home tour last week?


And remember that crazy-long to do list I created of things I'd like to do for our house? Well I added something else to it for our master bedroom: change out the floor lamps for wall sconces. Our bedroom measures about 9 feet across and feels pretty tight around the edges, so I've been thinking about ways to make it look and feel more open. Wall sconces seemed like a great way to make that happen, but knew we couldn't hardwire anything since we're renters.

Enter the newest IKEA catalog. 


Pin It!

6.03.2013

May Project Round-Up


I feel like I say this every month, but man, May flew by in a flash. Welcome, June! I'm excited summer is here - are you?

Before May is a distant memory, let's take a few minutes to look back at the projects I posted about on the ole blog this past month, starting with this fun way to display printed Instagrams using pants hangers. (I print my Instagrams to Walgreen's One Hour Photo using an app called Printicular. It's so easy and inexpensive.)


My favorite project of the month (and the most popular one with y'all as well) was the wood shim pendant light. Though it ended up being a little more challenging than I anticipated, I love how it came together in the end, and seeing it hanging over our dining room table really makes me happy. If you missed any of the posts about it, you can catch up here: one, two, three.


I revamped the every-other-Friday Creative Bits Series a bit, and shared a really pretty office space and a beautiful living room this month. This has been a fun way to connect with other bloggers, so if you have a space you think has a few Creative Bits of its own, send a photo of it my way and I might use it in a future post!


Operation {Re}Organization continued this month. This time I tamed the chaos of the front hall closet in a series of three posts (inspiration, before/strategy and after). What was a disaster area is now sooo much more functional and even has secret storage for sporting equipment. Did any of y'all tackle an organizational project this month?


And of course you can't have "function" without "fun" (bad pun, sorry), so I added these blue watercolor-y/painterly labels to make sure things are easy to find and are returned to their proper homes. There's a link to download a free set of blank labels too if you need some!


I also took on a new cleaning plan in Operation {Re}Organization this month. The first week has gone pretty well so far. Since I technically implemented this plan last Tuesday, I technically have one more day to do my last weekly task...clean the bathroom...ugh. At least once it's done I'll have the satisfaction of checking that box once I'm done though - thanks to my handy list here :).


Are you a Kate Spade fan? If so, you'll want to check out the Kate Spade Style Soiree hosted by Jenna and others last month. I joined their party and created a Kate Spade-inspired gold zig zag pitcher. Who doesn't need a little gold in their lives?


To celebrate my mom this month on Mother's Day, I took some photos with my brother, Instagrammed them, and created a photo strip style card for her. It was a fun project for me, and she loved it! Win win.


Another one of my favorite projects this month was this DIY iPhone speaker made out of...a toilet paper roll. Talk about doing a project "on the cheap" :). I use it all the time!


Last but not least, I shared a recipe for banana avocado bread. Head on over to the post to see why I used avocados, of all things, in this delicious quick bread.


That about wraps it up for May! Thanks, as always, for reading. I'm so grateful to each of you for stopping by my little corner of the blogging world.

And thanks to these wonderful blogs for featuring my posts this month:


Come on back tomorrow for a fun project I did over the weekend. Want to know what it is? Go back to this post from last week for a hint!

Pin It!

5.15.2013

Wood Shim Pendant Light: The Installation (Part Three)

My wood shim pendant light is up! Hanging from the ceiling! And I looove it. Wanna see?


After finishing it a week or so ago, I had to wait a few days to finally hang it because I needed a special tool - a hammer drill - to place the hook in our *ahem* concrete ceiling. Do y'all know how hard it is to drill through concrete? If you've never had a chance to enjoy that experience, trust me when I say it's hard. My triceps were sore the next day from the force I had to use to drill straight up into the ceiling.

That being said, this isn't a "how to" post on hanging ceiling fixtures (consult an expert if you're not sure what you're doing!), but here's a little free advice...In order to place a screw into concrete, you'll need a hammer drill and some Tapcon concrete screws. Thankfully, my father-in-law is a contractor and he could advise me on exactly what I'd need to hang this guy correctly.


I experimented with some different hanging heights, and ultimately decided to hang the fixture fairly close to the ceiling. This might be higher than "normal" (whatever that is :)) for a dining fixture, but I didn't want to obstruct any sight lines through our apartment or block the lovely Martha's Vineyard map we have hanging there.

Since this is a plug in pendant, I needed to figure out a way to hide that long cord. In the photo above, you can see that the it runs along the ceiling and then disappears. In our space, I found that it's least noticeable if I run it down the wall just around the corner from the dining area. Around that corner is our front hall, and when you come in the door you hardly notice there's a thin white cord going down the wall.


In part one of this pendant light saga, I mentioned that there might be a little paint action involved with this fixture. In the end, I decided to leave it in its natural wood state for now. I like seeing the knots and the color variation in the wood. I'll live with it for awhile and reassess in the coming months. You can always paint something, but it's hard to go back to natural wood if you change your mind!

Thus ends the saga of the wood shim pendant light. Phew! To catch up on the back story of this guy, you can head over to my brainstorming session post, part one - the reveal, and part two - how I made it.

Let's take one last look at this pretty pendant light hanging over our dining table:


On a side note, I can't help but mention that today is my third wedding anniversary! Happy anniversary, C! Here's to many, many more to come :).


---------


Pin It!

5.08.2013

How To: Make a Wood Shim Pendant Light (Part Two)


Welcome to part two of the wood shim pendant light saga! To read part one, head on over to this post. Today I'll show you how I used an old drum shade and some wood shims to make a pendant light for our dining room table. The process was pretty straightforward once I got going and had all the right supplies. It just took a little trial and error to get it looking the way I wanted. So, if after you read the tutorial, you're asking yourself, "Why was she complaining so much about this seemingly simple project yesterday?" know that what you see here is the yesssss I finally got it right! product :). Hopefully, if you do something similar, this tutorial will help you avoid some of the mishaps that I had along the way.

Supplies needed: 


Step one: Gather your supplies.

I used an old drum shade from Target I got on clearance several years ago for this project. While I liked the turquoise stripe, I didn't want any of that color showing through once I glued the shims on...


...so I pulled it off and was left with a white drum shade. Now, of course if you just buy a white drum shade, you won't need this step. I'm just too cheap to go out and buy a new shade. Why buy new if you can reuse? ;)


I did spend a little money on my other supplies. I picked up a HEMMA cord set (pendant kit) from IKEA for $5, and a set of wood shims for about $4 from Lowes. Shims come in different lengths, so make sure you pick up the ones that are the appropriate length for your project. 


Step 2: Plug in your hot glue gun and get gluing!

Wood shims are really lightweight, so a couple of dabs of hot glue is all you need to stick 'em to the shade. I put one dab at the top and one at the bottom of the shade to secure them. 


Since my drum shade is slightly tapered, I chose to put two layers of shims on to cover the entire shade. On the first layer, I left a small gap in between each shim so that the shims sit perfectly vertical (straight up and down). You can also see in these photos that the shims stick out from the edges of the shade. They are longer than the height of the shade, so I decided to center the shims so that they stick out from both the top and bottom of the shade. It's up to you how you want to place them!


Once you get all the way around with the first layer, it will look like this:


Repeat the steps for the second layer. Make sure to cover the gap between two shims in the first layer with a shim in the second layer. This isn't only functional - it provides a cool overlapping effect and adds some dimension to your pendant light.

By the end of all your gluing, your pendant light will look like this!


Step 3: Attach shade to the pendant light kit/cord set.

My cord set is of the plug-in variety. I chose this option because I live in a rental and I can't install permanent overhead fixtures (yay renting!). If you can install an overhead light, I'd say do it! That way, you won't have a pesky cord to hide once you get it rigged up. 

Since I used a drum shade with a slip UNO fitter (if you're going, "huh?" at that term, take a look at this article) as my base, attaching it to the cord kit was pretty simple. I just put the socket end of the kit down on one side of the slip UNO fitter and screwed in the bulb from the opposite side of the fitter to secure the cord kit to the shade. Voila! Pendant lamp done.


Like I said at the beginning, this project is pretty simple when you have the right materials. I can't wait to finally install it over our dining room table (I'm currently waiting to borrow the right tools...I get to use a hammer drill!). I think it'll look great! (Update: it's installed! Read about it here.)

The total cost for this project was around $15 including the shade, pendant kit/cord set and shims. Not bad for a brand new overhead light, huh?

Have you ever DIY'd a pendant light or any other light fixture? Any advice for this novice over here? 

---------


Pin It!
Related Posts Plugin for WordPress, Blogger...
Blogging tips