Showing posts with label Instagram. Show all posts

4.13.2015

Be Strong and Courageous iPhone Wallpaper + Instagram Photo


Happy Monday, y'all! I hope you had great weekends. The weather has finally turned here in Philly and what started as a very dreary week turned into an absolutely gorgeous weekend. I'm very, very thankful for that.

Today I have something very simple to share with y'all: a new iPhone wallpaper with a verse on it that has popped up in my life a lot lately. It's Joshua 1:9 and it says, "Have I not commanded you? Be strong and courageous for the Lord your God is with you wherever you go." I figured that since it keeps coming up in my life and is such an encouragement to me that I'd stick it on my iPhone for awhile as my lock screen. I shared the little graphic on Instagram (do you follow me over there? @MayRicherFullerBe just joined!) last week and figured I'd pass it along to y'all in case you need a little reminder of this truth in your life.

If you'd like to download this for yourself, here are the links:


Be encouraged today, friends!


Enjoy what you read today?  Enter your email address below to subscribe to May Richer Fuller Be!


Delivered by FeedBurner

Pin It!

3.25.2014

Easy DIY Instagram Coasters


I don't know about you, but I have a tiny love affair with Instagram. I think it's my favorite social media channel. It's simple and straightforward, feels personal, and it's easy to interact with people you follow. It's also a fun way to catalog the everyday little things that you wouldn't necessarily snap a photo of otherwise.

And while I love my Instagram feed and photos, I still really like holding physical photos in my hands. I printed out a bunch of my favorites at Walgreens last year using my favorite app, Printicular, and have a rotating stack on display in our living room.

I decided to take a few and use them for today's crafty project - coasters! I had some old, tired-looking tile coasters that could seriously use a mini-makeover so I Mod Podged four of my Instagrams right on top of them.

Here's a quick tutorial of how I did it:

Supplies needed:

  • Printed 4"x4" Instagrams
  • Ceramic tiles
  • Scissors or paper trimmer
  • Mod Podge
  • Paintbrush


First, I trimmed the Instagrams so they fit on the tiles. You can see they were a little bit too big at their original 4"x4"size...the edges of the Instagram peek out around the tile in this photo:


So I trimmed them down about half an inch using a paper trimmer. I found this to be easier than cutting with scissors since the trimmer gives a nice, straight edge.


Here are all four Instagrams trimmed down to the right size:


Then it was time for Mod Podge!

I brushed a thin coat of Mod Podge onto the top of the old tile...


...stuck the Instagram on the tile...


...and brushed on another thin coat of Mod Podge on top of each to seal them and protect them from future contact with water.

Then they were done!


This was so easy (I think it took about 15 minutes total), and I love that these coasters now hold photos of some favorite places and memories I've captures over the past couple of years. Little happies, if you will ;).


Have y'all ever made personalized coasters like these? What fun things have you done with Instagrams?


Like this projects? Try these too!


---------


Pin It!

6.03.2013

May Project Round-Up


I feel like I say this every month, but man, May flew by in a flash. Welcome, June! I'm excited summer is here - are you?

Before May is a distant memory, let's take a few minutes to look back at the projects I posted about on the ole blog this past month, starting with this 
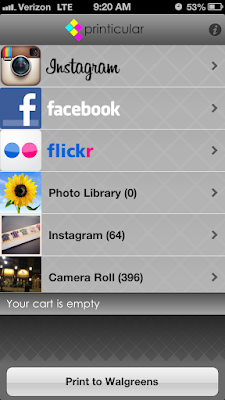
fun way to display printed Instagrams using pants hangers. (I print my Instagrams to Walgreen's One Hour Photo using an app called Printicular. It's so easy and inexpensive.)


My favorite project of the month (and the most popular one with y'all as well) was the wood shim pendant light. Though it ended up being a little more challenging than I anticipated, I love how it came together in the end, and seeing it hanging over our dining room table really makes me happy. If you missed any of the posts about it, you can catch up here: one, two, three.


I revamped the every-other-Friday Creative Bits Series a bit, and shared a really pretty office space and a beautiful living room this month. This has been a fun way to connect with other bloggers, so if you have a space you think has a few Creative Bits of its own, send a photo of it my way and I might use it in a future post!


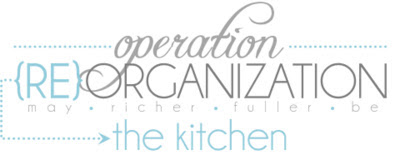
Operation {Re}Organization continued this month. This time I tamed the chaos of the front hall closet in a series of three posts (inspiration, before/strategy and after). What was a disaster area is now sooo much more functional and even has secret storage for sporting equipment. Did any of y'all tackle an organizational project this month?


And of course you can't have "function" without "fun" (bad pun, sorry), so I added these blue watercolor-y/painterly labels to make sure things are easy to find and are returned to their proper homes. There's a link to download a free set of blank labels too if you need some!


I also took on a new cleaning plan in Operation {Re}Organization this month. The first week has gone pretty well so far. Since I technically implemented this plan last Tuesday, I technically have one more day to do my last weekly task...clean the bathroom...ugh. At least once it's done I'll have the satisfaction of checking that box once I'm done though - thanks to my handy list here :).


Are you a Kate Spade fan? If so, you'll want to check out the Kate Spade Style Soiree hosted by Jenna and others last month. I joined their party and created a Kate Spade-inspired gold zig zag pitcher. Who doesn't need a little gold in their lives?


To celebrate my mom this month on Mother's Day, I took some photos with my brother, Instagrammed them, and created a photo strip style card for her. It was a fun project for me, and she loved it! Win win.


Another one of my favorite projects this month was this DIY iPhone speaker made out of...a toilet paper roll. Talk about doing a project "on the cheap" :). I use it all the time!


Last but not least, I shared a recipe for banana avocado bread. Head on over to the post to see why I used avocados, of all things, in this delicious quick bread.


That about wraps it up for May! Thanks, as always, for reading. I'm so grateful to each of you for stopping by my little corner of the blogging world.

And thanks to these wonderful blogs for featuring my posts this month:


Come on back tomorrow for a fun project I did over the weekend. Want to know what it is? Go back to this post from last week for a hint!

Pin It!

5.06.2013

Displaying Printed Instagrams


Happy Monday, y'all! I hope you all had great weekends!

Back in March, I told you about my new favorite app, Printicular, that allows you to print Instagrams from your phone to Walgreens one-hour photo center. It's pretty awesome if you want to be old-school like me and have actual prints (what a crazy thought!) of some of your favorite Instagrams to display in your home. I love that I can upload them and have them in my hands the same day. Yes, I can be impatient somtimes :).

Here's my Instagram of Instagrams from when I had them printed:


But the question now is, now that you have physical prints, how do you display them? Since Instagrams are fun, non-traditional photos, I think they call for a fun, non-traditional display. Don't you think? I had some fun scouring the house for something to use and came up with a pile of unused pants hangers. I thought they'd be perfect for the job. Go with me on this one...

Take a look:


Pretty cute, yes? After playing around with them for a little while, I figured out that I could clamp 5 photos onto one pants hanger, making a fun display for a grouping of photos.


I used five hangers in all to display 25 Instagrams. They look great hung all together in a group.


They're currently hanging on a cable in our apartment, but I'm not sure they'll stay there. We'll see. Wherever they end up though, I think they look pretty snazzy on their hangers.

I love how Instagram allows me to capture both big moments and everyday happenings in my life. So many of these photos capture little snippets of life that might otherwise be forgotten (example: that single barren tree on the beach that was strikingly beautiful and stark at the same time). If you've been reading this little blog for any length of time, you've probably noticed that I love taking photos, and Instagram provides one more way for me to snap away and share.

How do you use Instagram? Have you ever printed your photos? If you have, have you found a fun way to display them? I'm looking forward to trying out some others. Watch out - my walls may soon be wallpapered with Instagrams...uh oh!


---------


featured on: If It's Not Baroque


Pin It!

4.24.2013

Instagram Contest from Emily Henderson

Hello my lovely people! I hope y'all are having great weeks so far. I was catching up on Emily Henderson's blog last week and ran across an Instagram contest she's holding. I thought I'd share it with you, along with my entry, in case you want to participate or just follow along in this little competition.


To enter, all you have to do (as the graphic above indicates) is answer the question, "What piece of furniture would you save from a fire?" with an Instagram of the piece along with the hashtag #emilysaveme. The winner doesn't get a prize, per se, but Emily is going to show off 20 of her favorites on her blog. I'd say that's a pretty good prize! Fun, huh? I thought so. So I entered last night. Wanna see what piece I chose?

Here's my Instagram:


It's a jelly cupboard that used to belong to my grandparents. It's an ancient piece and I love it. It adds so much character to our apartment, plus it provides a TON of storage space.

Here's a "real photo" of it too:


Apologies for the glare - the windows to the right cast a funny light on that piece.

And though this contest isn't about styling, I kind of love the vignettes I've got on top of it right now.


The frame holds a tiny watercolor painting of me and my husband from our wedding. The W letter used to be plain black - I spray painted it glossy white and added popsicle sticks to the front for some fun texture. My favorite (and only) plants, the succulents, sit in the bottom half of an apothecary jar. I love that I haven't been able to kill them yet (I've had them for almost a year!). They're sitting on a pretty little cake stand (for sale in my Etsy shop right now!), which sits on top of a few design books. If you've got a good eye, you may have noticed that the confetti banner I made recently found a home strung along the top of the mirror.

If you'd like to read Emily's post on her contest, go here. Entries close on Friday, the 26th, so jump on it if you want to enter!

And yes, to the observant people (like those ones who noticed the confetti banner :) ), I mentioned Emily Henderson in yesterday's post too. She has no idea who I am, or that I'm mentioning this contest- I just think she's super awesome!


Pin It!

3.18.2013

Printicular - An App for Easy Instagram Prints


Hey look! It's an Instagram of Instagrams! Have I blown your mind yet on this lovely Monday morning?

I don't know about you, but I have a small obsession with Instagram, and have had it on my "list" for awhile now to get some printed out. I've found a few sites that do it, but honestly, it hasn't been super high on my priority list. Plus, most of the places that print them as little squares have been a little pricier than I was willing to pay and since they were online, I would have had to wait for them to ship (and pay for shipping) - what a terrible thing! Go ahead, call me impatient and cheap. I deserve it.

Well, thanks to the Nester, I found out about this awesome app called Printicular. It prints from your phone to Walgreens One-Hour Photo. That's right, you only have to wait ONE hour. That solved my impatience issue. The prices are reasonable too - only $.39 for a 4"x4" print. I ordered about 30.

So how does it work, you ask? Good question, my friend. The nerd in me thought it might be fun to show a few screenshots of the process from my phone. It's really so easy, I don't even need to do this, but that's what you're getting today!

Step 1: Download the app (it's available through the App Store for iPhone, or the Google Play store for Android).

Step 2: Open app. You'll see this screen pop up. Select Instagram.


Step 3: Allow Printicular to access your Instagram account. All of your photos will come up in a thumbnail grid. Select the photos you want by tapping the individual thumbnails. Then hit the "Print to Walgreens" button.


Step 4: Select the quantity you'd like of each photo (for instance, "1" will print one of each photo you selected). Don't forget to enter a coupon code if you can find one. PARNTER25 worked for me to get 25% off.


Step 5: Enter your zip code to select a location. I made one up here - don't want the whole Internet to know my zip!


Step 6: Enter your information to complete your order. Walgreens will send you an email once your print order goes through, and again once your prints are ready for pick up. So easy!


I'll definitely be using this app again in the future. I can't wait to figure out a fun way to display my cute little square prints. Has anyone else out there printed Instagram photos? If you have, what site/app did you use?

P.S. I wasn't paid or perked to write this post. I just loved using the app and hoped I could share the wealth with others! Printicular doesn't even know I exist :).

 ---------

P.P.S. Notice the changes to the blog header? I had some fun redesigning it, as well as a new logo for my Etsy shop, this weekend. I'll be back to share more specifics about it sometime this week!

P.P.P.S. (Gosh, I'm just full of post-scripts today, huh?) Did you hear Google Reader is being retired? I'm kinda, maybe, sorta freaking out. I love my Reader. Anyone have any good alternates? I'll be needing one come July 1.


Pin It!

2.07.2013

The Pantry: Before (And a Tiny Bit of Progress)


(Missed the first kitchen post yesterday? Click here to see it.)

Boy oh boy are y'all in for a treat today. You have the pleasure of seeing my pantry in all its disarrayed glory. Clicking the publish button on this one really makes me wince, but I keep telling myself it's part of the process. For all of you out there who fret about why your home doesn't look as clean and organized as all those homes on blogs and Pinterest, this one's for you. Real life isn't always perfectly color-coded, labeled and beautified (in fact, it's rarely like that). I know that I really appreciate blogs that show the bad with the good, so that's what I'm doing today. There is no beautiful reveal at the end of this one. Just giving you a fair warning.

Let's get down to business.

Like I've mentioned before, we don't have a proper pantry. We use half a cabinet in the kitchen and a little bit of free-standing storage in a piece of furniture in our front hall. While I do sometimes pine away for a real pantry, I really can't complain about the amount of storage, size and layout of our current kitchen. When we moved into this apartment, I just knew it would mean would couldn't stock up on many "extras" (i.e. canned foods, extra snacks, etc.). And I knew we'd survive just fine :).

So here we go. Onto some "before" shots.

Here's the cabinet part:

{ahh, the beauty of a closed door}

When you open that door, you have the pleasure of looking at this:


Yikes! No sense of order. The soup cans live with the cornstarch. The balsamic vinegar lives with the Life cereal. There are things buried back there that haven't seen daylight in months.

You might be asking yourself how in the world a cabinet that small can become that messy. Or maybe, just maybe you're actually saying, "Hey! That's exactly how my cabinet looks!" I'm hoping at least one of you out there can identify with this.

The other part of our pantry lives just around the corner. Here's what her contents look like:


This is supposed to house our extra food inventory, paper products, and baking supplies all neatly so that we can easily grab something when needed.

What, you don't see that happening? Ok, me neither. Looks like a jumbled pile miscellany.

One last thing I need show you is the corner of our kitchen by the toaster.


This used to be our breakfast area...until I ran out of space in our cabinet above and then it became the overflow area for pantry items. I deserve a slap on the wrist for that one. 

Bottom line? Clearly it's time for a clean out and reorganization.

So last night, at about 9pm, I decided it was time to start in on it and I made a little progress. I emptied both pantry spaces and the breakfast area, trashed old stuff, and grouped similar items together. I even got rid of some of the manufacturer boxes and emptied things into reusable containers. Since it was so late, I just used my iPhone and Instagram to document a little of the progress...


It's certainly not pretty, but the important thing is that it's happening. And if I ever want to be able to cook again, this stuff will have to find its way off of the counter and back into the cabinets. Nothing motivates better than covering your countertops with stuff, right?!

I'm excited about the end game here. I really think it's going to turn out great. Hope I'll be back soon with more exciting progress and details to share!

Pin It!
Related Posts Plugin for WordPress, Blogger...
Blogging tips