Showing posts with label gallery wall. Show all posts

9.10.2013

How To: Make a Watercolor From a Map


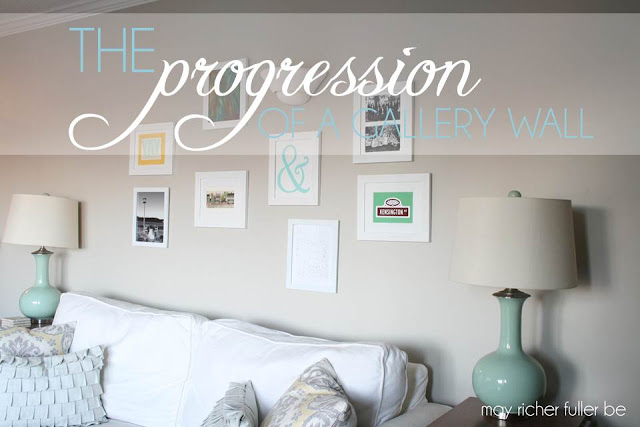
I happen to love maps as art. If you've been around MRFB for a bit, you've probably seen one of my favorite pieces - a vintage map of Martha's Vineyard - that hangs above our dining room table. So when I recently found a way to make a watercolor map of any place in the world, I couldn't wait to make one and add it to the ever-changing gallery wall in the living room. (Here's the latest iteration of that wall in case you want to see it.)

Wait, what's that I heard you say? You're not an artist and you don't do watercolor? Oh good, me neither. I've got a secret to share with you about these watercolor maps. You don't have to be an artist to make a pretty map like the one you see above. In fact, someone has already done all the hard work for you. 

Non-watercolorists, meet Stamen Maps. Some creative genius over there has created a watercolor version of the whole world. Whoa. All you have to do is pick your favorite place by searching (just like on Google Maps), choose your printing boundaries, save it, and print it out. So simple.

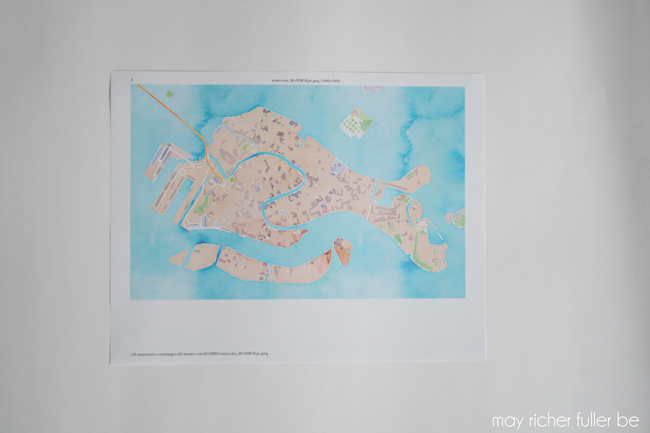
I made a bunch of them online (because I was having way too much fun seeing what my favorite places looked like in watercolor), but chose to print out this map of Venice because a) we went there last summer, so it's got some memories attached to it and b) it looks stinkin' cool as a map since it's shaped like a fish. 

Here it is printed out. If I had been all fancy, I would've printed it on card stock, but I didn't have any handy so out it came on regular ole printer paper. Worked just fine for my purposes :).


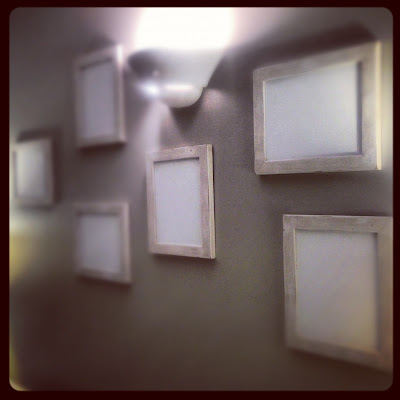
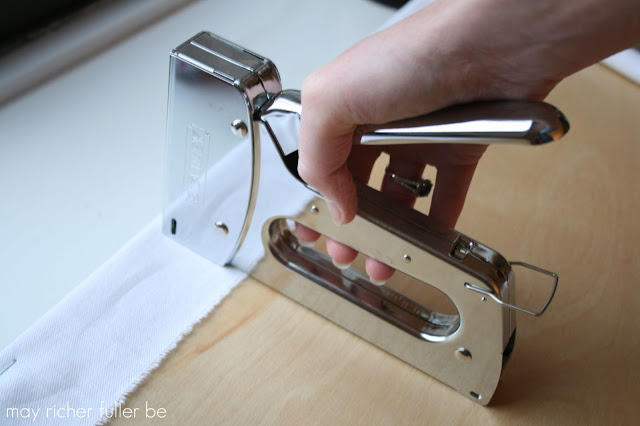
I trimmed it down so that it would fit nicely in my 8x10 frame, put a piece of heavy white paper behind it as a mat (the lazy gal's version of framing) and hung it on the wall.

It sits on the bottom middle area of the gallery wall. The colors mix quite nicely with the ampersand and Kensington Ave. street sign that are nearby.


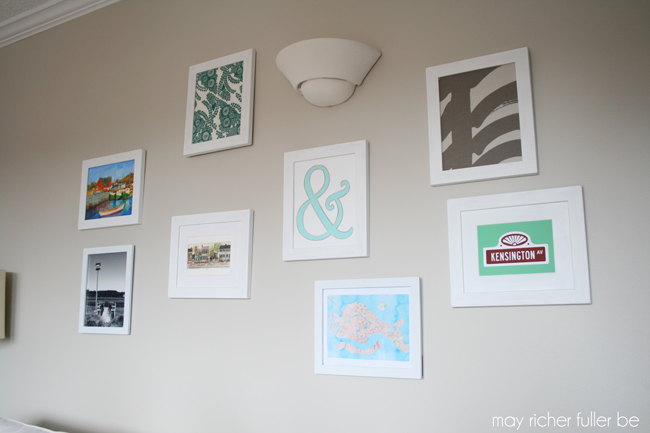
I'm loving this (inexpensive) little addition to the gallery wall.

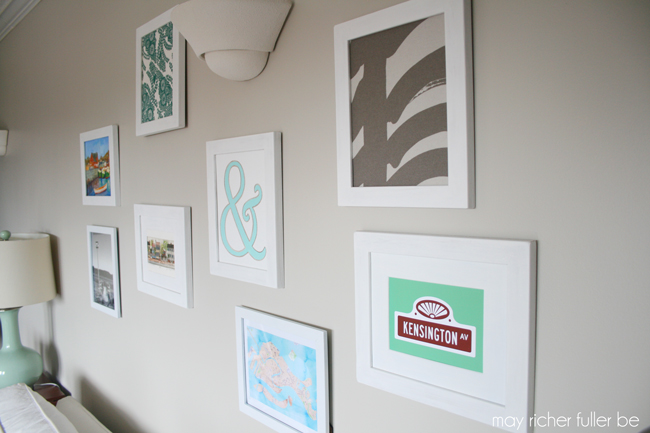
I think it would also be really cool to make 6-8 maps of all your favorite places and hang them in nice big gallery frames a la this style from Young House Love. Somebody please do that for me. I can't hang a grid pattern above our sofa because of that silly, off-center wall sconce (oy, how that drives me nuts).

While I've got you here, I also wanted to point out a piece of "real art" that I added to the wall - a beautiful oil painting. I picked up this tiny gem from a local artist at a farmer's market this summer. I love the colors and the scene. Ain't she pretty?


I'm still working on tweaking this wall and the frame contents because I'm not totally satisfied with it. I think I need to add a couple more frames to fill it out. What do you think?

---------


Pin It!

7.01.2013

Ditto DIY Challenge: Framing Fabric {Changing Up the Gallery Wall!}


Happy Monday morning to all of you! Today's July 1st, which is significant for two reasons: one, we officially say adios to Google Reader. I think a small moment of silence is in order.

But! Let's not linger on that for too long because of reason number two...

It's time for another ditto DIY project! This is a fun monthly challenge issued by Darlene from Fieldstone Hill Design along with a bunch of other lovely bloggers seen here:


You can read all about the challenge here, but the gist of it is that we're all finding ways to add framed fabric as art to our homes this month! This is a great way to add art to your space without breaking the bank. Click on over to Fieldstone Hill Design to see how each of these designers interpreted the challenge. These a link-up party too so the rest of us can join in on the fun.

As for my take on it, I've been thinking about changing up some of the pieces on our gallery wall, so this was the perfect excuse to grab a couple of favorite fabrics and throw 'em up on the wall. Isn't that the beauty of a gallery wall? The ability to change things up is such a fun aspect of it to me.

The last time we visited my dear little gallery wall, it looked like this:


Now, with the newly framed fabrics, it looks like this:


Can you spot the changes? Out went the photos of our wedding party and my DIY finger painting art, and in came the teal floral fabric and the abstract gray and cream fabric.

The teal fabric is actually a small, hand block-printed table runner. I didn't want to cut it up (because I still want to be able to use it as a table runner in the future!), so I just wrapped it around a small, white 8x10 canvas and taped it taut with painter's tape. You'd never know that from looking at it, huh? Shh...let's keep that our little secret.

The gray and cream almost zebra-looking abstract piece is a remnant I picked up a few weeks ago from Crate and Barrel Outlet. They carry Marimekko fabric there and have a whole barrel (literally, a barrel) full of small remnant pieces. These are perfect for small projects, especially since the remnants are $0.99/lb. Yes, you read that right, 99 cents per pound! You better believe I dug out a whole bunch of pieces at that price, including a couple of really cool metallic patterns. I'll have to show you my finds sometime. I framed this gray piece in the same way as the teal piece. Hooray for non-permanent painter's tape!


I also moved a couple of the frames around until I liked the arrangement that included the new framed fabrics. Bonus points to you if you noticed those changes!

My ampersand art got a little upgrade as well in the form a metallic gold outline. It's sort of hard to see from far away, but I think this photo below shows it pretty well. I used the same sharpie on it as I used on my Kate Spade-inspired zig zag pitcher. The gold edge has an almost 3D effect - I love it!


It took me about 10 minutes to frame up those fabrics - talk about an easy (and inexpensive) way to add some art to your walls. Anyone, and I mean anyone, can do this project. I can't wait to see all the other ditto DIY projects. If you've framed some fabric in your home, write up a post about it and then you can link up to the party today too!

Hope y'all have wonderful weeks - I can't believe the fourth of July is coming up on Thursday!
---------


Pin It!

5.02.2013

April Project Round-Up


Quick announcement: The set of 13 vintage kitchen canisters/spice jars I wrote about last week is now up for sale in my shop. If you're interested, or know someone who might be, shoot 'em the link! Thanks!

---------

It's always fun for me to take a look back at the past month and remember all the projects that kept me busy (and creating!). This once-a-month project round-up post is also a great resource to catch up on posts you may have missed. Onetwothree go!

I shared a couple of yummy recipes this month: an easy make-it-yourself bruschetta (perfect party appetizer) and s'mores bark. I've found myself dreaming about that s'mores bark - I'll definitely be making it again soon.


You got a chance to see my living room gallery wall develop and evolve into its current state. I'm really happy with it - so glad to check that project, and its growing pains, off the list!


I launched a new print for the shop with one of my favorite verses on it ("We love because he first loved us" - I John 4:19) It's available here if you'd like one for you or as a gift.


This month was "peak bloom time" for D.C.'s cherry blossoms, and I went on a little photo tour of these stunningly beautiful trees. I wish they stayed this pretty forever.


I shared some step-by-step instructions on how to make your own custom iPhone case insert.


Pink and orange seem to be a theme lately since this pleated paper wreath has pink and orange stitching on the pleats. Maybe they just seem like a springy combo?


My outdoor photography tips were by far my most popular April post. I guess y'all are just as into improving your photography as I am!


Since Google Reader is going away come July, I wrote up this super practical post on two alternate feed readers: Bloglovin' and feedly. Feedly fits my needs, but both are great!


And last, but certainly not least, is my favorite project from last month: how to make spoon flowers. They were so easy and turned out so well!


Before I go, I also wanted to thank some awesome blogs for featuring my posts this month. Many, many thanks to: Apartment Therapy (ahh!), IHeart OrganizingBlissfully Ever After, Tatertots and Jello, Serenity Now, and Dear Creatives.

That wraps up the month of April... hey there May! I've got lots of project ideas up my sleeve, so get ready.

Have a great day!

Pin It!

4.04.2013

The Progression of a Gallery Wall


Once upon a time, there was a sad, blank wall behind our sofa. The only thing on it was a wimpy, off-center sconce. It was dying for some love and attention - something to give it some oomph and purpose. You've seen some of the story here, and here, but I think today's the day for the full story behind the wall :).


I've always admired Young House Love's epic gallery wall of white frames, but didn't want to spend my pennies on a bunch of frames at this point - even inexpensive IKEA ones. So I waited, and I pondered how I could create my own gallery wall on the very cheap. All the while, this wall remained a blank slate. It bugged me to no end.

Then something magical happened. One day, waaay back in the fall (end of October, I think?), I was walking out of our apartment building's garage, and saw a stack of six empty wooden frames. Though they were pretty beat up, or as I like to say, "rustic," I saw plenty of potential, and I couldn't turn down six identical free frames (free being the key word). The perfect find to start building a gallery wall.

Since they were empty, I ended up purchasing inexpensive 8x10 canvases (from Michael's with a 50% off coupon - I think I got 10 for about $6) to fill them, knowing I could then put anything on top of the canvases. Blank slates. I used velcro Command strips to hang them so that I wouldn't put a bunch of nail holes in the wall of our rented apartment. Here's an Instagram from when I first put them up (sorry about the ghostly, blurry look - it's a little creepy, huh?):


I added "art" and photos soon after that, and ended up with this:


Looking much better than before, but it wasn't nearly as full-looking as I wanted it to be. If you read this post, you'll remember that I also had a few similarly sized black frames on hand that I painted white and added to the wall to "fill it out."

With the addition of two of these newly painted frames, I ended up with a gallery wall that looked like this:


Much better, right? I lived with this for awhile, but something always bothered me about it. See how the six "found" frames are off-white and blend in with the wall and the two newly-painted white frames really pop? I knew I needed to paint those off-white frames white to really make the gallery wall work. So I finally bit the bullet and took them all down and painted them this weekend.

Here's the wall in its current state - much more cohesive and pretty!


The fact that all the frames are white unites otherwise mismatched art and photos.

And just for kicks, I thought it would be fun to play a game I like to call "what's on our gallery wall?" Let's take a looksie...


Starting at the top, you see a painting that looks like a five-year old may have done it. But ohh no, that was all me. Don't envy my painting skills, k? I know it's ah-mazing. (That was sarcasm, in case you missed it. I know it's not exactly a Monet-equivalent.) I needed some art therapy the other night, so I may or may not have thrown some paint on one of the canvases and used my fingers (yep) to create this piece of "art." It may or may not stay, but that's the beauty of a gallery wall - you can pop art in and out on a whim!

Let's continue clockwise around the wall with the ampersand art. I also did that one. You can read about how here. It's an ode to my love of typography.

The wedding photos are of our bridal party. One of the boys and one of the girls. I absolutely adore those photos. (Credit goes to our awesome wedding photographer who also happens to be my cousin.)

The street sign card is a little thing I picked up at a local Richmond shop as a reminder of our time spent living on Kensington Ave.

The Richmond Fan District art print is one that should look familiar. You may have seen it on my sidebar or remember my post about it. I designed it and it's for sale in my Etsy shop if you'd like one.

Continuing on around...with the row house watercolor. It's of some houses on the street my parents lived on when I was first born. I spent the first six months of my life in a cute little row house. Wish I remembered that! I love row houses and would love to live in one someday.

The photo is one I took on a trip to the beach in South Carolina a few years back. I love the simplicity of the birdhouse overlooking the dock and lagoon. So peaceful.

And lastly, the "YAY" letterpress card was part of a gift from C. It's just so fun, I couldn't resist putting it up.

That'll do it! That's story of the progression of our gallery wall. I love that all of the art and photos are meaningful, and the fact this project ended up being extremely budget-friendly. Just goes to show you don't always have to shell out a large chunk of change to decorate your walls.

Let's take one last look at how this wall has developed.

Before:


After:


What do you have on your walls? Any fun stories behind any art or photos?


---------


Pin It!

2.05.2013

Richmond Fan Street Name Graphic Art

*update: the print is up in my Etsy shop! click the link in the sidebar to see the listing!*

Hey present and former RVA dwellers {Richmond, Virginia, that is}, today's post is for you! If you have no connection to that wonderful town, this may seem a bit random, but read on, because I'm in the market for some opinions :). And if you're into graphic design/typography, you may enjoy this post regardless!

I'm experimenting with the idea of creating a series of neighborhood street name graphics. The reasoning behind it came from the love I have for our former neighborhood in Richmond, Virginia. I've seen a ton of graphic art for the 50 United States out there (type "state art" in the search bar on Pinterest, and you'll see what I mean), but I wanted something a little more specific to where I lived that I could hang somewhere like our gallery wall. I love the idea of commemorating places we've lived. Marking that time in our lives in a personal way. Does this ring a bell with any of y'all?

The idea of "hyperlocal" graphic art came to me a few weeks ago and I ran with it, creating a graphic that included all the street names in our old neighborhood called "the Fan" in Richmond. Take a look below.

It's designed to be printed as an 8x10 or 11x14. There's a fat white border around it (hard to see on this white background) so it'll sit nicely in the center of a frame without need for a mat unless you wanted one.

So here's the thing, dear readers, I'd love to know your opinion on this idea of "hyperlocal" typographical art. Is this something you'd like to have in your home? Would you love to see your neighborhood streets in a format like this? Are there other colors you'd like to see? I know I love it, and would hang it in a heartbeat (and I probably will as soon as I have a minute to get it printed!), but what about you?

And to those still living in Richmond (lucky you!), is this something you'd like to have a copy of? Let me know either by commenting here on this post, shooting me an email at: mayricherfullerbe{at}gmail.com, or tweeting at me @richerfullerbe. And spread the word to your friends - I'd love to hear from a wide range of people! You can use the buttons at the very bottom of this post to share it. Thanks!

Pin It!

2.01.2013

January Project Round-Up

Well hello February! And hello dear readers!

Last night, I was looking back at my January posts and noticed that I did a lot of projects this month. Hooray for accomplishing things! So today, I figured I'd do a nice little project round-up so that you can easily go back and take a look at anything you may have missed. Let's begin, shall we?


I started off the new year with a wood wreath I made with my father-in-law and sister-in-law. I had a blast using power tools to create this guy.


Operation {Re}Organization commenced in our house, starting with the office "nook." If I'm as successful at hitting all the other problem areas as I was with the office, I'll be pretty happy! Now the key is to keep the motivation going...

The first project involved our office supplies. What used to live in about eight different containers all over our house now lives in three, and because of that we now have several empty drawers and boxes. Consolidation, baby. I'm so into that. Can't wait to utilize some of those storage containers for other projects.


Our gallery wall got some special attention this month. I made a little art for it in the form of this (free!) art print...

...and this ampersand. They make me smile every time I see them. 


Some old frames got a new home on the gallery wall once painted white.


I finally got fed up with the disaster that was our junk drawer, and gave it a good clean-out and organized it.


The major project this month was finally finishing our desk for the office nook. I am so, so happy with the results.


After the desk reveal, I showed you how I made the top since it's a bit out of the box - it's upholstered! Yes, upholstered. I'm glad I took a chance on that because I think it turned out great.


For the final office project of the month, I corralled and filed our important papers. To add a little "pretty" to this rather mundane area, I used a happy green file box and made some washi tape labels. Gold polka dots? Yes please.


And that'll wrap up my January projects. Can't wait to see what February brings.

Hope y'all have a great weekend!

Pin It!

1.21.2013

Gallery Wall - New Additions and Updates

Over the weekend, I had a chance to play with the gallery wall over our living room sofa. I originally posted about it way back in November, so you can check out that post for more background if you're interested.  The "quick recap" version is that we started with this sad, sad blank wall with an off-center wall sconce. Since we're renters, I can't change the unfortunate-looking sconce or its location, so the best I could do was disguise it. To do that, and to add some life to wall, I put up a few frames to start a gallery wall:


It was better than a blank wall, but it was still looking a little...blah (even with my new ampersand artwork). It needed a couple of more frames to fill out the space. I had some black frames hanging around (pun totally intended) that I spray painted white to fit in with the existing look.

{spray painting action in process}

{all done!}

After the paint dried, I reassembled them with their contents: a black and white photo I took in one, and one of my "consider it pure joy" art prints in the other.

I then used a very precise technique called "eye-balling" to pick the placement on the wall. :) Here's where they ended up:


You can see the black and white photo in the bottom left, and the art print on the very bottom towards the right side. I think it looks much fuller and more complete. I'm undecided on whether to add one more for good measure. What do you think?


For comparison, here's the "before" shot again:


And after from a couple more angles. The left...

 ...And the right:


I think it's shaping up quite nicely. One thing I love about it is that each photo or piece of art has a story behind it. I like personal touches like that. Maybe I'll share a few of them sometime.

Do you have a gallery wall in your house? If you do, what's on yours? I'd love to hear (or see!)

---------

linking up to: Emily A. Clark

Pin It!
Related Posts Plugin for WordPress, Blogger...
Blogging tips