Showing posts with label pantry. Show all posts

1.21.2014

Pantry Organization {Take Two}

Last week I mentioned how I had failed needed to revisit some of the areas I organized in our home last year. One of those lovely areas was our pantry - or should I say, half a cabinet in our kitchen. It was tough to keep everything we needed in such a small area, and if we ever acquired anything larger than a box of Triscuits from the grocery store, we were in trouble.

Here's what it looked like for a few months after I organized it the first time:


Clearly there wasn't a lot of wiggle room in there, and it was soon apparent that the "system" I put in place wasn't working.

The cabinet (and surrounding countertop area) looked like this before I got to working on it over the weekend:


Not terrible, but as you can see, we were storing bags of chips and other snacks on the counter since we had no other room - not ideal. It was time for a change. I somehow needed to increase the size of our pantry without really changing much else in the kitchen.

So I did what I always do when I first start an organization project...EMPTIED EVERYTHING. Then I did some brainstorming and space planning.


{By the way, I cannot tell you how much it bothers me that the cabinets in our rental are yellowy-white while the trim is pure white and the white in the granite is also pure white...could they not have painted the cabinets the same color as the trim? The photo above shows how nicely it clashes, so I thought I'd take a moment to point that out :). }

The wine glasses I kept in the top right of the double cabinet got relocated since we hardly ever use them (we typically use our stemless glasses that live in the secretary-turned-bar). They were taking up prime real estate that I knew would be better utilized as food or other storage for oft-used items. That little change made a huge difference in my organization strategy.

In order to make more room I did some other creative rearranging as well including cleaning out the little double cabinet above the fridge (no photos of that, sorry! It was boring anyway...) and this cabinet to the right...


Out came the mixing bowls, strainers, and other random bowls and containers. Once I was done emptying out, I was left with these gloriously empty cabinets ready to be filled up again.


Meanwhile, all the stuff from those cabinets ended up here:


...and here. Ack.


{Oh hello $6 rug. I heart you.}

After a little strategy session with myself, a little purging and a little consolidating, everything went back onto the shelves. I adjusted the heights of said shelves to better utilize the available space and commandeered one additional shelf for food items in the double cabinet. Also, the mixing bowls, measuring cups and strainers moved from the cabinet to the right to this double cabinet. And look! There's nothing on the counter anymore! Victory.


The pantry shelves have some room to spare now. I can bring groceries home and have somewhere for them to go!


Drinking glasses (along with a couple of other items) did a switcheroo to the cabinet to the right. They're still just as easy to access and are less crowded on these shelves than they were before. 


There's way more breathing room now, and there's even room to grow a little bit. It may not look like Martha Stewart, but hey, function is the key here, right? Here's to hoping this new system works out better than the previous one!

So that's the story of my failure-turned-turned victory in the pantry department.

I hope this is encouraging to y'all and shows you that just because you organize something in your home once, that doesn't mean that it will work perfectly. In fact, sometimes it just doesn't and you have to start over again. I'm ok with that. Organization, just like most things in life, has its ups and downs. You just have to be willing to admit that something isn't working and try again!

Pin It!

1.14.2014

Operation {Re}Organization: What's Working and What's Not


If you've been following the blog for awhile, you may remember that last year, one of my major goals was to get a few "problem" areas in our apartment organized. I took on a new area of the house almost monthly, and the hard work really paid off! As I've been thinking about new ways to get organized this year (isn't just about everyone thinking about that right now? ha!), and what I want to work on, I've also been reflecting a bit about what I did last year that worked, and what might need some tweaking.

Before we get going, I want to say one thing: once a space is organized, that doesn't necessarily mean it's done forever and that the system will always work perfectly. For example, perhaps you purged and organized your pantry. You put a system in place, gave everything a home, gave yourself a big pat on the back for a job well done, and then came to realize a short while later that, oh shoot, this isn't working. You know what? That's ok. Seriously ok. I consider myself to be a pretty organized person, and my systems fail too. I still have clutter, even when I spent what feels like a year going through most every space in our apartment.

But guess what, my friends, all that work is not, I repeat, IS NOT worthless. Organization is a continual process. It takes time and effort, and I hope that some of my projects have inspired/will inspire you to get (back) on that organization horse. Writing these words is going to help keep me accountable as well. I've got some project ideas up my sleeve, but before I start again, let's take a look back at three of last year's major problem areas that I detailed in this post...

Problem area #1: Front Hall Closet


Overall Grade: A-

This closet has come a long way, baby! It serves all of it's (many) purposes well, including storing coats, athletic gear, tools, paint, utility-related items, wrapping paper, vacuum and dog supplies. It pretty much looks just like this photo does now after living with it for nearly eight months.

My only complaint is that the wrapping paper can be a little tricky to get to with all the coats in place. Thankfully, I don't have to get it out very often, but when I do, it's a little annoying to shove the coats to the side and pull a roll down.

To read more about this space, take a look at the inspiration, the before, and the after.

---------


Overall Grade: C-

Alas, the "pantry" area (we have a small cabinet in the kitchen and one small piece of free-standing furniture we use as pantry storage) has really gone downhill. It's not a total fail, but not everything fits anymore, and the use of space doesn't totally make sense anymore in the kitchen cabinet area. I think I'm going to clean out and start over there. I'm brainstorming some alternatives, so I'll let you know what I come up with soon.

On the bright side, the storage system in the free-standing piece of furniture has worked really well. It holds all the extra/overstocked and baking-related items still looks very much like this photo below:


To read more about the pantry organization, check out these posts: before (and a little progress)after, and DIY pantry labels

---------

Problem area #3: Bathroom


Overall Grade: B+

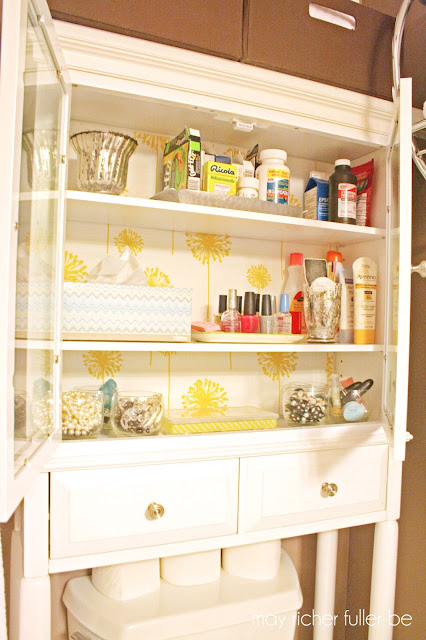
The bathroom is certainly a success story. I'm proud to say that the over-the-toilet storage has worked really well as it looks above, and that I've only made a few very minor changes since tackling that project back in March. 

The place that could use a little bit of work is the storage under the sink. It's nothing major, but I think it's time to clean out the clear storage bins and baskets, take inventory, and figure out what we need to stock up on. I hate it when we suddenly run out of shampoo or some other item, and I have to buy it full price! I'd much rather shop the sales, use coupons, and store the items in the bins for later, but in order to fully utilize that kind of system, I need to know what I have! Plans are in the works to make that a reality...

To read more about the bathroom organization project, check out these posts: introduction, before, and after.


So that's where I am today on some of the major organizing projects from the past year. I need a little kick in the pants to get going, so I figured sharing a little bit on the current state of these projects would help! A little bit at a time...

What are you hoping to organize this year? Any help or tips I can give to kickstart the process?

Pin It!

3.05.2013

February Project Round-Up


Man, I can't believe we're already five days into March! Since February is a short month, I'm not being too hard on myself for being a few days late on my monthly project round-up. I was pretty excited about showing you Jackson's new bed yesterday, so I pushed this post back a day. This is a great "catch-up" post if you're new to the blog, or if you missed a project here and there.

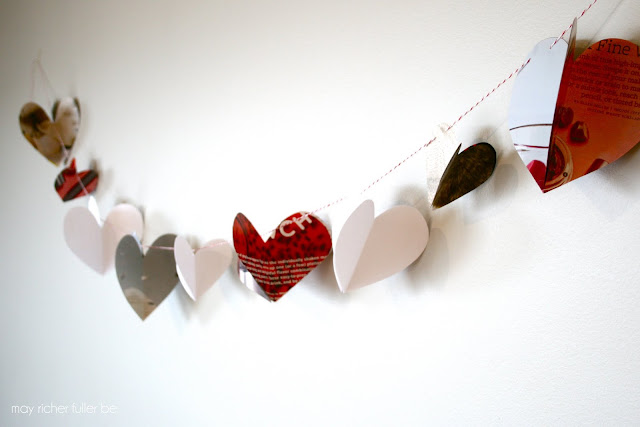
I started off the month with a fun little Valentine's Day project - a recycled magazine page heart garland.


The Richmond Fan District art print made its debut (and is for sale in my Etsy shop).

Operation {Re}Organization continued on... and this month I tackled parts of the kitchen. The "pantry" areas were my main target. You can track the progression in these three posts: the plan and inspiration, before and a tiny bit of progress, and after!

{part of the reorganized pantry cabinet}

And what's a pantry makeover without some pretty labels to go with it? As you can see in the photo above, I whipped up some printable pantry labels to go on the reusable containers that house our "staple" foods.


I finally got to participate in a Pinterest Challenge for the first time this month! I customized a magnetic fridge organizer to help keep our incoming mail, coupons and grocery lists organized. There are sooo many awesome projects linked up to the Pinterest Challenge host pages - definitely check them out if you haven't had a chance. (Grab a cup of coffee, start over at Young House Love, and prepared to get lost for awhile...)


Lastly, I walked through some of the updates I've made recently on the blog. These included ways to navigate the blog, find posts on a particular topic, how to pin from a post, etc., and you might notice a few cosmetic changes, too. I'm always scheming up more ways to change things up though, so watch out for more in the coming months!

{one of many blog updates}


So that's February in a nutshell y'all! Thanks, as always, for reading :).

Pin It!

2.12.2013

DIY Pantry Labels


Hello friends! I'm back today with some more details on the labels you saw yesterday in my pantry makeover "after" photos. 

Towards the end of my reorganization shenanigans last weekend, once everything had its designated "home," I stepped back to admire my work and realized something was missing...


It was all looking a little, blah. A bit utilitarian.

I needed a little something extra to pretty up and unify the contents. If I couldn't have a whole pantry full of beautiful matching containers, at least I could add a splash of fun to some of the mismatched containers I did have. 

The solution? Labels!

I flipped open my laptop and created a series of labels using Illustrator. I'm still learning how to use it (I'll probably continue to say that for awhile - the learning curve is pretty steep!), but it's oh so fun to use. I designed a label for each clear container and one box (that lovely shoe box on the bottom right in the photo above) in my newly organized pantry. When all was said and done, I ended up with these:
The actual (very easy!) labeling process went a little something like this:

I printed them out...


Cut them out using my handy dandy paper trimmer...


Matched up the label with the appropriate container...


Grabbed a strip of removable double-sided tape (so I can easily change out the labels if I need/want to) and stuck it on the container...


And slapped the label on top of the tape.


Ta-da!

I repeated the process until all containers were labeled.


Then back into the pantry they went.


Such an easy process. This bit of pizzazz was just what the pantry cabinet needed.

You could easily replicate this process with your own design. You certainly don't need Illustrator to make something just as cute. Powerpoint or Word would definitely work too! Want more details? Let me know in the comments and I'd be happy to go more in depth on the design process.

--------

This post is a part of the series "Operation {Re}Organization." To see other posts in the series, click the tab at the top of the page.


Pin It!

2.11.2013

Operation {Re}Organization: Pantry Makeover "After"

Hooray! The pantry is done!

After showing you the inspiration, and the before and "progress" photos, I finally had a chance to put everything back in its place this weekend and have some results to show you.

To jog your memory, here's what the cabinet portion of our pantry looked like before I got my organization-happy hands on it:

{cramming stuff into tight spaces became an art form here}

Here's what it looks like now:


And here's the other part of our pantry before, stuffed to the gills:


Now, all categorized and ordered:


Better Homes and Gardens may not be busting down my door to do a photo spread, but I'm really happy with how it turned out. The point of this project was not to create a dramatic reveal, but to make sure there was a place for everything, and everything in its place. To create a system that works for us. I think I achieved that. 

And, bonus(!), I spent a total of $0 on this project. 

Ready for some details? 

First, as you saw last week, I took everything out of the two spaces I wanted to organize. I threw out old or expired food, and took inventory of what we had. For example, it turns out I have four different kinds of rice and at least five varieties of pasta. Because they were stored in different areas of the kitchen, I had no idea, and over-bought at the grocery store. Not only does this mean I spent more money than I needed to, but this extra inventory takes up precious storage space unnecessarily!

Then I gathered the containers I wanted to use for items I wanted to take out of the original packaging. For me, it made the most sense to decant pasta, rice, crackers and extra Splenda packets into refillable containers. This makes it easy to see when I am running out of these staples, and I can make a mental note to either refill them from our extra inventory or buy more from the store. These containers now live on the top shelf of the kitchen cabinet:


I know we can all read the labels (more details in this post!), but I wanted to mention a few details about the containers. Since I tried to avoid spending moolah on this project, I used what I already had (thus, the mismatched containers). The rice on the left resides in three OXO Pop Up containers. Pasta is in the middle and lives in two glass containers. (They're so old I can't remember where they came from, but I've seen similar ones at The Container Store.) Crackers, extra Splenda packets, and oatmeal live on the right in three IKEA Pruta containers. Those Pruta containers cost $5 for a set of 17 - just in case you're looking for a low-cost set of containers. They're not the most durable, or the prettiest to look at, but man, they're super functional.

The contents of the other shelves are self-explanatory, but I did want to mention one thing about corralling smaller items. 

Allow me to demonstrate using the bottom shelf of the cabinet. See the two asterisks at the bottom?


In order to keep track of smaller snacky items, I used a small clear container (left asterisk) and a shoebox (right asterisk) to corral things like fruit snacks, popcorn, dried cranberries and trail mix. The clear container works well for fruit snacks because I never knew how many we had left when they lived in their original packaging. This shoebox was perfect because it didn't take up a lot of room, but keeps small snack items all in one place. It's easy to pull out the box and grab the dried cranberries now, for instance, whereas before, I always had to dig around and pull out other things to get to them.

Ok, time to change locations to the other food storage area. Here it is again so you don't have to scroll back up to see:


This space houses all of our extra inventory, paper products, and my baking basket. Now if we're out of something, I can simply and quickly look here to see if we have what I need, or if I need to replenish at the store. When I'm ready to bake, I just take the whole basket out of here to put on the counter for easy access. The basket is an ancient letter tray that was my grandparents', by the way. 

I'm so glad to be finished with this project. It may not look quite like the inspiration photos I showed you last week ;), but it's totally practical. Sometimes I think we, as bloggers (yes, I'm making a gross generalization - please don't get mad at me), feel like we have to have this jaw-dropping, dramatic, and perfectly-styled before and after - or it's not worth showing our readers. This reorganization project goes to show that although that's nice (and heck, I thoroughly enjoy those kind of reveals!), it's really about doing something that works for you and your family. If it's pretty but not functional, what's the point? If it's functional and pretty - yay! That's the best combination. For this project, the labels I added are my little bit of "pretty" for this project. I'll be sure to give more details on those tomorrow.  (*Update: follow this link for label details!)

So, with "keeping it real" in mind, here's a final set of before and after shots, because I know we all love those. :)

Kitchen cabinet...

 ...And "extra inventory" cabinet...


Have a great Monday, y'all!
--------

This post is a part of the series "Operation {Re}Organization." To see other posts in the series, click the tab at the top of the page.

Pin It!

2.08.2013

Creative Bits | 13: Upcycled Pantry Canisters

If you've been following for awhile, you heard me say before that I'm all about using what I've got on hand, re-purposing things, and generally spending as little as possible on projects around our house. Yay for tight budgets! Since this is kitchen organization month over here, and I've been dreaming about possibilities for our pantry as well as beginning to organize it, I've been on the lookout for inexpensive ways to update its storage.

Though I would love to go on a shopping spree at the Container Store to make this happen, I'm pretty sure my credit card would give me a dirty look and refuse to be swiped. Plus, when I see beautiful pantry makeovers filled with dollar store items, I have a hard time justifying spending a lot on pretty containers. And you know what's even better than buying dollar store containers? Using free containers! Yes, it's true! (she says, spoken with an enthusiastic infomercial voice.) How? Read on, friends, read on.

Lisa, from Lewisville Love made over her pantry using - wait for it - empty almond containers.


Would you have guessed that all those gorgeous, clear, silver-topped containers housed almonds in their previous lives? Neither would I!

Head on over to her blog to see how she did this, and how beautifully her entire pantry turned out.

I'm just so darn impressed with all the creativity and resourcefulness that's out there these days. It's so fun for me to feature some of these ideas on my little blog.

I'm off to be creative and resourceful myself in the pantry department this weekend. Fingers crossed I can get it finished and ready for a close up!

---------

Creative Bits is a semi-regular series here on May Richer Fuller Be where I share little tips, tricks and simple do-it-yourself projects from other creative bloggers' minds. I figure if it makes me say, "wow," it's worth passing along to you! And remember, if you want to pin any images that don't belong to me, please click through and pin from the original source!

Click the "Creative Bits Series" tab at the top of the page to see more posts like this.

Pin It!

2.07.2013

The Pantry: Before (And a Tiny Bit of Progress)


(Missed the first kitchen post yesterday? Click here to see it.)

Boy oh boy are y'all in for a treat today. You have the pleasure of seeing my pantry in all its disarrayed glory. Clicking the publish button on this one really makes me wince, but I keep telling myself it's part of the process. For all of you out there who fret about why your home doesn't look as clean and organized as all those homes on blogs and Pinterest, this one's for you. Real life isn't always perfectly color-coded, labeled and beautified (in fact, it's rarely like that). I know that I really appreciate blogs that show the bad with the good, so that's what I'm doing today. There is no beautiful reveal at the end of this one. Just giving you a fair warning.

Let's get down to business.

Like I've mentioned before, we don't have a proper pantry. We use half a cabinet in the kitchen and a little bit of free-standing storage in a piece of furniture in our front hall. While I do sometimes pine away for a real pantry, I really can't complain about the amount of storage, size and layout of our current kitchen. When we moved into this apartment, I just knew it would mean would couldn't stock up on many "extras" (i.e. canned foods, extra snacks, etc.). And I knew we'd survive just fine :).

So here we go. Onto some "before" shots.

Here's the cabinet part:

{ahh, the beauty of a closed door}

When you open that door, you have the pleasure of looking at this:


Yikes! No sense of order. The soup cans live with the cornstarch. The balsamic vinegar lives with the Life cereal. There are things buried back there that haven't seen daylight in months.

You might be asking yourself how in the world a cabinet that small can become that messy. Or maybe, just maybe you're actually saying, "Hey! That's exactly how my cabinet looks!" I'm hoping at least one of you out there can identify with this.

The other part of our pantry lives just around the corner. Here's what her contents look like:


This is supposed to house our extra food inventory, paper products, and baking supplies all neatly so that we can easily grab something when needed.

What, you don't see that happening? Ok, me neither. Looks like a jumbled pile miscellany.

One last thing I need show you is the corner of our kitchen by the toaster.


This used to be our breakfast area...until I ran out of space in our cabinet above and then it became the overflow area for pantry items. I deserve a slap on the wrist for that one. 

Bottom line? Clearly it's time for a clean out and reorganization.

So last night, at about 9pm, I decided it was time to start in on it and I made a little progress. I emptied both pantry spaces and the breakfast area, trashed old stuff, and grouped similar items together. I even got rid of some of the manufacturer boxes and emptied things into reusable containers. Since it was so late, I just used my iPhone and Instagram to document a little of the progress...


It's certainly not pretty, but the important thing is that it's happening. And if I ever want to be able to cook again, this stuff will have to find its way off of the counter and back into the cabinets. Nothing motivates better than covering your countertops with stuff, right?!

I'm excited about the end game here. I really think it's going to turn out great. Hope I'll be back soon with more exciting progress and details to share!

Pin It!
Related Posts Plugin for WordPress, Blogger...
Blogging tips