Showing posts with label IKEA hacks. Show all posts

2.22.2016

Favorite Find {Organization}: IKEA TRONES

If you've been around this blog for any length of time, you know I love me some good organization. When we moved into our new house around Thanksgiving, we were suddenly faced with something we had never had before: tons of storage space! Since we have fairly large closets in each bedroom, a linen closet in the bathroom, an unfinished basement and a garage, we haven't been very efficient or thoughtful about storage organization. We were desperate to get everything out of boxes and out of sight when we moved in, so we haphazardly threw things in closets upstairs and whatever didn't have a home there got demoted to the basement - not so good! All this disorganization been starting to bug me lately, and I'm hoping to get on the organization train soon. I figure if I write about it here, y'all might help keep me accountable :).

One place we've struggled with since day one in this house has been shoe storage, so I did what any normal human on the hunt for organization inspiration would do - headed to Pinterest. There I found my new love: the IKEA TRONES. I had noticed it in store before, but after seeing them in real folks' homes, I've become a big fan. It's a versatile little guy that provides great storage for shoes, but can also be used to store a variety of other small items as well. It blends in nicely with many decor styles.

Let's take a look at a few examples, shall we?

Entryway:

 {Stadshem via Elvira Spekulerar}
{Nalle's House}

Bedroom:

{Decor8}
{Dos Family}

Bathroom:

{IKEA}
{Bright Nest}

Office:

{Hey, Let's Make Stuff}

Gosh, the possibilities are endless! I can see these being used in so many ways other than shoes. Also, did I mention the price? $39.99 for a set of three boxes. Unbeatable! 

Do you have any of these in your house? If so, what do you use them for?

Enjoy what you read today?  Enter your email address below to subscribe to May Richer Fuller Be!  Delivered by FeedBurner

Pin It!

9.02.2015

Five Ways to Take IKEA Furniture From Boring to Beautiful


If you're on a tight budget when it comes to furnishing your home, IKEA is likely one of the first resources that comes to mind, right? They've rightly gained a solid reputation for having pieces that are both stylish and affordable, but there's one problem...everyone has the same pieces. If you've ever spent any time at this giant warehouse of a store, you start to be able to spot an IKEA piece from a mile away. While this isn't exactly a life-threatening issue, I do think that seeing the same IKEA furniture over and over can get a little bit tiresome.

Enter: the IKEA hack. This phrase has become a buzzword all over the blog and design world and it's a fantastic way to make your IKEA furniture not look like everyone else's. It's a way bring custom-looking furniture into your home at a fraction of the price. I've done a few of these hacks myself (see my Expedit makeover and semi-custom shelves for examples) and I'm sure there will be more in my future.

Today I wanted to show you five ways you can transform an IKEA piece and make it look custom. These five ideas range from super simple (even someone with no DIY skills can do it) to a little bit challenging (you might need a power tool or two), so there's something for everyone. I'll use the ubiquitous TARVA drawer chest to show you how many ways there are to take a boring piece and make it beautiful.

The TARVA is a great example because it's a solid wood piece (no particle board or hollow core here!), making it really versatile to hack. You'll see why in the examples below!

1 | KNOBS

Changing knobs and pulls is something anyone can do for a modest price and it automatically changes the look of a piece. This is by far the easiest and lowest commitment change you can make. Many of the examples below also involve other changes, but check out those knobs!

{Centsational Girl}
{The World According to Jessica Claire}
{Cherished Bliss}

2 | PAINT (OR STAIN)

Painting or staining a piece of furniture certainly takes time and effort, but it's another simple way to customize the TARVA. Combine paint with new knobs and you'll have a beautiful piece in no time.

{Smitten Studio}
{By Stephanie Lynn}
{Chris Loves Julia}

3 | O'VERLAYS

O'verlays is a brilliant company that makes, yep, overlays that are made to fit on select IKEA pieces to give them a custom look. They involve no saws, no tricky cuts and no intricate math problems. Hooray! They have an immediate impact on the piece's style.

{My Pretty Little House}
{O'verlays}
{Sarah and Ben}

4 | LEGS

Changing the legs on the TARVA probably involves a bit of DIY skill, but I think this, plus paint and knobs, may be the ultimate way to turn a boring piece into a custom one. Because the shape of the TARVA is a very standard box with drawers, the legs can turn the piece into anything from mid-century to farmhouse to industrial. You can even add casters!

{Smitten Studio}

{City Farmhouse}
{Design Sponge}

5 | TOP

Lastly, another DIY opportunity comes in the form of changing the top. It was harder to find examples of this, but in my mind, there are all sorts of ways you could do this! Staining the top and painting the rest a different color is certainly an option, but how about a faux marble top, or even a metal one?

{My Bella Bug}
{Classy and Fabulous}
Do you have other ideas for how to customize these pieces? Let me know in the comments!

Happy IKEA hacking, friends!


Enjoy what you read today?  Enter your email address below to subscribe to May Richer Fuller Be!  Delivered by FeedBurner

Pin It!

3.23.2015

Before and After: Basement Bathroom Makeover


We've come a long way, folks. Operation "Hide the Bidet" in the guest bathroom/laundry room is complete! This is a big step in making the weirdest room in our house prettier and more functional. Let's take a look at where we started, shall we?


In case you missed the intro post to this room back in February, here's the quick version: our second bathroom and laundry room share a very awkward space in the basement. The landlord was clearly on a shoestring budget based on some of the fixture choices and didn't think the space through very well. BUT, he did decide to include a bidet - how lovely right?! Just kidding. For my European friends, I realize this isn't strange to you, but if you look closely, this bidet doesn't even function like a bidet - it has a down-facing faucet. It's pretty much useless and not a great use of space in a small home like ours.

I decided to do something about it and chose to figure out a way to hide the bidet and bring in more storage.

After lots of brainstorming, measuring, and brainstorming some more, I finally settled on a solution from good ole IKEA: a hacked VITTSJO shelving unit.

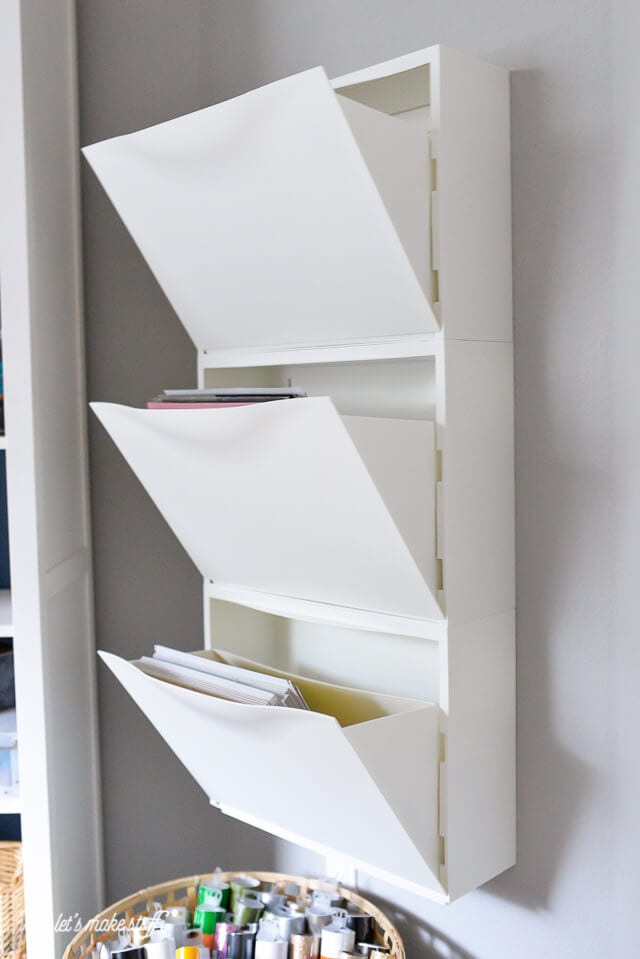
Here's the star of our show in all her glory...


For reference, the original IKEA VITTSJO looks like this:

I had to assemble it without the bottom shelf so it fit over top of the bidet. Once I put the shelving unit into place, it mostly concealed the bidet. To really make sure it was well-hidden, I installed that leftover solid bottom shelf in front of the unit by sitting it on top of the existing bottom brackets where it would've normally been installed. Then I secured it with a leftover shelf arm. That part's hard to explain in words, but take a look at the photo closely and I think you'll see what I mean.

That left me with a hidden bidet and three shelves of new storage in this bathroom/laundry room. Hooray! For now, I'm using SKUBB boxes for organization, but my next project is cleaning/organizing other closets in our house, so that may change. We'll see.


I'm storing our extra toilet paper in one box...


Laundry items and socks that are missing their other halves in another...(our dog, Jackson, likes to take socks out of the hamper and hide them all over the house, so we have an abundance of missing socks)


And extra guest towels in the last one.


I love having that stuff all put away and organized!

One unexpected fun addition to the room was the chance to hang this old framed print advertising a French restaurant. I found this in my parents' basement when we were moving last summer and hadn't found a good spot for it in our house...until now. After I took down the awkwardly high shelf that was on that wall, there was a perfect spot for art.


And who doesn't love fresh flowers in a bathroom? These pretty daffodils came from my parents' yard. Spring hasn't quite sprung here in Philly, but having these pretty things around sure makes it feel like it until flowers start blooming here :).


So that's my bathroom update for today. I'm so glad I can cross that one off the list.

Here's one more before and after of the space before I go!


Now onto more organization projects. Next on the list are those closets!

Enjoy what you read today?  Enter your email address below to subscribe to May Richer Fuller Be!


Delivered by FeedBurner

Pin It!

3.26.2013

Eight Favorite IKEA Hacks

Hey y'all! Sorry about going dark yesterday - the day got the best of me and I totally ran out of time to post. I'm back though (I know you were worried, ha!), and today I've got a fun post full of ideas for you to customize your IKEA furniture ('cause we all have a little bit of that, right?).

There's a reason IKEA furniture is so popular - it's inexpensive, good (enough) quality, functional, and it's easy to find pieces that will fit pretty much anyone's style. Those are all good things, right? But why not take their simple designs a step further and customize them - "hack" them, if you will - to make them a little more you? Custom pieces for a fraction of the normal cost? Yes please! The hacks these bloggers completed are so creative, and I've gotta say, I'm incredibly inspired by the results. Makes me want to break out some paint and tools and take on something like these myself!


These eight pieces are my current faves. Some have been on my Pinterest boards forever, and some are recent additions. Let's go through them, shall we?

1 | This barn light makeover from At Home on the Bay is really simple. Take a $14.99 ready-made pendant, give it a shiny coat of paint in a bright color, and you've got a statement light fixture. (Compare the price to this one and you'll be glad you took some time to DIY.)

2 | You know those library card files that are so popular? While we all wish we could have the real thing, this mini version from The Painted Hive makes for a great substitute.

3 | Meg Made Designs turned this Expedit into a cool printer's cabinet. This is the most "involved" DIY of the group, but if you're handy and have the right tools, I'm sure you could take this kind of project on, no problem.

4 | The Sweet Beast's Svalbo sideboard with dipped legs is such a fresh-looking piece. I love the happy color, and the fact that she felt free to remove the bottom (which didn't prove to be as simple as it sounds!) shelf to make it fit her style and needs.

5 | I love happy-colored lamps and Jessie's painted Bran lamp certainly fits that bill! All she did was swirl a little paint on the inside of the base and she was all set.

6 | This barnboard coffee table was a lesson in persistence and patience for Jen at City Farmhouse. The result is a lovely, rustic table that she loves. She also shared a great tutorial on the homemade stain she used to "age" the boards on top.

7 | The campaign-style furniture trend continues to stick around, and this Hemnes dresser by Lacquer and Linen echoes that style - but with a fun twist. Instead of campaign-style drawer pulls, she used some gold knot pulls. You'll have to head over to her post to see those up close. Love 'em.

8 | This desk with trestle-style legs and a lacquer top by White and Gold Designs (via Little Green Notebook) reminds me of our DIY desk, but with an extra dose of shininess. Look at those legs!

Feeling inspired to hack your own IKEA pieces yet?

One thing you might notice (or maybe I'm just aware if it!) is that I only mentioned one hack of the ever-popular Expedit bookcases...that's because I wrote a whole post on my love for and a couple of awesome uses of that iconic IKEA piece here. Check it out, or follow my Expedit Pinterest board if you're looking for a little more inspiration for those.


P.S. I'm putting the finishing touches on a little project I've been thinking about and working on for awhile, and I'm excited to share it this week! Hint: it involves my first-ever adventure in staining, and some hand-painted letters. Any guesses on what it is?

Pin It!
Related Posts Plugin for WordPress, Blogger...
Blogging tips