Showing posts with label philadelphia. Show all posts

8.26.2016

Kitchen Renovation: Demolition + Putting It Back Together

The long-awaited kitchen update is here! If you've been following on Instagram (@mayricherfullerbe), you've seen some sneak peeks here and there on our progress, but it's high time for a full blown post on it. I wanted to share about it in real time, but quickly discovered it was almost impossible to take on a full kitchen reno and launch an interior design business at the same time (and still sleep!). Now that we're mostly done with the kitchen, my time is a little less crunched, and that means I can update the blog!

Last time I wrote about the kitchen, I shared the design board and plans, but as a quick catch up, here's a little about where we're headed - we're doing a modern white IKEA kitchen with quartz countertops, brass hardware and charcoal tile floors. It's a complete cosmetic gut job. There are no structural or plumbing changes, but everything else is OUT.

I'm going to break this reno up into several posts starting with the demolition and the beginning of putting it back together. It felt like it took forever, but all in all, it only took three weeks to get the major work done thanks to the amazing contracting by my father-in-law. This was his last job before retirement, and man, we worked him hard and we're so so grateful for his work!

Let's begin, shall we? 

First step: take down all of the old cabinets and remove the appliances. (If you want to see the kitchen before, check out this post.)


The main wall of cabinets had exposed brick behind it, which is pretty sweet, but it was looking totally disgusting from years of grease buildup. After a little bit of deliberation, we decided to simply clean it up and paint it glossy white to match the rest of the trim in the house. It looks like a rustic subway tile now and I love it (photos to come on that!).


Next to go was the old tile. The floors were pretty uneven, so a lot of the tiles were cracked and some had been replaced over the years with non-matching tiles. My father-in-law spent a lot of time scheming and figuring out how to make the floors dead flat so the new floors won't have a tile cracking problem in the future.


One little fun fact - we only went without a sink for two days during this who renovation. It was amazing! We waited until the very last minute to swap out the old one with the new sink and sink cabinet, so those of you who are going through or are planning a kitchen renovation, see if your contractor will work with you to do this. It makes living in a construction zone so much less bad.


After everything was disassembled and cleaned up, we started installing the new IKEA cabinets! I spent many, many hours assembling them while my father-in-law did the skilled labor in the kitchen, but it really wasn't so bad. I had 13 cabinets and 17 drawers to assemble and let me tell you, IKEA has an incredible system that just works. It's pretty difficult to mess up if you follow the directions. And though it's time-consuming, if you break it up over the course of a week or so it doesn't feel totally overwhelming.

Here's an awkward picture of me putting one together. You're welcome.


Ahh! New cabinets! It's starting to look like a kitchen again, right?


We also purchased a new range, microwave/hood and refrigerator for this project. I've never had new appliances in any of the places we've lived and they make me oddly happy. They have all these fancy features that I never knew I needed (ha!), but now that I have them there's no going back. :)


These two tall pantries are amazing. We put a lot of shelves and a few drawers in them and they're perfect for dry goods, small appliances and our coffee station (more on that soon...). These are helping us keep our countertops clear, which was one request from my husband, and he doesn't request much, so you know I had to make that a priority, right?


Once all the cabinetry was set, it was time to take on the radiant heat flooring project. This was on my dream wish list and I'm SO happy we decided to do it. Our kitchen gets ridiculously cold in the winter because it hangs over our garage and the outside world. These radiant heat floors will make a huge difference.


We went with a loose coil system from Warmup (best customer service ever, by the way. I can't speak highly enough of them - and no, they're not sponsoring this post!). You basically nail down these guides and then weave the wire through them, keeping the wire at least two inches apart throughout. You also want to make sure you keep the wires out from under appliances and cabinets.

Here's another fantastic picture of me for your viewing pleasure. I'm adding some hot glue to places where the wire wanted to stand up. This helps keep them from popping up when you're pouring thinset onto the system. And no, I didn't do this by myself - my father in law gets most of the credit for making this dream happen!


After a layer of thinset dries on top of the wires, it's time to tile!


Once the tiling was complete, we were done with the major stuff - minus the countertop installation - big high five! 

I'll finish up today's post with a few shots of the cabinets with all the doors and drawers installed:


This little bank of cabinets on the opposite side is probably my favorite new addition. It's kind of like a floating sideboard. We put butcher block on it for a countertop and I love the warmth it brings to the kitchen. Those deep drawers are awesome for storage too! You can also catch a glimpse of the fancy new fridge. Can't wait to share details on that soon!


So that's where I'll wrap up for today. I think that's enough to take in for one day! Our countertops were install this week, so it's looking even better now. There's some finishing work to be done including painting, caulking and installing knobs and pulls, but we're thrilled with how it has turned out so far!

Enjoy what you read today?  Enter your email address below to subscribe to May Richer Fuller Be!  Delivered by FeedBurner

Pin It!

7.19.2016

Kitchen Design Board + Floor Plans

The countdown is on! In about two weeks, we'll be starting our kitchen renovation and I cannot wait. Demo is set to begin in about two weeks - in other words, things will be getting real real fast. (Any advice on living without a kitchen for awhile?)

I basically started planning this kitchen reno the moment we first laid eyes on our house last year and if you've been around the blog for awhile, you might remember that in our "30 day blitz" after closing we took down a wall and did some quick reconfiguring to make it work for us before we could move forward with a true remodeling project.

It went from this (real estate photo):


To this (wall came down, installed a dishwasher and moved the sink to where the fridge used to be):


Since this photo was taken back in the winter, the only thing we've done is install pendant lighting (shown in the design board below) over the peninsula. Though it's been in a state of limbo - for example, our only ceiling light in there right now is a hanging bulb from a ceiling fan we took down, ha! - it's been great to live with the kitchen in this form for awhile to really be able to know what we wanted our new one to be like.

A few months ago, before I took time off from blogging in June and July, I shared my kitchen inspiration, and I'm happy to report I've stayed pretty true to that vision! Light, bright and modern are the key words.

So without further adieu, here's the design board for our new kitchen!

(Please note that some of the following are affiliate links, which means that if you purchase through the link, I may earn a small commission at no cost to you. Thanks for supporting the blog in this way!)

1. IKEA cabinets (VEDDINGE) || 2. quartz countertop (Caesarstone London Grey) || 3. butcher block countertop || 4. refrigerator || 5. range || 6. dishwasher || 7. brass hex knob || 8. brass pull || 9. pendant lights || 10. faucet || 11. sink || 12. floor tile

We decided to go with IKEA for our cabinets, doors and quartz/butcherblock countertops. Their system is amazing (soft close doors, anyone?!) and the prices are hard to beat. Though there's a lot of assembly involved, I'm not too concerned since I'm an avid do-it-yourselfer and I have a contractor father-in-law spearheading the project. :)

I went back and forth for a good while on whether to go with flat panel doors or shaker style and ultimately decided to go with the more modern, flat panel doors. I'm pairing the simple door style with some really fun brushed brass pulls and knobs that take the kitchen to the next level. (By the way, the hardware I chose is super affordable - especially those Target pulls. I went into the store the other day to see them in person and they're a great weight and color, which I wasn't necessarily expecting for a Target find! #targetdoesitagain)

For the countertops, I wanted something that looked like marble, but was more durable, and these London Grey quartz countertops fit the bill. I loved the veining and the grey tone. They'll be everywhere in the kitchen except for a small section that will have butcher block. Those cabinets will imitate a credenza - more on that in the floor plans below.

I haven't nailed down the exact tile for the flooring, but I know it will be a dark gray/charcoal and likely be in a 12"x24" size. We're also pretty sure we're going to install electric radiant heat under the tile since our kitchen is freezing underfoot in the winter. Does anyone have any brands they recommend for that? I'm still researching...

Our sink and faucet were ordered this week. I can't tell you how excited I am to be replacing our cheap double basin, stainless steel sink with a deep, single basin one, and our leaky, low faucet for a sleek, pull down one!

Lastly, appliances. I've been thrilled with our Whirlpool dishwasher (it's silent and cleans really well) and we'll be going with them for our refrigerator, range and microwave/hood as well. I'm not sure exactly which models yet, but the three I linked above are strong contenders.

Now let's take a look at the rough floor plan! If any of you have ever tried out the IKEA kitchen planner, you know it's a bit maddening to use, but it gets the job done for the most part.

Here's the overall view:


The main part of the kitchen will maintain the existing L-shape, but the countertop on the peninsula (where the sink and dishwasher are) will extend out into the dining area so we can have a real bar with stools under it for seating. The new items are the "credenza" (represented as brown in the above floor plan) and the floor-to-ceiling pantries (labeled 10 and 11 above).

(To see our kitchen as it stands now, check out this post.)

Below you can see the pantries on the left side. The cabinetry surrounding the range has basically the same layout as the existing cabinetry. A microwave/hood will go above the range.

And P.S., I have no idea why the knobs aren't parallel with each other - a quirk of the software I guess!


Here's a better look at the "credenza" on the opposite side of the space. It will have exposed legs since a small radiator will be sitting under those cabinets. I'm excited to gain a bit of counter space here too!


Our sink, dishwasher and pull out trash can(!) will be in the peninsula and the bar area will extend out the back.


I think that's it. Phew! That was a long post, but I hope it gives you a better idea of where we're headed. Hopefully the next update will be a real life one where we'll be saying adios! to the old kitchen!


*Psst! Need help with your home? Come on over to Mix & Match Design Company and let's chat!


Enjoy what you read today?  Enter your email address below to subscribe to May Richer Fuller Be!  Delivered by FeedBurner

Pin It!

4.28.2016

Kitchen Renovation Inspiration

{Sugar & Cloth}
That's right, a kitchen renovation! Though it's not going to happen until later this summer, it's never too early to start planning and dreaming, right? I'm also hoping that y'all will chime in with your two cents on kitchen renos. I'm all ears!

Nothing is set in stone yet, but let's start with a few facts about the direction we're headed and then I'll get to the pretty stuff. :)

We're planning:

  • Modern white cabinets (who's surprised there?)
  • Marble-like quartz countertops
  • Brass hardware
  • Dark floors
  • Stainless steel appliances

We'll pretty much be starting from scratch while basically keeping the same layout. The one lone survivor in the demo phase will be the dishwasher (we bought it when we moved in since the house didn't have one). For cabinets, we're 90% sure we'll be using IKEA Sektion system with VEDDINGE fronts, so lots of cabinet building will be happening over here! I can't wait to get started. 

Here are a few kitchens I've found that I love that echo the style/look we're going for:

{Annabode via Design Sponge}
{Sita Montgomery Interiors via Style Me Pretty}
{Francois et Moi}
{Oh Happy Day}
{Nicole Davis Interiors}
{Burke Decor}
{House Updated}
Get the idea? ;)

Of course I'll be sharing all the nitty gritty details from the planning phase all the way through to the reveal, so get ready for lots of kitchen happenings soon!
For reference, here's what our kitchen looks like now:


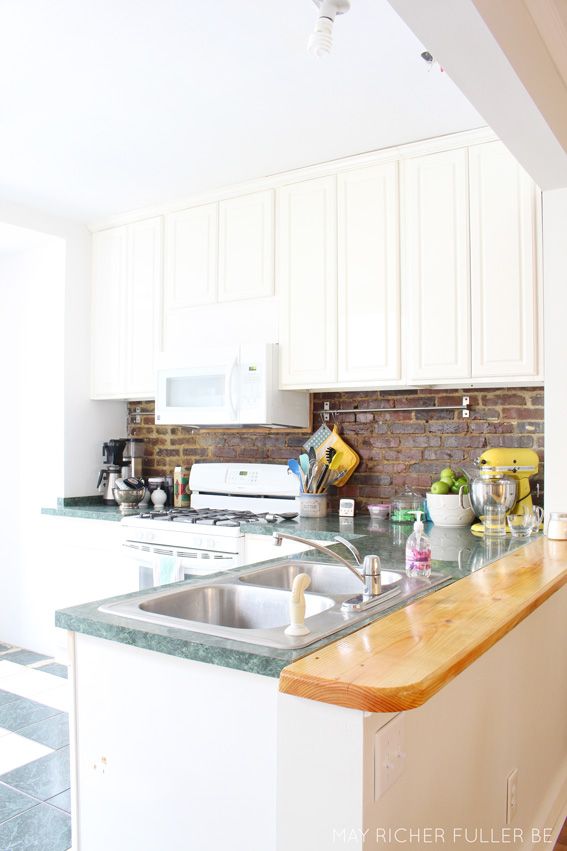
I can't wait to get rid of the green laminate countertops and that seen-better-days stainless sink!

Enjoy what you read today?  Enter your email address below to subscribe to May Richer Fuller Be!  Delivered by FeedBurner

Pin It!

3.23.2016

"State of the Dining Room" Update


Hello friends! I hope you're having great weeks so far. Work has been keeping me quite busy lately and I'm ready for things to slow down a little bit! I'm popping in today to share a little update on our dining room. Though it's far from what I'd call "done," I'm ok with that and I figured y'all would like to see some of the progress and hear about the process. After all, real life makeovers don't happen overnight!

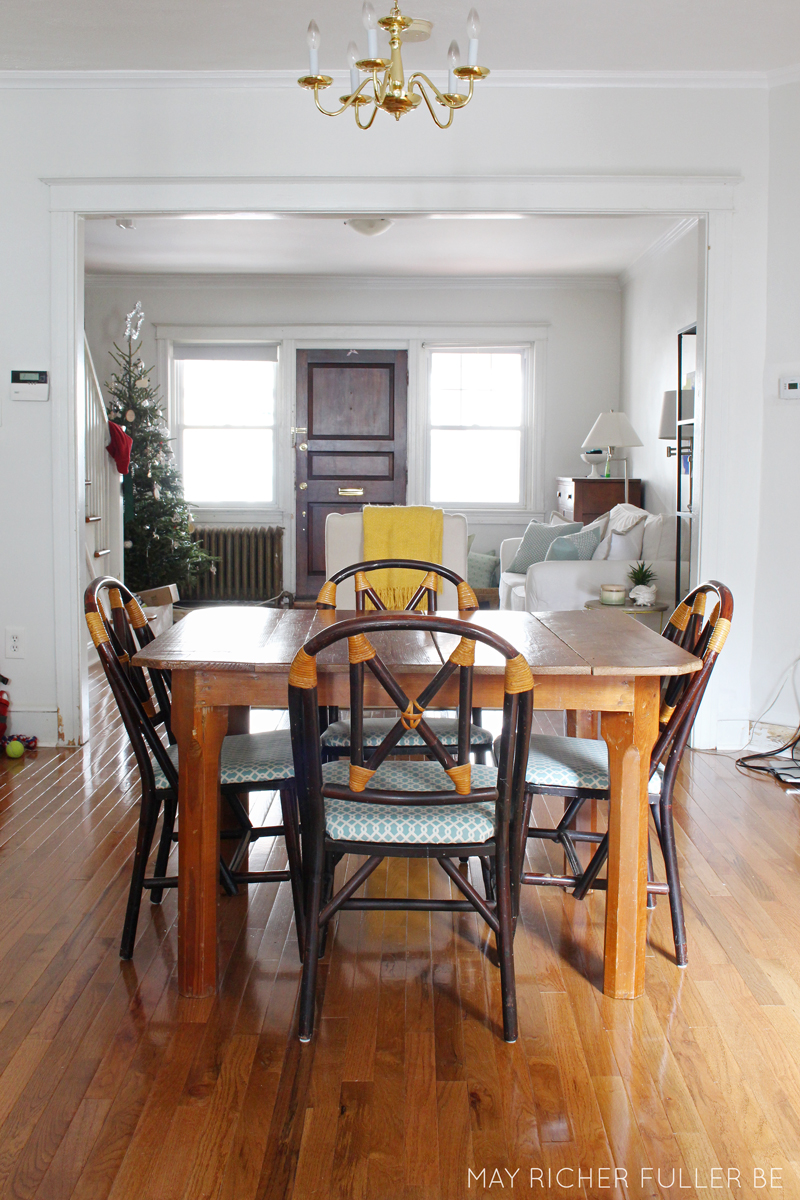
The last time you saw a full shot of our dining room, it looked like this:


Our petite, but lovely farm table (a family piece) lived here, and we were using a secretary for storage. We knew we wanted a larger dining table to host folks for the elaborate dinner parties we're planning - I kid, but seriously, we wanted to be able to have more than two people over at a time - and better storage for serving pieces, barware and china.

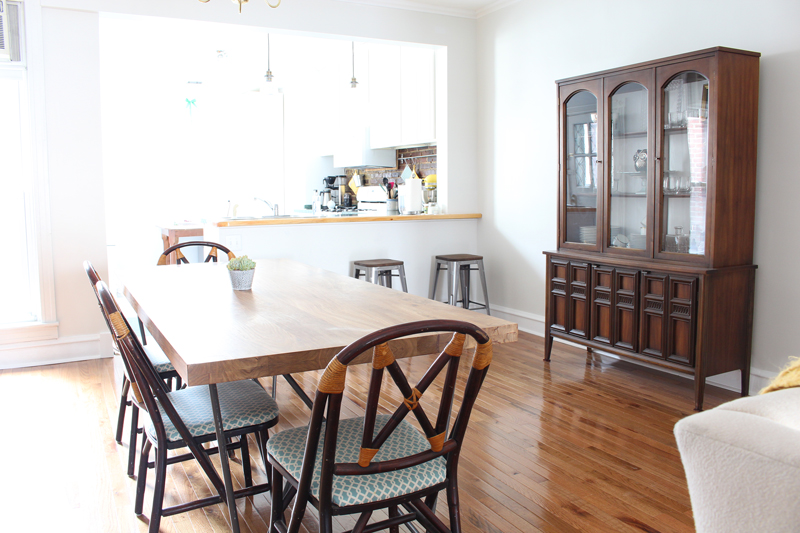
I hit the jackpot with a thrifted china hutch I found at my favorite local Philly spot, Uhuru, back in January, and that piece has become a workhorse. I wrote about it in this post if you want more details about it and the little DIY magic I worked on it. You'll see it a little later in this post.

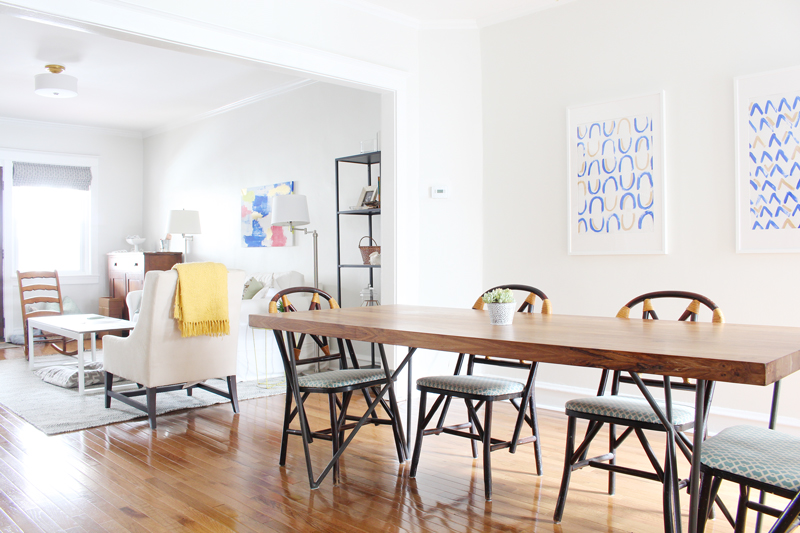
Then, after months of hunting Craigslist for the perfect dining room table that my husband and I could both agree on, the Dylan table from CB2 popped up for nearly half off the retail price. It was the perfect mix between traditional farm table, mid-century modern and industrial, and we love it. Enough chit chat though, let's get to to the photos!


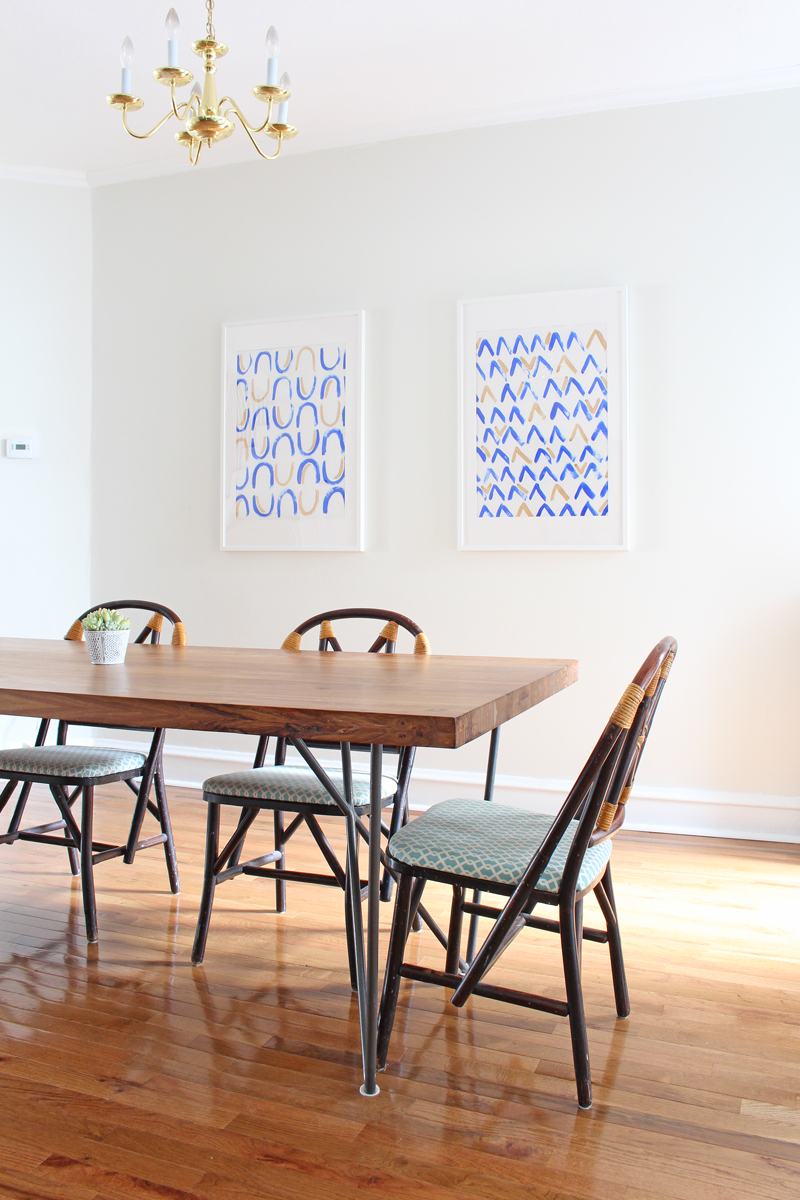
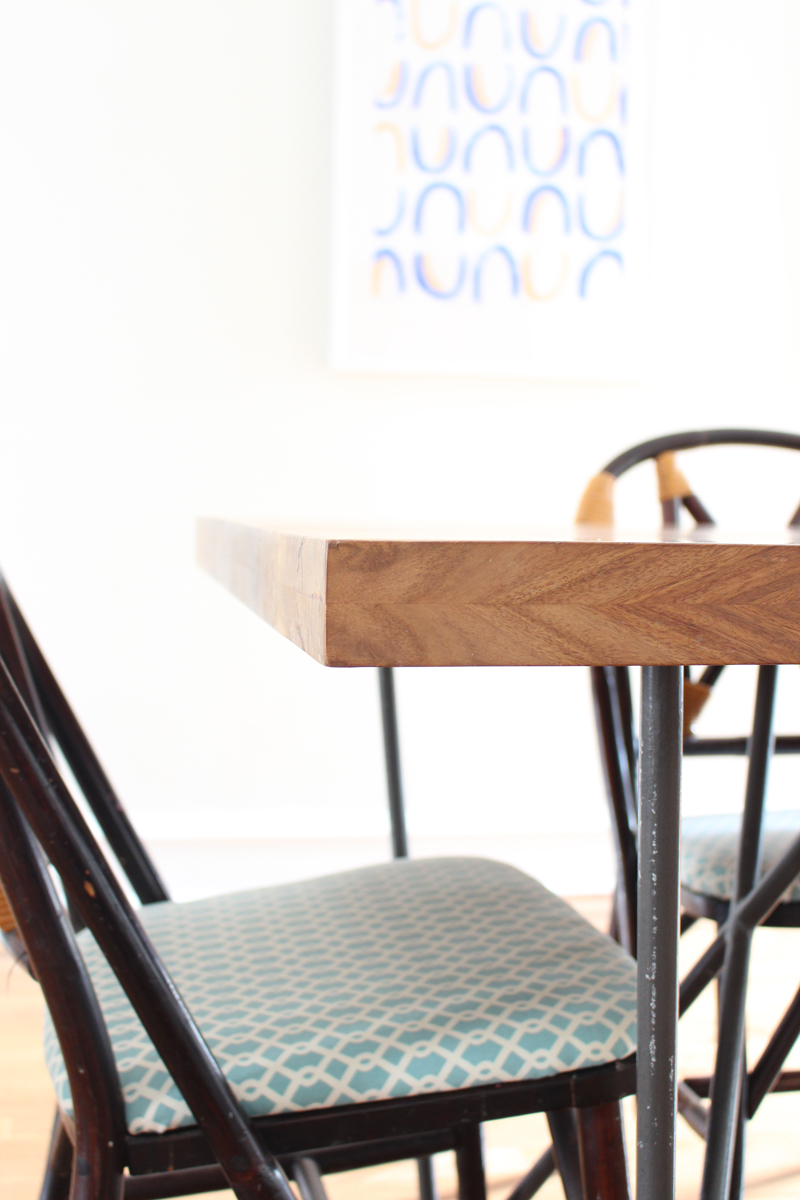
Can I just tell you how pretty this table is? It has a thick, solid wood top and iron hairpin-like legs. And yes, it does weigh approximately a thousand pounds (I'm exaggerating, but not by much). Like true city-dwellers who don't have a large car to pick up giant Craigslist finds, we called an UberXL to pick it up and bring it home. The driver was so awesome - he even helped us carry it into the house. It was quite a hilarious scene.


It fits six to eight people, and clearly we are in need of more seating! We're contemplating doing four chairs and a bench - do y'all have thoughts on a bench? I think it would look less crowded visually than having six chairs since our space isn't huge, but I worry a little bit about comfort for the folks sitting at a bench for long periods of time.


I can't get over how thick and beautiful the table top is.


If you're paying very close attention, you might notice that the china hutch swapped walls and I added some large-scale art to the wall where that piece used to be.


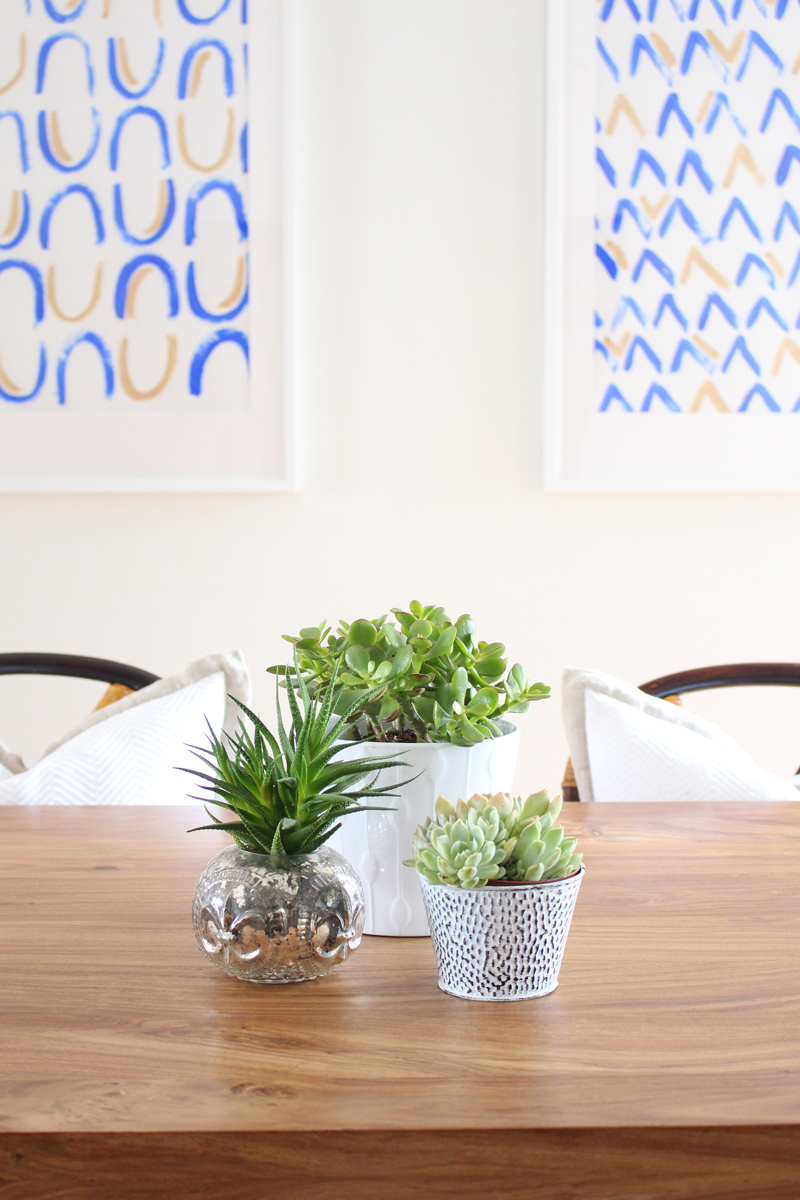
I'll share a little more about that art in another post, but I will let you in on a little secret: it was a DIY I put together with some acrylic craft paint and some Modern Masters Pale Gold from the Metallic Paint Collection. They're super simple and add a nice graphic focal point to the room.


I'd say the dining room is coming right along!

What's left to do in here? A few things:

  • Change out that unfortunate shiny brass chandelier for something awesome. Jury's out on what that will be, but I talked about some recent favorites last week in this post.
  • Figure out the seating. I'd like to get four of these white Eiffel style dining chairs (*affiliate link) and a bench. My husband isn't sold on those chairs though.
  • Paint the radiator white.
  • Maybe add a rug? 
So that's the "State of the Dining Room" update. Do y'all like these "in-process" posts?

Like I said above, I'll be sharing more about that DIY art in another post!

*Don't forget to enter the giveaway for a FREE e-design package if you're in the Philly or DC areas. All the info on how to enter is here.


Enjoy what you read today?  Enter your email address below to subscribe to May Richer Fuller Be!  Delivered by FeedBurner

Pin It!

3.07.2016

Small Bathroom Makeover {The Full Before & After}


Last week I shared a little bit of the makeover I gave our small bathroom and I'm back to give you the full details of what I did - all the way from the beginning. I feel like you need to see the true before photos to really appreciate how it looks now. :)

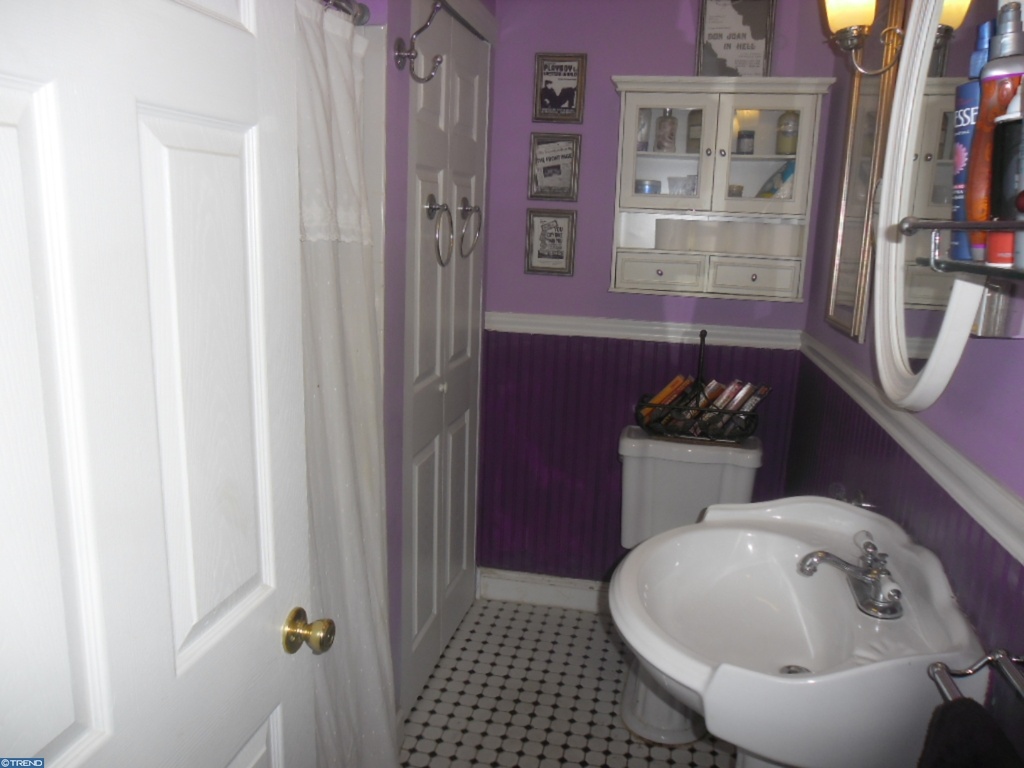
In case you haven't been around since we started renovating out little row house in Philadelphia back in the fall, let me show you where we started with this bathroom beginning with a real estate listing photo:


Helloooo purple! Two shades of purple, in fact. This was the actual photo the real estate agent put in the listing (crooked, poorly lit and just so much stuff). They certainly weren't doing the house any favors here, but thankfully we were able to see past all that and realize that the bones were good - it just needed some serious help in the paint and decluttering department.

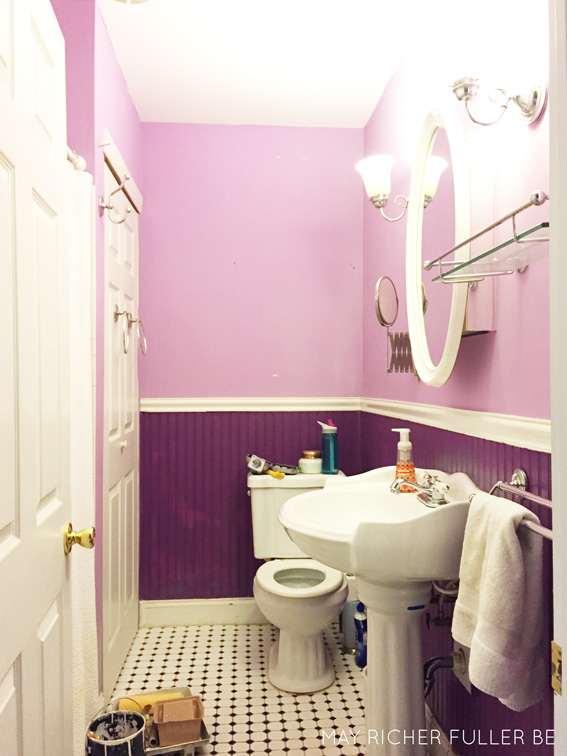
Let's move on to how it looked once all the previous owner's stuff was gone:


Please forgive the crazy lighting here and the other junk. This was taken before I figured out how to shoot this tiny, windowless room and right before I was about to paint! :)

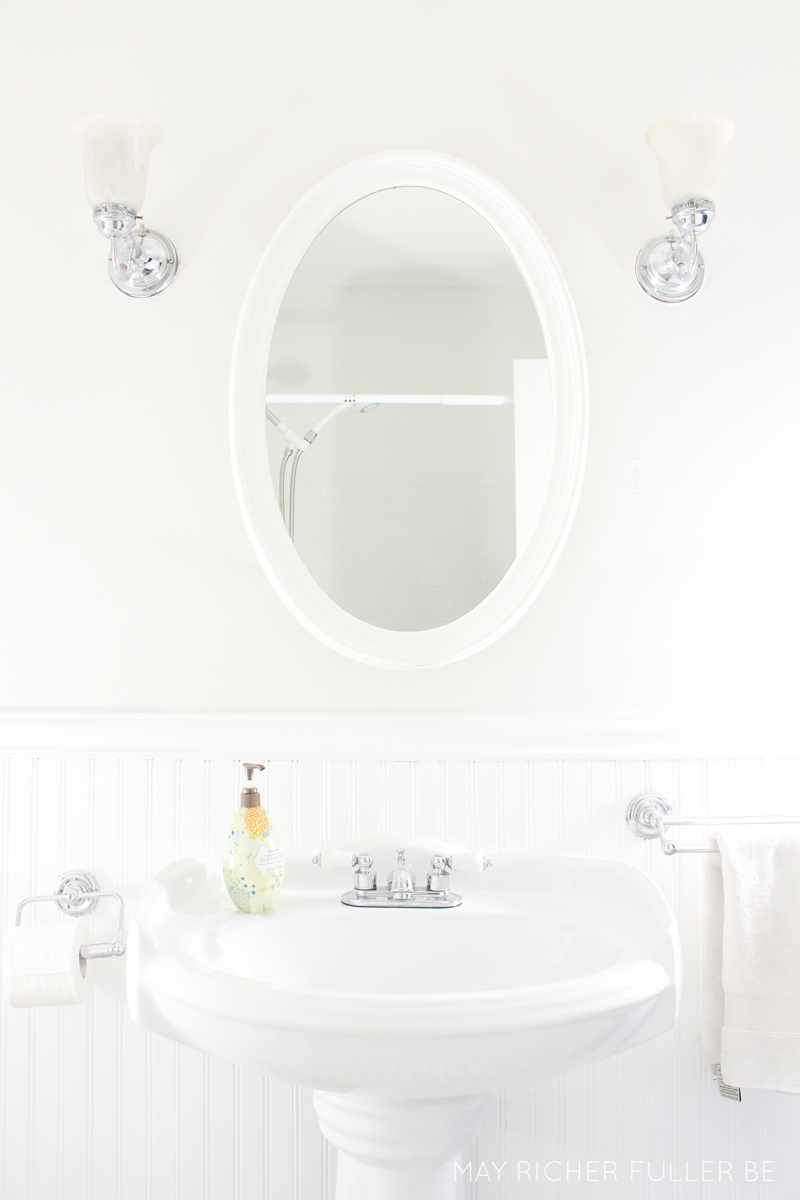
The first step in this bathroom makeover was getting rid of all that purple. I gave it all a coat of Kilz primer then two coats of regular paint: Behr Ultra Pure White on the beadboard and Benjamin Moore Winter White on the walls. I also took down the glass shelf by the mirror, the small accordion vanity mirror and the two towel rings on the linen closet doors. I felt like all of those things were making an already small room feel cluttered.


Again, the lighting in this photo is terrible! Oh well - can't worry about that now that it's in the past. Even with the terrible lighting, it was looking so much better already.

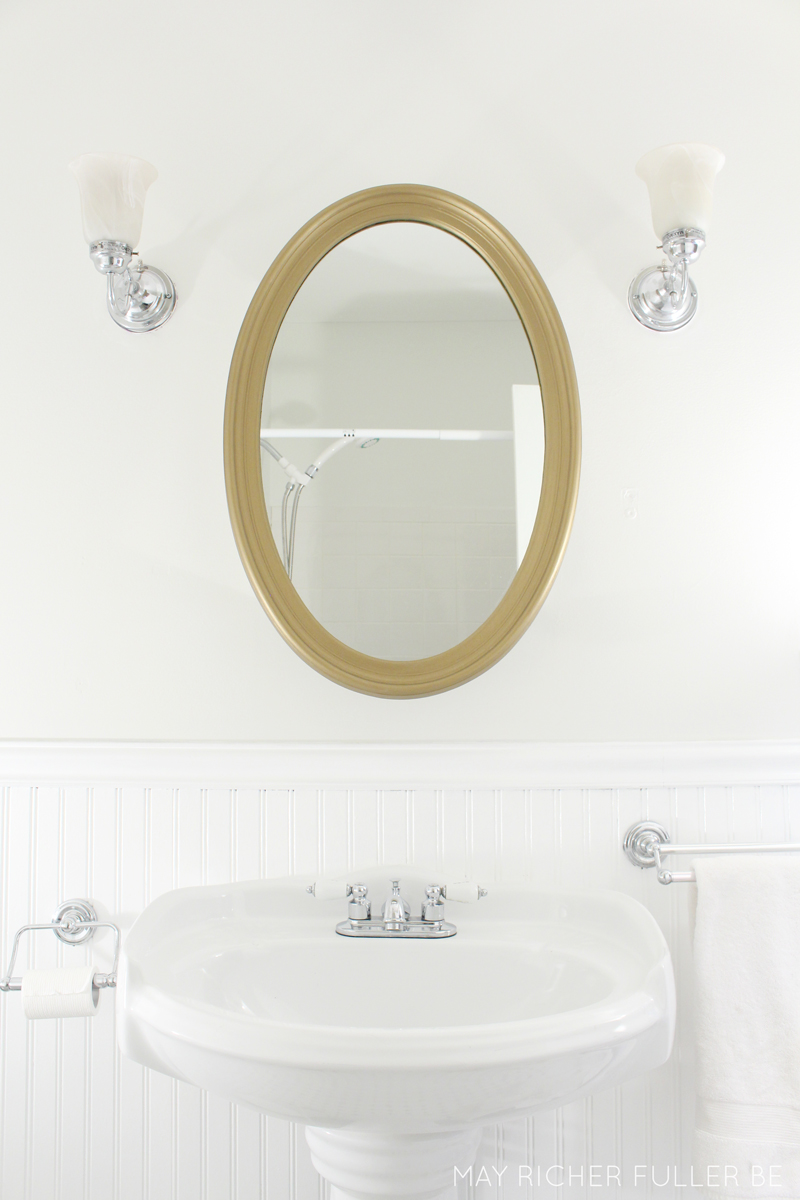
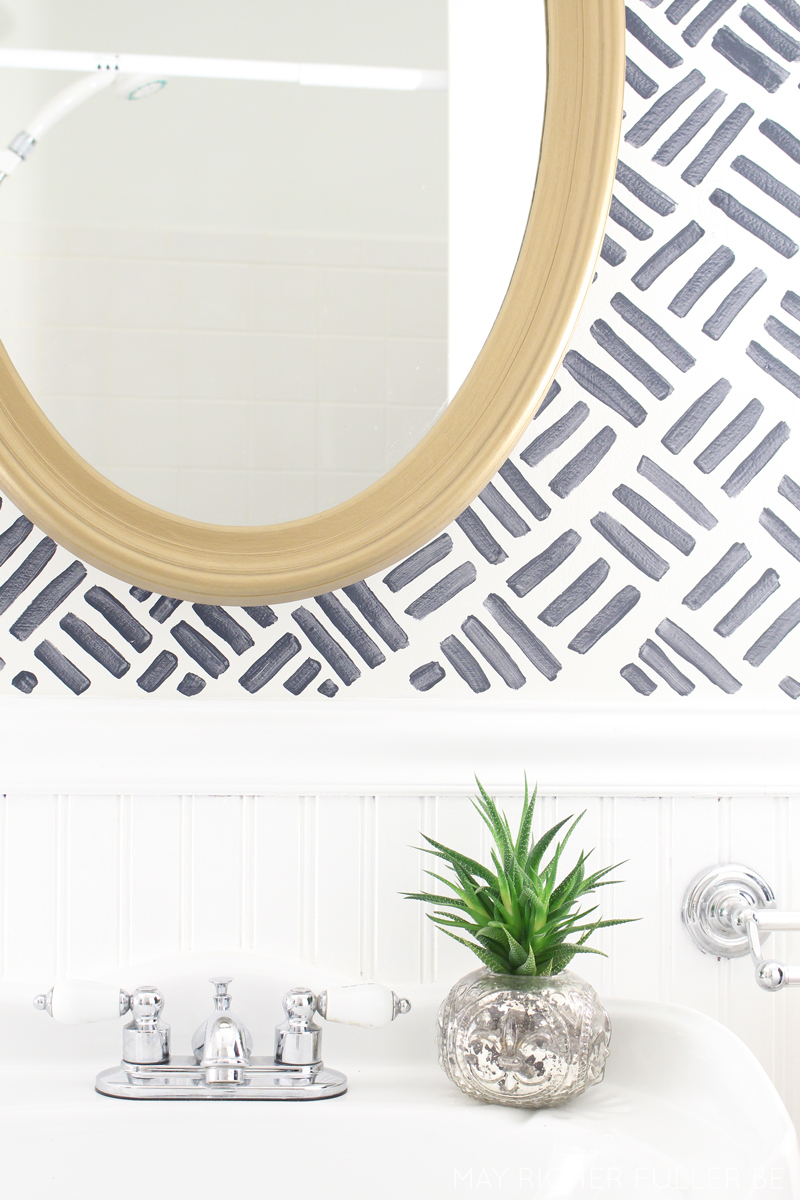
The next step was to paint the boring white medicine cabinet mirror a beautiful matte metallic brass from Modern Masters. I talked all about that in last week's post, so head over there if you'd like more details.

This mirror just blended right into the wall when it was white...


Then boom. Brass. Now it's a focal point!


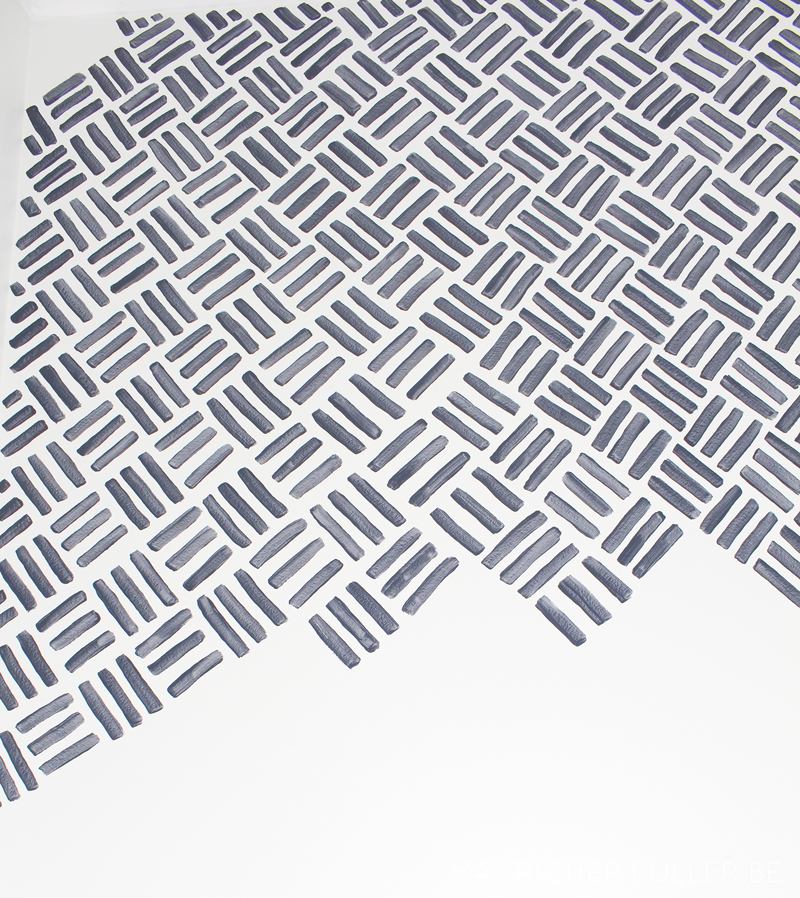
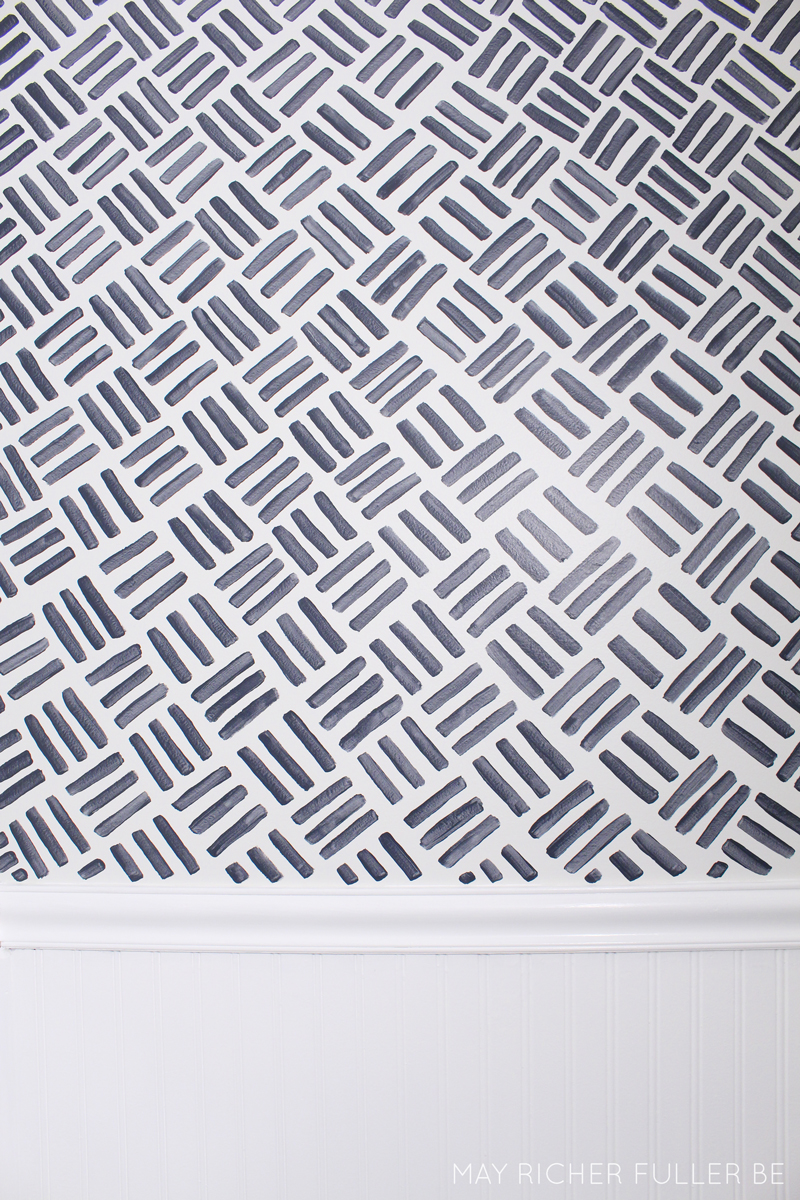
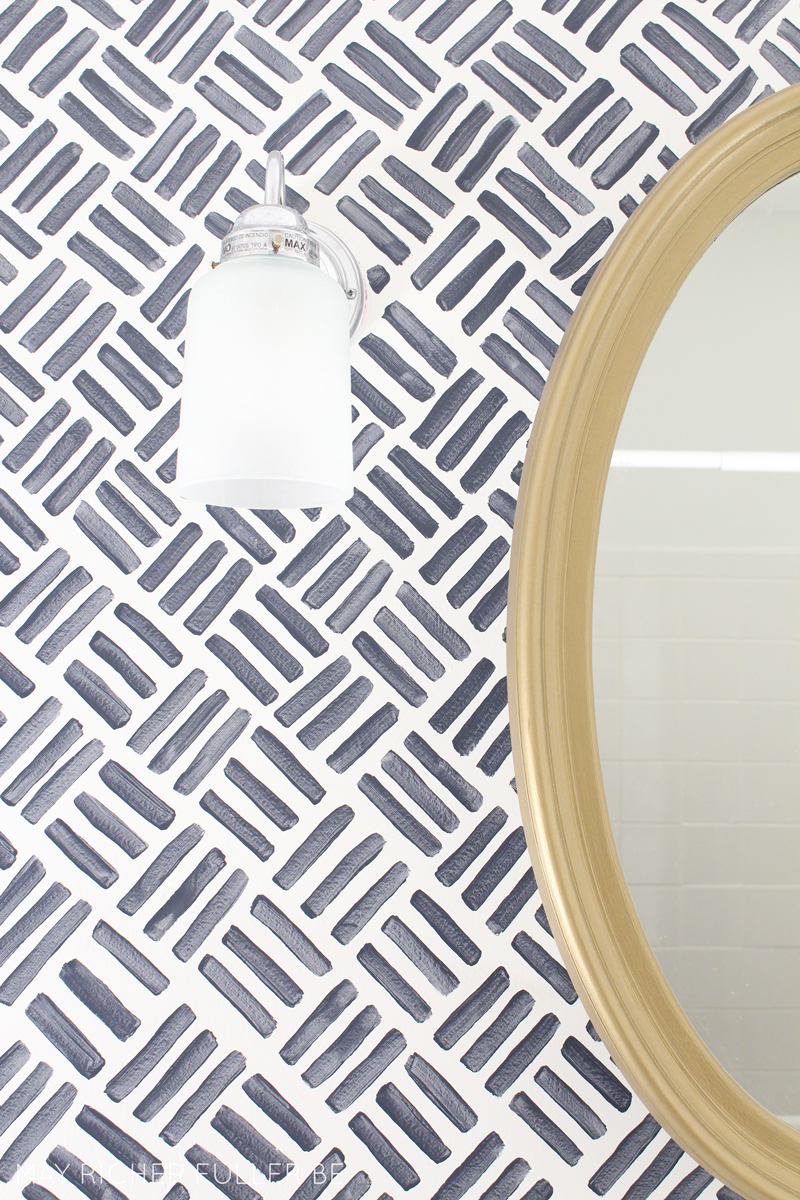
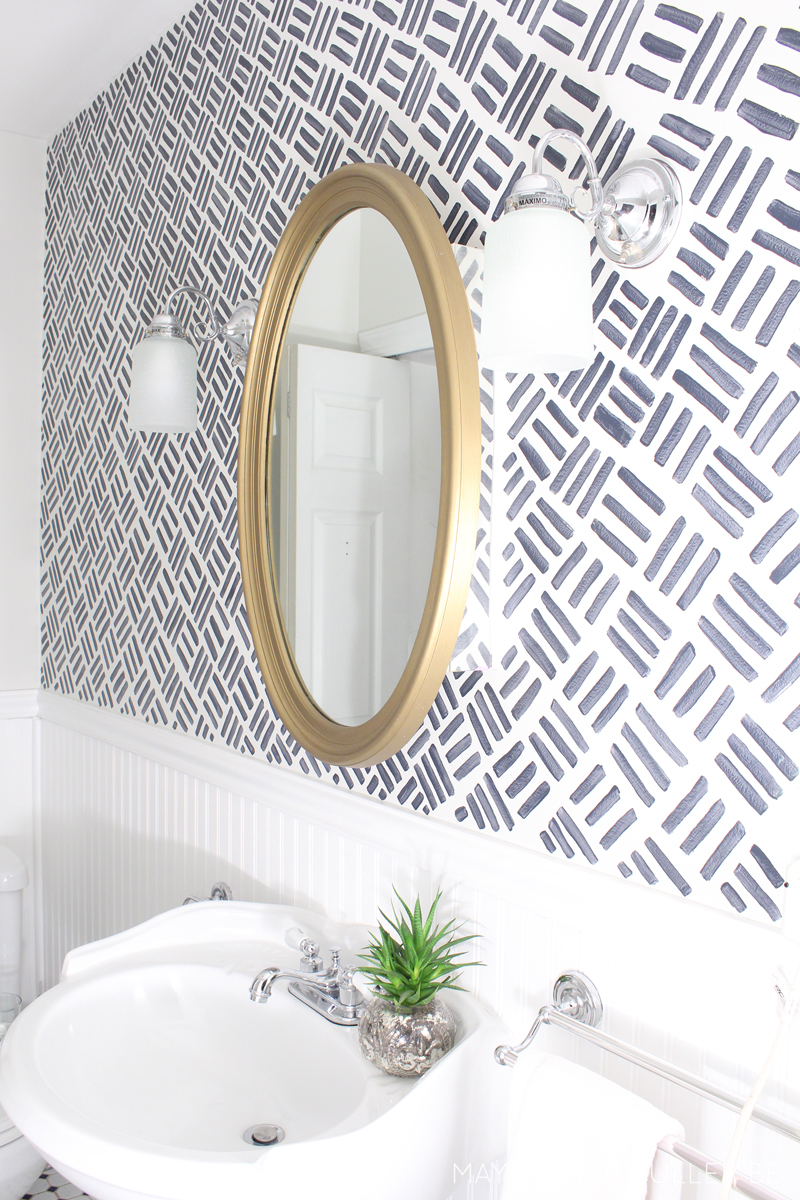
After the mirror was done, it was time to really make that wall a showstopper with some pattern. I talked a lot about wanting to use wallpaper in here, but in the end, I realized I could get the look I wanted for a fraction of the price using paint. Plus, with paint there's no need to worry about humidity issues that can sometimes be a problem with wallpaper in bathrooms.

I picked up a sample pot of paint at Lowe's in Valspar's Gotham Gray. Depending on the light, it looks like a charcoal gray with some blue in it or nearly black. I love love the color.

I sketched out some patterns on a piece of poster board and ended up with a simple repeating hash pattern (is that what you'd call it?). It's almost like a basketweave. I decided to throw caution to the wind and freehanded it all the way across the wall. It took a couple of afternoons to finish, but was surprisingly therapeutic. Here it is in progress:


And here's a finished section:


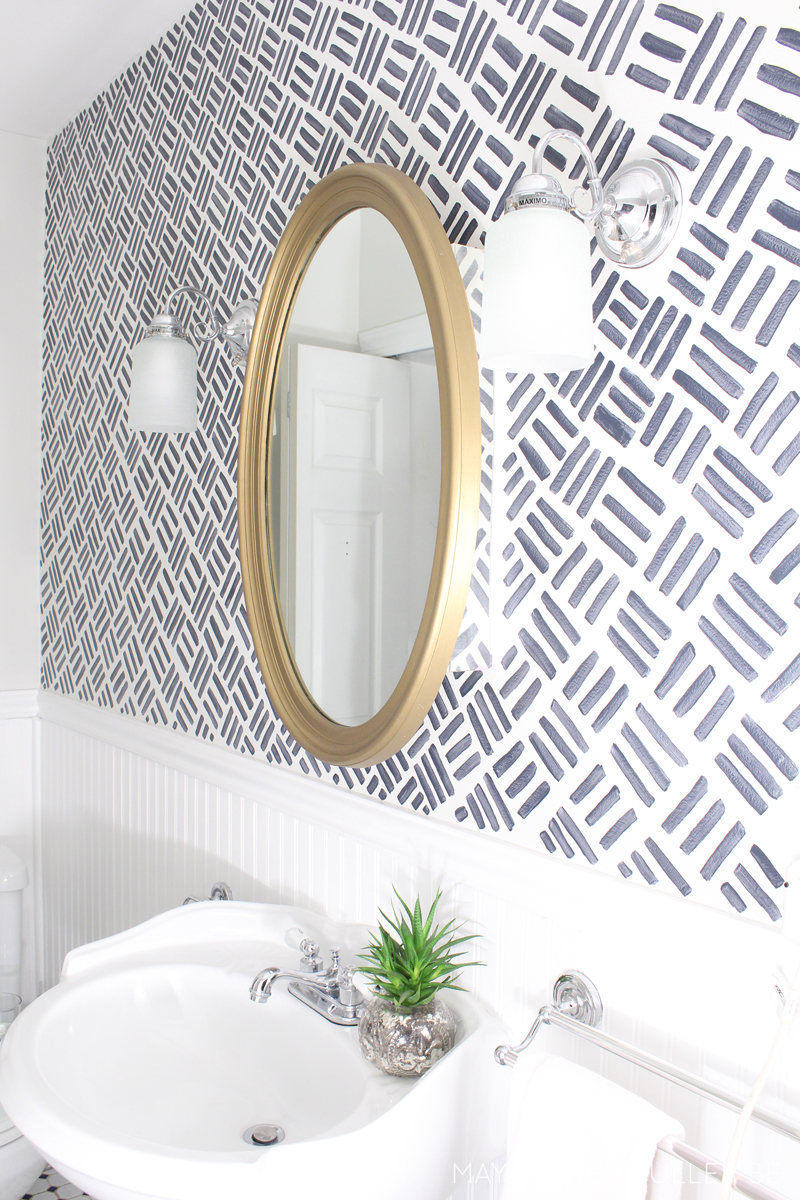
Now let's get to the good stuff and see the whole thing!


I'm thrilled with how well the pattern plays with the brass mirror. In an all white room, this was just the pop it needed!

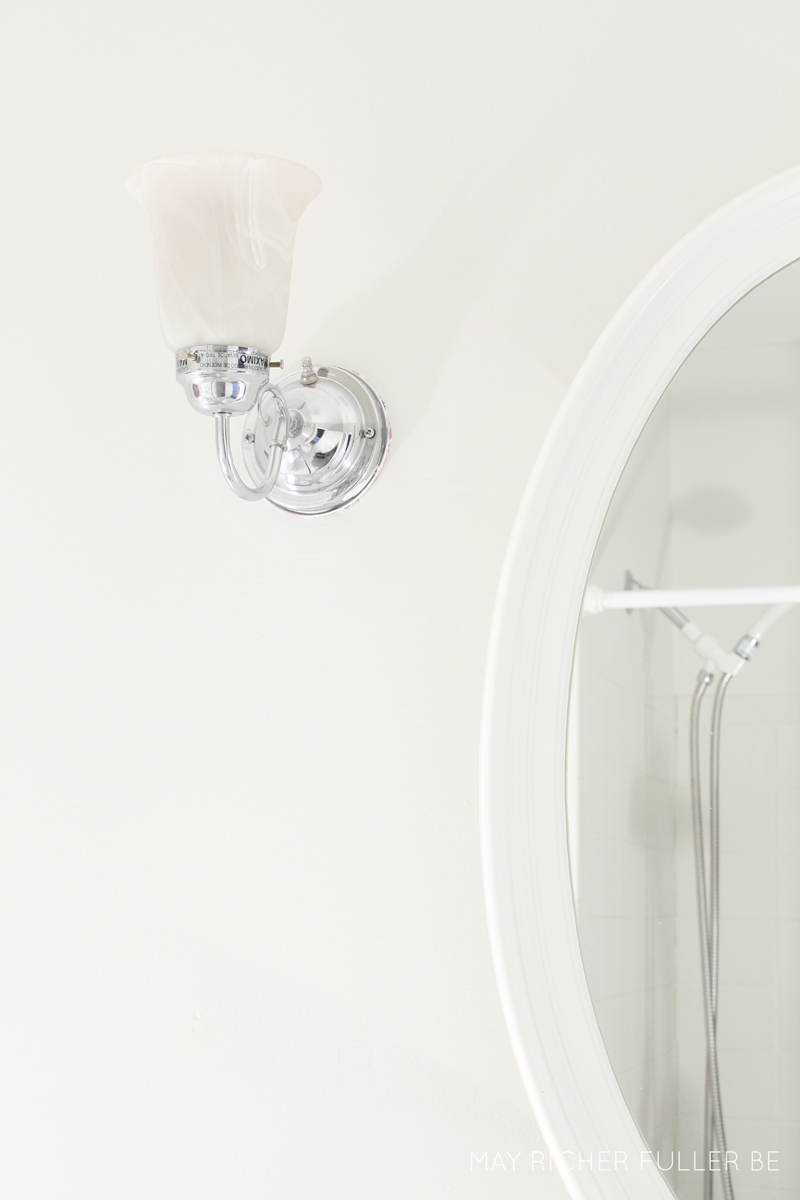
The other small change I made had to do with the sconces. They're not my favorite, but purchasing new ones wasn't on my list for now, so I decided to get creative. Here's a closeup of one of them pre-update:


I realized that I could swap out the glass shades since they were a standard size, so I snagged two of these more modern ones from Lowe's while I was picking up my sample pot of paint. (The online photo does not do them justice - I'm glad I saw them in person first!) When I got home, I flipped the sconces upside down and put the new glass shades on. I like them so much more now!


These small details can make all the difference, can't they?

So that's full story behind our sub-$50 bathroom makeover. I'm thrilled with how it looks and it makes me so happy to go in there now. Three cheers for the power of paint and a little creative thinking!


Enjoy what you read today?  Enter your email address below to subscribe to May Richer Fuller Be!  Delivered by FeedBurner

Pin It!
Related Posts Plugin for WordPress, Blogger...
Blogging tips