Showing posts with label fonts. Show all posts

9.17.2013

13 Awesome & Free Chalkboard Fonts

Goooood morning! I hope y'all enjoyed yesterday's post on the chalkboard art I made for CHAT. It really is an awesome organization. If you have no idea what I'm talking about or missed yesterday's post, I encourage you to take a minute to read it and see what this ministry is all about. Also, tomorrow morning marks the start of a fundraising campaign called The Amazing Raise, which is a 36-hour online giving contest where non-profit organizations in the city of Richmond, Virginia compete for the greatest number of unique $50 donations. The top three winners will receive "bonuses" on top of the money they raised from individual donors. If yesterday's post struck a chord in you, would you consider donating to this fantastic cause? The contest starts tomorrow (Wednesday, September 18th) at 6am and goes through Thursday (September 19th) at 6pm. Head to The Amazing Raise site to donate.

Onward! Yesterday I mentioned that I downloaded a bunch of "chalkboard-worthy" fonts to play around with when putting together the art for CHAT. I found so many good ones that I thought I'd share 13 of my favorites with y'all. You can pin this little graphic below to keep as a reference for later if you'd like :).
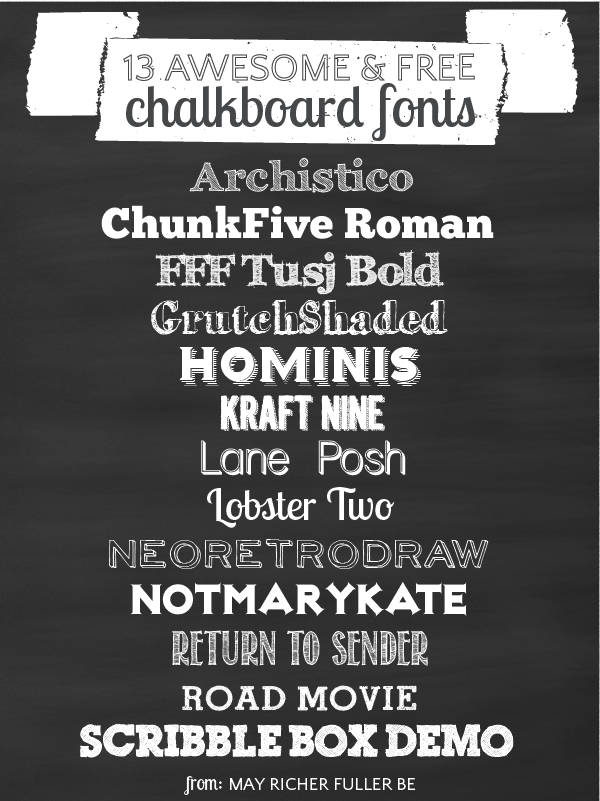

These are all free typefaces, but I always check to see if they're free for personal or commercial use. If it's free for personal use, you can't put it on anything you're going to sell, but if it's free for commercial use, go to town! Use it on whatever you want! Here are the links to the fonts above:

Archistico | ChunkFive Roman | FFF Tusj | GrutchShaded | Hominis | Kraft Nine (free for personal use) | Lane Posh | Lobster Two | NeoRetroDraw | NotMaryKate | Return To Sender (free for personal use) | Road Movie (free for personal use) | Scribble Box Demo (free for personal use)

A couple of general tips on downloading typefaces:

  • If you're planning on using a lot of fonts for commercial use (say you have a stationery business, Etsy shop, etc.), a great site to download them from is Font Squirrel. ALL of these are free for commercial use. HOOray.
  • For instructions on how to install fonts onto your computer, scroll to the bottom of this post for a tutorial.
Have fun with these! I know I have :). In fact, I'm putting together a few little chalkboard-esque freebies for you tomorrow using a few of them along with some others. Do you have an iPhone? If so, come on back to grab a free download for it!


---------


Pin It!

7.02.2013

June Project Round-Up


It's that time of the month again - no not that time of the month! (bad joke?) - it's time to take a minute to look back at the projects I did on this little ole blog over the past month. This is a great way for you to catch up on anything you missed, or if you're new here, it's like a highlight reel, so you can click around easily and find posts that are of interest to you.

If you find you like what you see, you can always have my posts delivered to your inbox (fill in your email address in the "follow by email" form on the sidebar), follow MRFB using an RSS feed reader like feedly or Bloglovin', or find me on Facebook and Twitter. I'd love for you to stick around awhile.

So what did I have going on here in June? Well, let's start with my favorite projects...

The appliqued onesies and customized burp cloths definitely topped the list. I gave the two sets I made to a couple of my cute pregnant friends, and they were definitely hits! I love giving handmade gifts.


My other favorite project was the coral and gray dipped side table. It's just such a fun piece!


I started a new semi-regular series called "Defining My Style" where I'm showing off some pretty photos of homes I love - room by room - that I feel represent my style. Last month I covered exteriors and entryways, and showed the current state of our tiny entry to our apartment.


I DIY'd a whiteboard out of an old frame to hang on that little sliver of wall on the right side of the door to liven up that space as well as add some functionality. We've definitely been using it a lot!


The most viewed post in June was on how to create a font out of your own handwriting. I was actually pretty surprised by that - and I'm glad I'm not alone in thinking that was a pretty darn cool idea :).


Operation {Re}Organization continued kinda casually this month. I conquered some little things like the freezer and a trick to speed up your dishwasher routine.


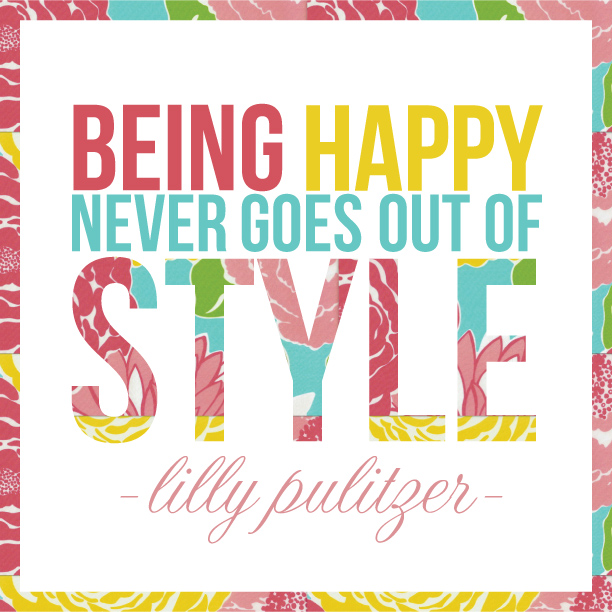
And lastly, I designed this little print for the Lilly Pulitzer Style Soiree Series and it makes me smile every time I look at it. You can download it for free here if you've got a spot for it in your home, or if you'd like to give it as a gift.


Before I go, I'd also like to give a big thanks (and a virtual hug) to some wonderful blogger ladies who featured my posts this month:


And of course, thank you for reading my little blog!


Pin It!

6.11.2013

How To: Create a Typeface Out of Your Handwriting


Confession #1: I'm in love with typefaces {fonts}.

Confession #2: I'm also in love with pretty handwriting. I even like to practice my own handwriting and prefer to write in cursive. Yep, I'm that nerdy. In fact, funny story, I had a friend in college who had the most beautiful script handwriting and I had major handwriting envy, so I set out to try and write like her. I practiced. Over and over...in class as I was taking notes, in my journals, grocery lists...you name it. Though my cursive handwriting still isn't nearly as pretty as hers, I still love to try.

So where am I going with this? Well, since I love both typefaces and pretty handwriting, wouldn't it be cool if I could make a typeface out of my very own handwriting? I think yes :). Anyone else think that's a fun idea?

I recently learned that this is possible thanks to a free online tool called My Script Font, which takes a scanned image of your handwriting and turns it into a font you can install on your computer. So I gave it a shot using my own handwriting. It's silly and totally imperfect, but so fun! So allow me to introduce you to the Chaney font:


I used my "block print" handwriting for this one. I love how the uppercase letters came out, but am not as wild about the lowercase. It looks more kid-like than I think my "real" handwriting does.

Just for fun, I created a few squigglies too (the last row - in coral).

So how do you do it?

Step 1: Go to My Script Font and download the template. Print it out. Write out each letter in its designated box with a black, felt-tipped pen (I used a fine point Sharpie).

One hint: try to keep your letters in line with their examples for best results. DO NOT write outside their boxes. On my first attempt, I had a problem with wonky spacing between letters because I wrote outside the box.

Step 2: Scan the template in to your computer as a JPEG, TIFF or PNG. Here's what mine looked like:


Step 3: Name your font on the site and click "send file." It'll generate your font for you to download.

Step 4: Download your font and install it on your computer. If you don't know how to install it, go to the bottom of this post for instructions.

Step 5: Open your favorite word processing application (i.e. Word) and select your font from the font list. Type away and play with your new typeface!

I can't wait to experiment some more with this tool. It's so easy to do that I'm definitely going to make another one (maybe more like my cursive?!).

Have any of you tried this with your handwriting? Or do you plan to after you read this awesomely nerdy post?

---------


Pin It!

3.19.2013

Branding Redesign: May Richer Fuller Be & CSW Designs

For awhile now, I've been dreaming up new looks for both May Richer Fuller Be and CSW Designs (my Etsy shop), and finally got a chance to sit down with my creative brain this weekend to make it happen. I rolled out the new blog header and Etsy shop logo on Sunday night, and made a few tweaks yesterday. I think it's done, but I can't promise it won't change again :). If you're reading this on an RSS feed like Google Reader (which is going away - alas!) or an email version, you'll want to click over to the full blog to see the changes.

I had a few goals in mind when it came to the redesign:
  • Have consistent branding across both the blog and the Etsy shop (fonts, colors and style).
  • Keep it simple, but give it a unique look.
  • Use Illustrator (i.e. force myself to continue to learn the software).
  • Add a tagline so that new readers know what I write about and do on this blog (May Richer Fuller Be doesn't exactly scream "design/life/DIY blog"...but that's what it is!).
To show how all the aspects of the new design work together, I made a little "branding board" for both the blog and the Etsy shop.

Here's the one for the blog:


And using many of the same elements above (fulfilling one of my goals - consistency!), here's the branding board for the Etsy shop:


You can click over to the Etsy shop to see the new logo and shop banner "live."

I even threw together a business card for fun. It's not really necessary, but I was already having fun designing all these elements, so I threw that in - we'll see if I ever actually have them made! I guess my shop is technically a business, so it makes sense, sorta, to have a business card?

The part I'm most excited about is the pattern I created in Illustrator to fill the letters in the logos. It's modern and clean-lined, and almost looks glassy (shiny? I can't decide). Super fun. It comes in three of the "theme colors" of the blog. 

You might also notice that the blog background disappeared. The the watercolor-y chevron pattern didn't make the cut, unfortunately, even though I still love it. Since simplicity was the name of the game, I wanted to let the new logo have the spotlight - so out it went. 

My homepage photo got a little face lift too. The border around it is now filled with the same pattern as the letters in the header.

Let's play the before and after game, ok? :) For comparison, here's what the blog header looked like before:


And after:

The Etsy shop logo before (far right on the side bar):


And after:


I certainly don't claim to be a professional graphic designer, but I'm loving this new design. I'd love to know what you think, too, so leave a comment if you'd like (don't be shy!).

Have a great day!

Pin It!

2.26.2013

Free Font Round-Up

Being the typography nerd that I am, I love love pretty fonts (especially free ones!). When used well, they can really impact the look and feel of something you've designed. I've been collecting free fonts on my Graphic Design Pinterest board for awhile now, so I figured it might be time to share a few with you lovely people. Lots of blogs have put together lists of their favorites (I did that a little while ago here), and I hope that these sets will broaden your font world from the pre-installed ones on your computer. There is definitely some overlap in these lists, but that's ok - it must mean they're good ones, right? :)

Click on the links below the graphic to go to the original post. There are links to each font so you can download and install them to your computer. Installation instructions for PCs and Macs are at the bottom of the post as well.

*Note that all of these are free for personal use, but make sure you read the fine print for each one if you choose to download several of them. If you plan to use them for any items you plan to make money off of, you'll likely need to purchase a license.


/ 1 / A Subtle Revelry / 2 / I Will Invitations Blog / 3 / A Subtle Revelry / 4 / Homemade Ocean / 5 / Nicole's Classes / 6 / Nicole's Classes / 7 / The Handmade Home (Ashley's got a whole series on her blog) / 8 / The Handmade Home


To install fonts on a PC:
  • Download the font (it will be a zipped file)
  • Right click the zipped file you downloaded and click "extract all"
  • Click "extract" to save the font files to your computer
  • Double click the individual font file you want to install to open it
  • In the new window that pops up, click "install" 
  • Close the font file and you're done!
To install fonts on a Mac:
  • Download the font (it will be a zipped file)
  • Double click the zipped file and a new unzipped folder should appear in the Finder
  • Double click the individual font file you want to install to open it
  • In the new window that pops up, click "install font"
  • Close the window and you're done!

Enjoy!

Pin It!
Related Posts Plugin for WordPress, Blogger...
Blogging tips