As you might remember from the first sneak peak into our row house, the front door leads right into the kitchen, so we don't have much in the way of a real entryway or foyer. I've had to get creative with how to make that space function well as both a part of the kitchen and entryway. It's still a work in progress, but I do have a fun update to share with you today involving art!
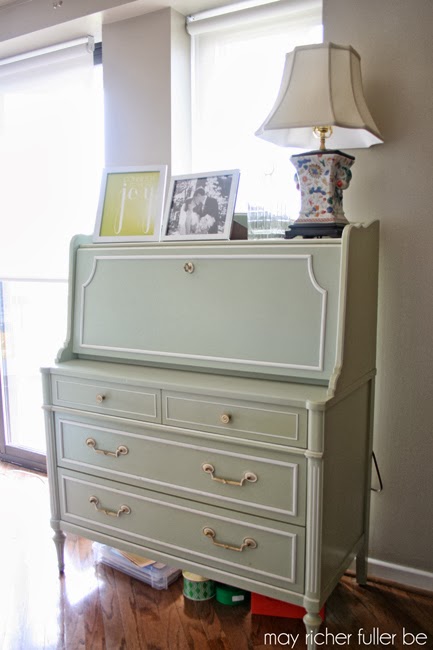
The secretary desk we inherited from my grandparents (the one that used to be a bar) has now become the landing area for keys and other small items in the entry, as well as kitchen storage. A set of hooks (not pictured in today's post) that are mounted on the wall next to it corral coats, Jackson's leash, umbrellas, etc. Those hooks, plus the milk glass vessel on the secretary are great for keeping things organized and off the dining room table - for the most part :).
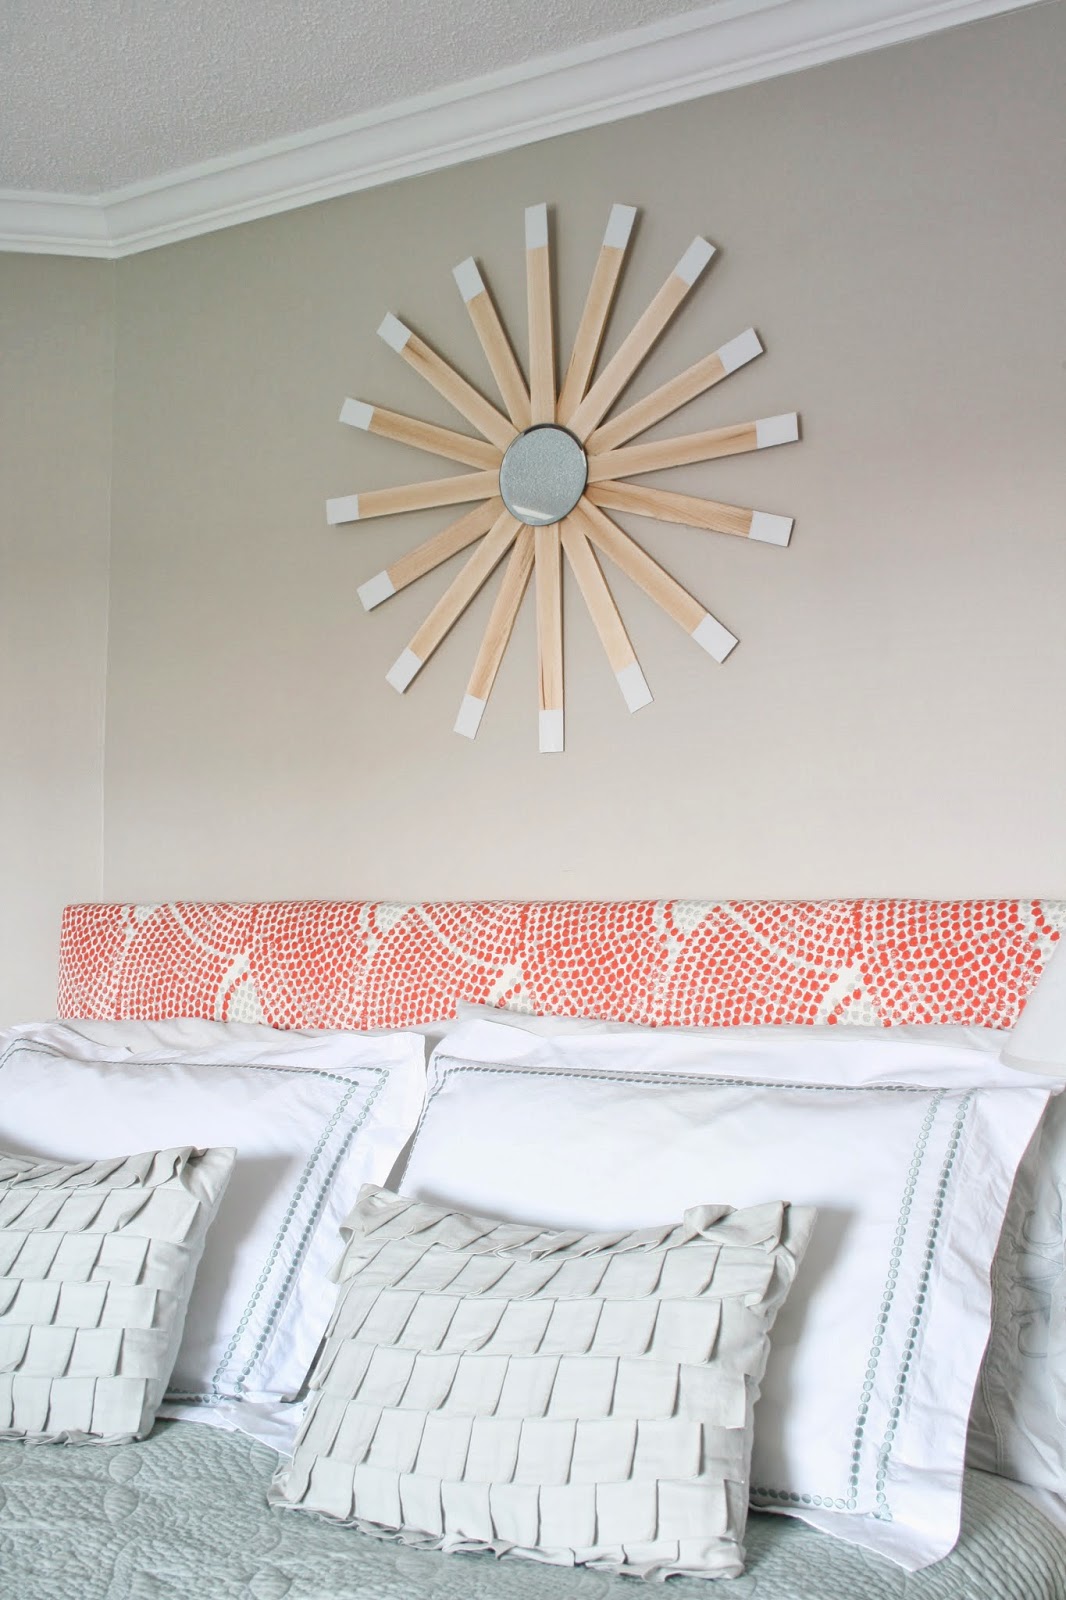
I was excited about getting that area functional, but the wall space above the secretary was looking pretty blah. It needed some art, desperately, but I wasn't really sure what should go there...until I received a lovely package from my in-laws for my birthday that contained three awesome pieces of state string art crafted by one of my sisters-in-law! She made one for each of the states C and I have lived in since we got married and I just love them. I knew immediately that these were the pieces of art I needed to go above the secretary. They're a little whimsical, have wonderful meaning to us and are great conversation starters. We've slowly migrated north from Virginia to DC to Pennsylvania - and I'm hoping that's as far north as it gets!
I put them up using - you guessed it - Command Strips! If you caught my post on these babies last week, you might recall that I have a slight love affair with them - there are so many uses for them, and putting up lightweight art is a natural one. The walls on that side of our house are plaster, which can be a pain the booty to hang stuff on, so the Command Strips were definitely the right thing for this job.
I attached one medium-sized picture hanging strip (the ones that act like velcro) to the back of each one and stuck them right on the wall. It couldn't have been easier. I love projects with instant gratification like this! (Especially when someone else has already done the hard work of making the art for you :).)
Now that wall is looking much more complete thanks to a little bit of string art.
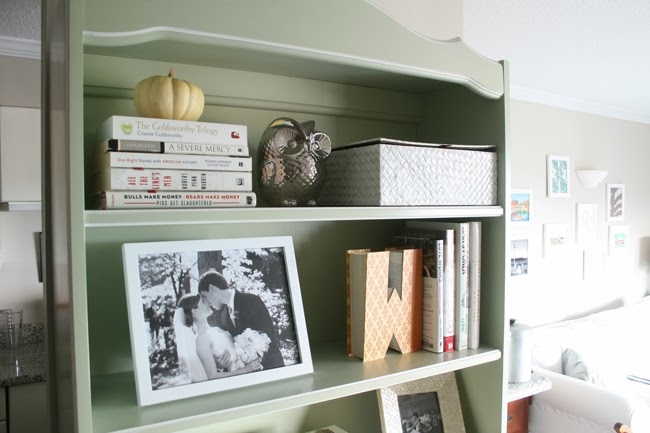
P.S. I seriously heart the two brass ram's head bookends that are holding up the cookbooks.
Back to the art though - to show you what a big difference art makes, take a look at the wall before...
...And after!
Much better. So that's the little update I have to share about our little house for today. Did you do any little projects this weekend that made a big difference in your home?
Showing posts with label entryway. Show all posts
9.08.2014
10.28.2013
Organizing Dog Walking Supplies {31 Days: Day 29}
We sure do love our little dog, Jackson (meet him here and here), but he comes with a lot of stuff! I've got most of his supplies under control in his designated bin in the front closet, but one thing I've never attempted to corral are his supplies for walks. It wasn't until I saw this post that I realized how much it bothered me that they didn't have a true home in our entryway. Sometimes, spending a few minutes organizing the little things makes all the difference, so that's what I did.
The furniture piece in our entryway (the same one that I styled the shelves of last week) often becomes a dumping ground for random paper, mail, keys and Jackson's leashes.
I decided that one thing I could easily clear off of it would be his leashes and the towel we use to wipe his paws. I had those two small metal buckets (from the Target dollar section a few years ago) and a couple of extra command hooks on hand, so I used those two things to make a little holding station.
In order to keep them accessible at the front door, I placed the two command hooks on the side of the furniture piece that faces the living room. That way, you wouldn't see them from the front door, but they're right where I need them to be.
I gave the adhesive on the hooks time to "cure" before hanging the buckets (they recommend an hour in the instructions) and I do find that that helps make sure they're secure. On an occasion or two in the past, I've been a little too eager to hang things on them before that hour is up and it's never worked out well!
I hung the buckets and placed Jackson's two leashes (one retractable and one short one) and his harness in one bucket, and the towel in the other. They're the perfect size for those items and nothing more! No chance to clutter up those buckets!
I'm so thrilled with how this worked out. Nothing like a little creativity and using supplies you have on hand to come up with a simple organizing solution. And the great part about using command hooks here is that we can always remove them later with no damage to that piece of furniture. Here's to hoping we keep this mini-system up!
Read the series from the beginning...

linking up to: Primitive and Proper, DIY Showoff, Rain on a Tin Roof, Home Stories A to Z, Uncommon Designs, If It's Not Baroque, Liz Marie Blog, Blissfully Ever After,Design, Dining and Diapers, Crafty Scrappy Happy, Craftberry Bush, The Shabby Creek Cottage, Tatertots and Jello, Serenity Now, It’s Overflowing, House of Rose, Love of Family and Home, Dear Creatives, Madigan Made, First Home...Love Life, Simply Dream and Create,Whipperberry, Sparkles and A Stove, Making Home Base, Naptime Creations, Southern Hospitality, Remodelaholic, Living Well Spending Less

10.23.2013
Styling Shelves by Shopping the House {31 Days: Day 23}
My entryway shelves were begging for some style and personality, so I did one of my favorite things - shopping the house - and pulled together a cozy and inviting look for fall. I want people to feel welcome and know that we truly live in our house. I think that in a small way, putting some effort into styling the shelves really helps with that. Do you know what I mean?
Before, I got my hands on them, these shelves were kind of a dumping ground for framed photos, which was kind of sad use of the space. I have a bunch of mismatched frames full of photos I love, but it was all looking rather haphazard. Take a look:
To pretty up these shelves, I grabbed all the (mostly) white books from the built-in bookcase in the living room, my favorite silver owl a large framed wedding photo, a W-shaped book (a gift from Chartreuse & Co during the Hometalk Halloween Hunt) and a few other items.
Now I'm no styling expert, but I'm loving how it all came together. I played around with a few different arrangements and ultimately settled on what you see here. The items on the shelves are all pretty different style-wise, but I think they came together nicely for cohesive look. There's lots of white with a touch of metallic and a small dose of color. It's quite a transformation from the frame graveyard above :).
Just goes to show that you probably have all kinds of items in your house that you could use to style tabletops, shelves or tables. You don't necessarily need to go our and buy lots of seasonal decor either. Maybe a little white pumpkin is all you need for it to say "fall"! All of us probably have accessories, books and other objects tucked away that are perfect for this kind of use. Don't be afraid to mix and match styles - a collected vibe is often the best anyway!
Do you have any great tips for styling shelves?
Read the series from the beginning...

linking up to: DIY Showoff, Rain on a Tin Roof, Home Stories A to Z, Uncommon Designs, If It's Not Baroque, Liz Marie Blog, Blissfully Ever After,Design, Dining and Diapers, Crafty Scrappy Happy, Craftberry Bush, The Shabby Creek Cottage, Tatertots and Jello, Serenity Now, It’s Overflowing, House of Rose, Love of Family and Home, Dear Creatives, Madigan Made, First Home...Love Life, Simply Dream and Create,Whipperberry, Sparkles and A Stove,Making Home Base, Naptime Creations, Southern Hospitality, Remodelaholic, Living Well Spending Less

10.07.2013
"Loving What You've Got" Home Tour {31 Days: Day 7}
I've been putting off this itty bitty city apartment tour for way too long. I've thought of every excuse under the sun: our apartment is so tiny and hard to photograph or this room's not finished or ugh, I don't even like what's going on with that room! But it's time to put all those thoughts aside and realize that it's never "done," and as the Nester says, "it doesn't have to be perfect to be beautiful." After all, this 31 days series is all about using and loving what I have and our home really does fit all of our current needs (and many wants too!). It may be tiny, but it's ours, and I am so grateful for it. So with all that in mind, I'd like to welcome you to our home! You'll see a couple of photos of each room/space today, and throughout the rest of my 31 days series, I'll show you some details of certain areas and some of the creative things I've done to make the most of them.
First of all, it's helpful to understand that our apartment has a really funky shape. Here's the floor plan to give you an idea of what I'm working with here:
We jokingly call it our triangular-shaped apartment. See why?
Now that you've seen the floor plan, let's get started!
ENTRYWAY:
LIVING ROOM:
This is where we spend the vast majority of our time. We love this space - even though it does have a funky shape to it. Furniture placement along the TV wall area is a little tricky due to the triangle shape, but we're workin' with it. We love having people over, and having this one "large" space (ahem, large as far as DC apartments go) to hang out in is awesome.
DINING AREA:
If you made a u-turn from that last photo of the living room, you'd run into our dining table. We designated this as dining space by installing that pendant light fixture over the center of the table. We didn't have space for a dining table in our last apartment, so I'm glad we can at least put a real table in this one and not eat all of our dinners on the couch! Who am I kidding, we still do that most of the time :).
We also have a multi-functional secretary desk on the wall opposite the dining table. We've repurposed the pull-down desk part of it into something that I think is pretty awesome, but you'll have to wait for another post to find out what it is!
BATHROOM:
Tiny, tiny (so there's not much to show you!) - but it's nice and organized. We're making the most of it by adding happy touches like the yellow floral fabric lining the back of the etagere.
BEDROOM:
I'm still loving the headboard I made a couple of months ago. I replaced the pleated paper wreath with the sunburst mirror I made (the how-to for that is over on Kayla Aimee's blog). See the second photo for that addition. If you look back at the floor plan, you can see that the wall our bed sits against has some interesting angles that make bedside table placement difficult. If you have any ideas on how to make these more functional, I'm all ears.
OFFICE AREA:
This sawhorse desk with upholstered top I made awhile back sits in the corner of our bedroom opposite the bed. It's a great workspace, and I especially love that it sits in front of a big ole window. I'm so glad we have it.
That'll doe it for the tour of our itty bitty city apartment. Hope you enjoyed it! Thanks to those who took my reader survey that suggested I add a home tour. I always love it when blogs have one, so it was high time I added one to my blog! Let me know if you have any questions about our home. I'll be going into more detail about some areas in future posts during this series, but I'm happy to answer anything you'd like to ask in the meantime!
Read the series from the beginning...
---------
linking up to: DIY Showoff, Rain on a Tin Roof, Home Stories A to Z, Uncommon Designs, If It's Not Baroque, Liz Marie Blog, Blissfully Ever After, Design, Dining and Diapers, Crafty Scrappy Happy, Craftberry Bush, The Shabby Creek Cottage, Tatertots and Jello, Serenity Now, It’s Overflowing, House of Rose, Love of Family and Home, Dear Creatives, Madigan Made, First Home...Love Life, Simply Dream and Create, Whipperberry, Sparkles and A Stove, Making Home Base, Naptime Creations, Southern Hospitality, Remodelaholic

7.02.2013
June Project Round-Up
It's that time of the month again - no not that time of the month! (bad joke?) - it's time to take a minute to look back at the projects I did on this little ole blog over the past month. This is a great way for you to catch up on anything you missed, or if you're new here, it's like a highlight reel, so you can click around easily and find posts that are of interest to you.
If you find you like what you see, you can always have my posts delivered to your inbox (fill in your email address in the "follow by email" form on the sidebar), follow MRFB using an RSS feed reader like feedly or Bloglovin', or find me on Facebook and Twitter. I'd love for you to stick around awhile.
So what did I have going on here in June? Well, let's start with my favorite projects...
The appliqued onesies and customized burp cloths definitely topped the list. I gave the two sets I made to a couple of my cute pregnant friends, and they were definitely hits! I love giving handmade gifts.
My other favorite project was the coral and gray dipped side table. It's just such a fun piece!
I started a new semi-regular series called "Defining My Style" where I'm showing off some pretty photos of homes I love - room by room - that I feel represent my style. Last month I covered exteriors and entryways, and showed the current state of our tiny entry to our apartment.
I DIY'd a whiteboard out of an old frame to hang on that little sliver of wall on the right side of the door to liven up that space as well as add some functionality. We've definitely been using it a lot!
The most viewed post in June was on how to create a font out of your own handwriting. I was actually pretty surprised by that - and I'm glad I'm not alone in thinking that was a pretty darn cool idea :).
Operation {Re}Organization continued kinda casually this month. I conquered some little things like the freezer and a trick to speed up your dishwasher routine.
And lastly, I designed this little print for the Lilly Pulitzer Style Soiree Series and it makes me smile every time I look at it. You can download it for free here if you've got a spot for it in your home, or if you'd like to give it as a gift.
Before I go, I'd also like to give a big thanks (and a virtual hug) to some wonderful blogger ladies who featured my posts this month:
And of course, thank you for reading my little blog!

Labels:
baby,
burp cloths,
craft,
defining my style,
DIY,
entryway,
exteriors,
fonts,
foyer,
freebie,
gift ideas,
graphic design,
home ideas,
how-to,
Lilly Pulitzer,
onesie,
our home,
recap,
tutorial,
typography
Subscribe to:
Posts (Atom)