Showing posts with label party decor. Show all posts

6.04.2015

Nautical Outdoor Party Inspiration & Ideas

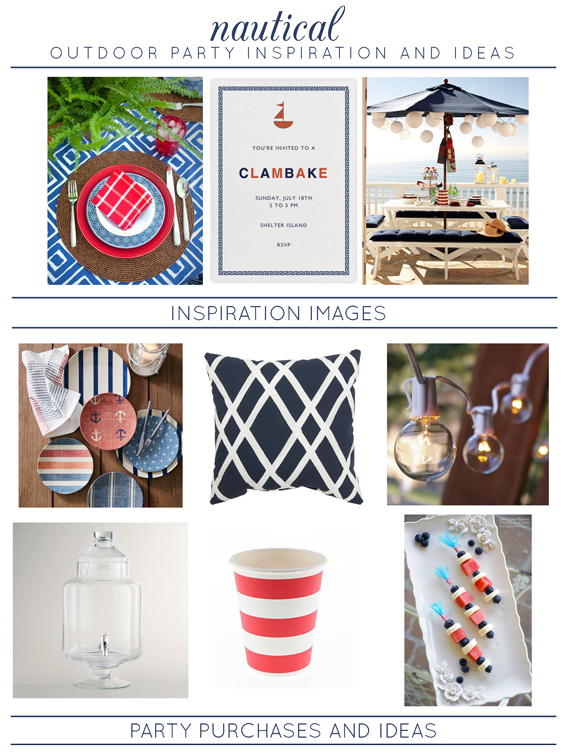
Inspiration Image Sources:

Party Purchases and Ideas Sources:

It's officially summertime, y'all! And with that season comes lots of outdoor shindigs. I for one love an outdoor party. It's casual, laid-back and fun - or it can be if you plan smart and do a few simple things to make it easy on yourself and your guests. I've learned a few things over the years and have a few pointers for you today on how I like to take on these parties. For fun, I added a theme (nautical!), but these pointers could certainly be used for any outdoor affair!

1. Look for inspiration. I find that it helps to have a vision for what you're trying to achieve, even if it's just a small gathering of friends on your back patio. We aren't talking about crazy, over-the-top Pinterest-themed parties, but just a little something to keep you on track. For my "nautical outdoor party," I found an image for a table setting from HGTV along with a table and umbrella from Coastal Style (via an old Pottery Barn image) that I loved. They both give off a casual vibe, but look pulled-together too.

2. Send out invitations a couple of weeks in advance. I think it's fun to send out an electronic invitation if you're inviting 10 or more people over. That's certainly not a hard and fast rule, but I think it makes it a feel a little more official and helps you keep track of RSVPs. I found an adorable invitation from Paperless Post (my favorite e-invitation site) that went along with my casual nautical theme.

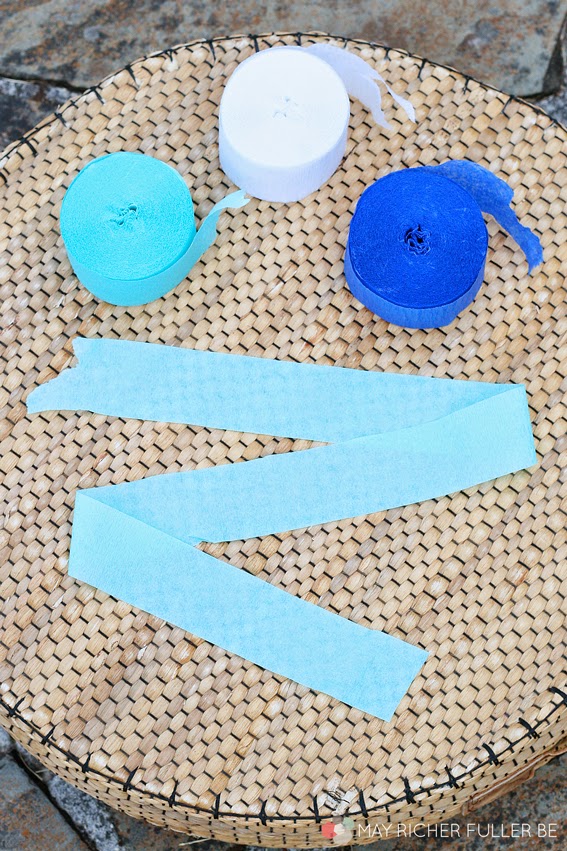
3. Gather your decorating supplies. Think about what you already have in the house that goes with your theme and use those things first. For an outdoor party, outdoor-friendly dinnerware like these melamine plates are handy (and unbreakable!), a few comfy pillows for folks to lean on, and some mood lighting - I love globe string lights for this. If you need to make any purchases, try to buy things you'll be able to use again!

4. Plan the menu. I am not a cook, so the simpler the better when it comes to the food and drinks. I'm always game for a potluck-style meal since people tend to bring their favorite yummy dish to share. As the host, I like to do one signature food item and one signature drink. This can make it feel festive and special. The inspiration I pulled for the special food item was for these adorable fireworks fruit kabobs. They're easy, but don't they look fancy? :) For a drink, it's easy to make a big jar-full and have people add alcohol if they'd like. This apothecary jar is perfect to house it in and then all you need are some cute cups and people can serve themselves. Easy enough, right?

Then all you need is to do is welcome people in, provide some comfy seating and good conversation...and enjoy yourself and your guests!

Ok, now who wants to throw a party? Sign me up!


Enjoy what you read today?  Enter your email address below to subscribe to May Richer Fuller Be!


Delivered by FeedBurner


Pin It!

5.28.2014

Crepe Paper Fringe Streamers {A Tutorial}


My mom's birthday was a couple of weeks ago and we had a "porch party" at the river house to celebrate. The screen porch on the river side of the house was a new addition last year and let me tell you, it's the best spot in the house once the weather gets nice! You can be outside without being outside, if you know what I mean. And since it doesn't get that cold here in Virginia except in the dead of winter, we use it three seasons out of the year.

Anyway, I'm rambling.


The reason I'm telling y'all about this is because we decided we needed to jazz up the porch to make it look festive for the party. I'd had these big fringe garlands on my radar for awhile and had been waiting for a good excuse to make some. Thanks for having a birthday, Mom! Unfortunately, small-town Wal-Mart didn't have wide crepe paper like the kind that's pictured on Oh Happy Day, so I had to modify their tutorial to make it work for my regular ole crepe paper rolls. These streamers were so easy to make - you really can't mess them up. I loved making them and thought it brought so much fun color to the porch for the party that I thought y'all might want to make it for a future shindig you're throwing. You can make a ton of 'em in a really short period of time - bonus points for that kind of party decor, amiright?!

Here's how I made my version of crepe paper fringe streamers:

Supplies Needed:

  • Rolls of crepe paper in various colors (I chose aqua, white and royal blue) 
  • Scissors 
  • Washi tape or other paint-friendly tape for hanging 

Tear off a strip of crepe paper in the length you need. I made a short one for the tutorial, but for the party, I made them really long so that they'd stretch a good distance.

Fold it in half...
{side note: the photo above looks like a face, doesn't it?!}

...then in half again so you have a nice short piece to work with. The more folds you make, the less cutting you'll have to do in the next step. :)

Take your scissors and make cuts all down the length of the folded crepe paper, leaving about half an inch uncut at the top. In other words, remember you're making fringe, not confetti!
 

When you finish making your cuts, you'll end up with a piece that looks like this:

Unfold it, and you'll have a nice, long, fringed streamer! Cute, isn't it?

Make a bunch of them and hang using washi tape (so that it doesn't damage a painted surface and is easy to take down). Many streamers equals maximum impact!

I filled the brick wall behind the food table with them for a free-form garland look:


And I couldn't resist adding a couple to the table itself.

I also looped a set of three around the whole screened area of the porch.


These took so little effort and had such a big impact on the space. I love that something so simple and easy turned a regular ole room into a place that was ready to host a fun shindig in just a matter of a couple of hours!

What are your go-to, easy decorations for a party? Anybody ever made the big fringe from over on Oh Happy Day?

---------


Pin It!

8.14.2013

Pleated Book Page Tassels {5 Days of Book Page Crafts: Day 3}


I hope y'all are enjoying this series so far. It's been really fun for me to come up with these projects and share them with you. Perhaps you've been inspired to make some of your own? I hope so! 

If you'd like to catch up or see the previous posts, here are day 1 (cone garland) and day 2 (flower pouf).

Today's craft - pleated paper book page tassels - is super, super easy and quick to churn out. I almost feel silly writing a "real" tutorial for them. They were loosely inspired by some tissue paper tassel garlands I've seen hanging around Pinterest like this one. The fun part about this book page craft is that you can customize and embellish them however you want. So the tutorial today is for a basic pleated paper tassel, but don't let that stop you from being creative with them! Paint 'em, washi tape 'em, dip dye 'em...go crazy!

Supplies Needed:
  • Book pages
  • Tape or stapler
  • Optional: extras to embellish (washi tape, paint, dye, ribbon, colorful twine/string, etc.)
(Yes, that's really all you need for the basic tassel!)

Step 1: Pleat book pages.


Accordion fold a single book page either long or short-ways depending on how long you want your tassel to be. You can also vary the width of your pleats to make either a fat or skinny tassel.

Step 2: Fold the pleated book page in half.


Self explanatory :).

Step 3: Pinch together and secure the folded end.


I used washi tape to do this since I wanted to add a little festive color and definition to the top of the tassel, but you can also throw a staple in there about a half-inch from the top if you want to keep it simple, or have another idea for embellishing them!

Step: 4: Fan out the loose end of the tassel to give it some volume.


And that's it! It's easy to make a bunch of these little tassels in about an hour's time. I think it took me all of 10 minutes to make several? So if you need a quick, last-minute party decoration, this is a great one!


I can think of so many uses for these cute little things: string them together to make a garland, clip them onto the edge of a table cloth for party decoration, drop a bunch into a clear bowl as a part of a centerpiece...the ideas could go on and on!

What would you use them for? And how would you embellish them? Leave a note in the comments! I love seeing your creativity at work :).


Pin It!
Related Posts Plugin for WordPress, Blogger...
Blogging tips