Showing posts with label ornaments. Show all posts

11.13.2014

Instagram Wood Slice Christmas Ornament


We're on to Day 2, friends! For an explanation of the next 11 days of crazy Christmas crafting, head on over here to this post. One thing I forgot to mention is that we're having a big ole LINK PARTY at the end of this series and we'd love for all of you to share your handmade ornaments! It'll be on Sunday, November 23rd, so mark your calendars.

Today's craft takes those lovely Instagrams off of the interwebs and puts them into your hands..well, onto your tree, actually! In case you didn't figure it out from the first photo above, we're going to be Mod Podging Instagrams onto wood slices. I still love having physical prints around, so I printed a few of my favorites off at my local Walgreens using my favorite Instagram printing app called Printicular. They're ready in an hour, which is amazing.

Besides the printed Instagrams, the supplies* you'll need for this project are:
  • Wood slices (I love working with them, so you'll be seeing several ornaments using them in the coming days!) 
  • Pen or sharpie
  • Mod Podge 
  • Paint brush
  • Drill with a small drill bit (optional)
  • Twine or ribbon (I like to use baker's twine!)

I sliced up a bunch of wood slices from some firewood at my in-laws' house last year, but you can get these from craft stores or Amazon (here are some in a pack of 50 or here's a pack of 20 {affiliate links}). Since every wood slice is going to be a slightly different shape, I put the wood slice on top of the Instagram I wanted to use and traced around it so it would fit nicely onto the wood slice. This photo was from a trip we took to the beach on a freezing day. It was so fun, but we were numb from head to toe by the end!


I cut the photo out making sure to cut slightly inside the traced line so that there would be a nice wood border around it to frame it.


I brushed a layer of Mod Podge onto the wood slice first, positioned the photo in the right place, and then brushed a coat of Mod Podge on top of the photo. Make sure you cover the edges well so that the photo doesn't curl up on you.


To hang the ornament, I used a small drill bit to put a hole in near the top of the ornament, threaded baker's twine through it and tied it off at the top to make a loop. If you don't have a drill handy, no problem! Just hot glue some twine or an ornament hook on the backside to hang.

I'd love to make one of these every year with a favorite photo - it would be a great way to add a personal touch to the tree!


Be sure and check out the other awesome Day 2 ornaments...links are below!
christmas-ornaments-handmade-diy-ideas Day 2

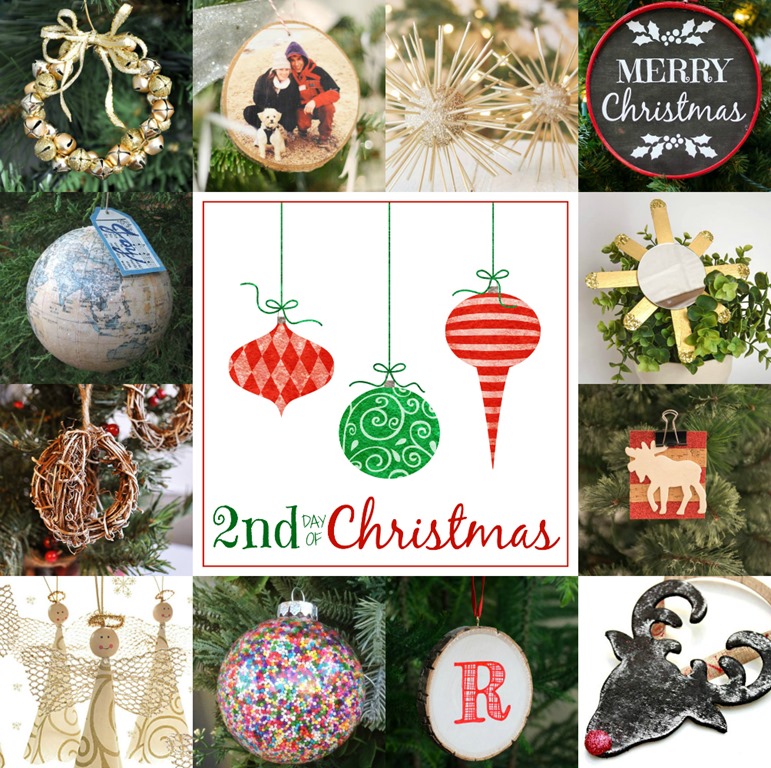
Easy Gold Jingle Bell Wreath by Serendipity Refined | Instagram Wood Slice Christmas Ornament by May Richer Fuller Be | Modern Urchin Ornament by Thrifty and Chic | Embroidery Hoop Ornament by It All Started With Paint | Joy to the World Ornament by Lovely Etc. | Sunburst Mirror Ornament by Whats Ur Home Story | Painted Rattan Ornaments by Cherished Bliss | DIY Moose Ornament by Bigger Than The Three of Us | Angel Ornament by Remodelando la Casa | DIY Sprinkle Ornament by The Happier Homemaker | Monogrammed Wood Slice Ornament by All Things G&D | Chalkboard Rudolph Ornament by Mom 4 Real


---------


*Note: some or all of the links are affiliate links, which means that I may make a small commission off of your purchase (at no cost to you). Thanks for supporting May Richer Fuller Be in this way!


Pin It!

12.17.2013

Wood Slice Ornaments {More Christmas Fun!}


Y'all, I've turned into a crazy Christmas crafter this year - I don't know what's gotten into me! You'd think that during one of the busiest times of the year, the last thing I'd want to do is pull out a bunch of supplies, cause a big mess (that I'd have to clean up), and make stuff, but it brings me so much joy on these cold days! I've been addicted to The Sing Off (anyone else watching?), which is a perfect show to have on in the background while crafting away.

So what did I craft this time? Oh, so nice of you to ask! I crafted, well...some more wood slice ornaments! I had some slices left over from the monogrammed ones I made a couple of weeks ago, so I thought I'd try a few other things with them. I came up with three more ideas, and I hope these will inspire a little bit of holiday creativity in you - if you're looking for that! If not, you can always pin 'em and save 'em for a rainy day :).


I used only things I already had around the house, and I'm sure that you've got similar things around you could use to make these. Crafting with supplies you already have = awesomely free crafts. If you need some wood slices to work with, take a look your local craft store or Amazon (here's a pack of 20 and here's a pack of 50) or your local craft store.

Other supplies I used for these included:


The first, and probably easiest (though they all are, really), is the stamped wood slice with the phrase, "comfort and joy." As I talked about in my Christmas home tour, those words have really resonated with me this season. I think that's what Jesus brought us when he came to earth - comfort and joy. So those words are now commemorated on this ornament.

I got out my gold stamp pad and alphabet stamps and stamped away - nothing too fancy or precise, which is my favorite part :).


I drilled a hole in the top and threaded some baker's twine through it for hanging. Since these words have been speaking to me this year, I also stamped "Christmas 2013" on the back to help me remember because let's be honest, years have started to run together!


The other super easy ornament I crafted was a Mod Podged Instagram ornament. I have a pile of Instagrams I had printed through the Printicular app (they print to Walgreen's one hour photo!), and I chose to craft with this one of our little family on the beach last February when it was brutally cold, but we were having a blast anyway. Great, great memories.


Place the wood slice on top, trace around it with a marker and cut it out just inside the lines so it fits nicely on the wood slice.


Use a paintbrush to put Mod Podge on the wood slice itself and on the back of the photo, and then on the top of the photo once you've got it positioned on the wood slice.


Let it dry, then drill a hole in the top so you can hang it.

The last ornament - a stitched monogram wood slice - is also simple to make, but just takes a little eye-ballin' and drillin'. I'd already painted this wood slice gold when I made the painted monogram wood slice ornaments, so I figured I'd put it to good use with another version of a monogram :).

I did a "W" for our last name, so I put holes in strategic places to make the "stitching" easy.


It was looking a little plain just with the baker's twine W, so I added a snazzy little border around the edge with a white paint pen. I think it worked out pretty well!


These ornaments fit in nicely with the metallic, white and natural Christmas theme I've got going on this year.


Of course, I had to immediately add them to the tree :).


Love 'em all!

Have you made any ornaments this year that you're crazy about?

P.S. If you're not the crafty type, no worries! These crafty Etsy makers can do the hard work for you. Shop the links below for some of my favorite wood slice ornament finds on Etsy:


---------


*Note: some or all of the links are affiliate links, which means that I may make a small commission off of your purchase (at no cost to you). Thanks for supporting May Richer Fuller Be in this way!


Pin It!
Related Posts Plugin for WordPress, Blogger...
Blogging tips