6.07.2013

Creative Bits | 21: Tips on Styling Shelves from Nalle's House

Have you ever run across a blog that just draws you in? That's beautiful and inspires and keeps you wanting to come back for more? If you're an avid blog reader, I'm sure this is familiar territory to you. It is to me, which is why my Google Reader list keeps growing! Most recently, this happened when I came across a blog through a few link parties I browse and submit to every week. I found myself clicking on Anu's (the author) links and saying to myself, oh, it's THIS blog again? (In a really good way.) Her projects, style and home are all so inspiring to me. So allow me to introduce you to Nalle's House if you don't know it already.

Anu has graciously allowed me to use one of her photographs for the Creative Bits series so I can point out a few creative tips on styling shelves. And these tips aren't just for shelves - they translate to styling most any space in your home.


I love the way she incorporates so many different pieces into the space without overwhelming or crowding it. The variety keeps it interesting (did you see the toy car on the second shelf?), but everything flows from one shelf to the next. It's just plain nice to look at, wouldn't you agree? 

Oh, and if you're curious about that pretty square plate on the bottom shelf, that's a DIY project. She wrote about it, instructions and everything, over on this post. Take a look! And while you're there, be sure to browse through her home tour and other projects. She does beautiful work.

Have a wonderful weekend!

photo source: Nalle's House


Pin It!

6.06.2013

Defining My Style: Home Exteriors

{BHG}

Hey there y'all! I'm switching gears majorly from the last couple of days' posts... away from baby gifts and toward home design. Exteriors to be exact. So if babies aren't your thang (yep, I definitely used the word "thang"), I hope that home design might be :).

Ever since I started reading shelter magazines years ago, and more recently, pinning like crazy to Pinterest, I've been collecting images that "speak to me." That might sound a little strange, but I think you know what I mean. Each of us are drawn to certain styles, or aesthetics. These are things that catch your eye, make you smile, or inspire you. Yes?

If you are an "inspiration collector" like I am, have you ever gone back and looked at a bunch of your favorite images/magazine pages/Pinterest boards to see what they have in common? This is an excellent exercise to do to help define your style, especially if you're looking into renovating your home or redesigning a room. Though none of these things are in my immediate future, I still love to do this - that's why I titled this post "Defining My Style."

I thought it might be fun start a new, semi-regular mini-series to give you a peek into my design style. And what better place to start than the outside? We can move our way into various interior spaces in future posts. But, I don't want this to be all about me and my style. I'd love for you to join in on the conversation in the comments or on my Facebook page. Tell me about the styles you love!

So let's get started. I'll show you some "curated" photos from my collection of home exteriors (i.e. my Exteriors Pinterest Board) and I'll point out my favorite elements and some common themes as we go along. Sound good? Super.

1. Cedar Shingles.

Oh how I love these. I think this comes from many years spent at a summer camp in New England where nearly all the houses were shingled. I love the simplicty, variation and texture, and the way they age (turning from their natural cedar to an ashy gray). I like them whitewashed or painted too.


2. Blue or Green Painted Doors.

Doors painted in light, airy, coastal colors (blues and greens, especially) are my absolute favorite. You've probably noticed lots of aqua doors in these photos, which is my top color choice.


3. Shutters.

Simple, craftsman-style board and batten shutters are my current favorite. They add a modern vibe without being non-traditional. I have both traditional and modern design leanings, so these fit both of those styles well.


4. Gray Exterior with White Trim.

This classic color combination will never go out of style. Whether it's the gray from the naturally aging cedar shingles or paint, you can't go wrong. I tend to prefer grays with cool rather than warm undertones.


5. Large Front Porch.

A large front porch (preferably wraparound) is most certainly on my "one day" wishlist for a home. There's a white plantation-style home near my parents' that has a porch that wraps three-quarters of the way around and I just stare at it (and drool a little) every time I drive by. Gorgeous. I'll have to snap a photo of it sometime.

{BHG}

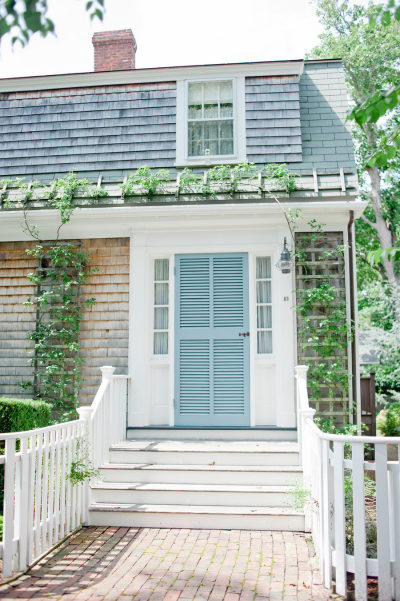
Overall, if I had to give my exterior style a name, I'd go with "coastal craftsman." Can you see it?

This is a fitting last photo welcoming you into the house, since it's where we'll go next on our little "defining my style" tour. Next up - entryways! Be back soon with that one. In the meantime, tell me a little bit about your style!

Pin It!

6.05.2013

Customized Burp Cloths Tutorial


**Announcement: Looking for a unique baby gift (that you don't have to make yourself!)? Take a look at my new line of onesies from CSW Designs! Choose your animal, color and pattern (chevron or polka dot). Perfect for the little ones in your life! 
---------
Happy Wednesday, y'all! I hope you enjoyed yesterday's appliqued onesie tutorial. I know I left you in total suspense yesterday by not showing you how to make the matching burp cloth (ha!), but don't worry, today's the day. This project is much easier than the onesie, so if you were a little intimidated by all the intricate stitching yesterday, I think you'll have no problem with these - it's all straight lines.

Let's get to it, shall we?

Supplies Needed: Customized Burp Cloths

  • Prefold cloth diapers
  • Fabric
  • Measuring tape
  • Sharp scissors
  • Iron (optional)
  • Sewing machine
  • Thread

Prefold cloth diapers seem to be the material of choice for these burp cloths according to other similar tutorials I've seen out there in the blogosphere. They're a great size, absorbent (you'd hope!), and the prefold makes it easy to fold and stack them. I bought a ten-pack of Gerber prefold diapers from Target for this project.

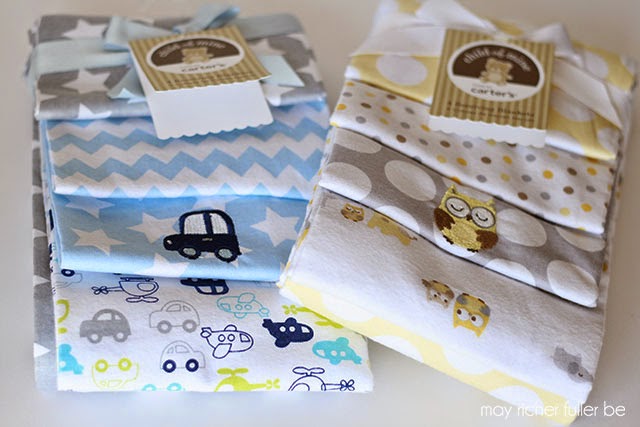
 And as you saw yesterday, I used these Carters receiving blankets for the fabric (more on that choice in yesterday's post).


After I washed, dried and ironed all the materials, I got to work cutting out a rectangular piece of fabric for the burp cloth.

I measured the width and length of the middle area of the cloth diaper to determine the size of my fabric. The middle section is thicker and more pad-like (since yes, it's a diaper!), and I chose to sew the fabric just down that section. It measured about 18" by 4". I cut a slightly larger (19" by 5") piece of the gray and white star fabric so that I had a little extra to fold under for a clean edge.


The next step is optional, but I recommend it because it'll make your sewing simpler and you'll get a nice,  straight edge.

Take your fabric and lay it down on your ironing board with the wrong side facing up. Fold one of the edges over about 1/4" to 1/2" and iron down. Repeat this on the remaining three sides. The photo below shows an example of one edge folded and ironed flat:


Lay your fabric with its nicely ironed, flat edges down on the middle of the diaper. Line it up so that it runs right down the thick middle area. Start sewing in one corner, placing the needle down about an 1/8th of an inch from each edge. You're basically sewing a continuous rectangle around the inside edge of the fabric. I didn't take a great photo of this, but here's a diagram to show you what I mean:

In this photo, you can see how close my needle is to the edge:


Once you finish sewing that one rectangle, you're done! That's it!

When you finish, fold the diaper up in thirds, and then in half,  keeping the pretty fabric on the outside, and you'll have yourself an adorable little burp cloth! Folding it up like this makes for a pretty presentation :).

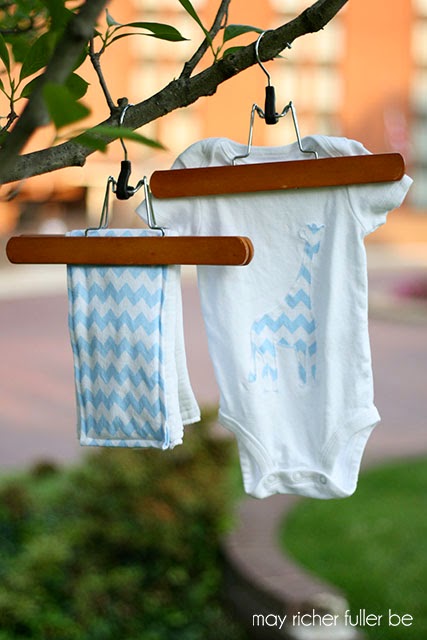
Here's one with the blue and white chevron pattern by itself...


 ...and with its matching onesie...


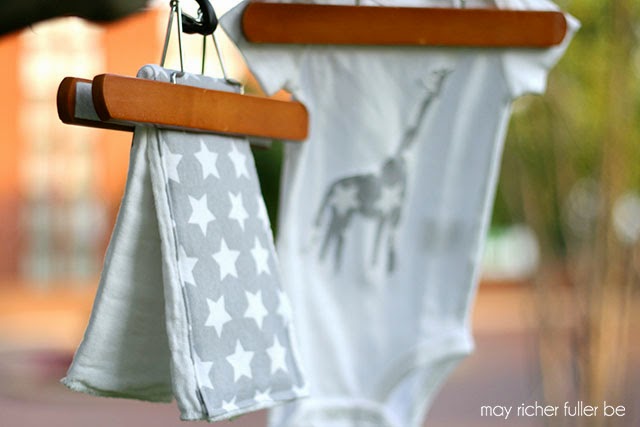
...and here's the one with the gray and white star fabric complete with its matching appliqued onesie in the background. 


That about wraps it up for these two DIY baby gifts. Hope you enjoyed these little tutorials. As always, let me know if you have any questions. If you make one of these yourself, I'd love to see it!

---------


Pin It!

6.04.2013

Appliqued Onesie Tutorial


**Announcement: Looking for a unique baby gift (that you don't have to make yourself!)? Take a look at my new line of onesies from CSW Designs! Choose your animal, color and pattern (chevron or polka dot). Perfect for the little ones in your life! 

---------
Last week I mentioned that seven (count 'em!) of my friends are pregnant right now, and two more delivered baby girls a couple weeks ago. That means there's lots of celebrating to do, so I've been thinking about some budget-friendly gift ideas to welcome these little ones to the world over the next few months. I love the idea of handmade gifts, and one of my favorite ideas so far is "customized" onesies (you can read about several adorable versions in this post from last week).

After writing up that post, I got the DIY itch and wanted to try my hand at my own version. So over the weekend, my sewing machine and I had a date and I got to work on a couple of sets of appliqued onesies and burp cloths. This was my first try at appliqueing anything, but I think they turned out mighty cute, so I thought I'd share a "how-to" in case you're in the market for some handmade baby gifts.

I took the majority of my photos with the onesies and burp cloths together (because they're just so darn adorable next to each other), but I'm thinking that today's post will turn into a novel if I write up both tutorials in one post. So let's consider this Part 1 and I'll share the tutorial for the burp cloths tomorrow. Sorry for the teaser title in the first photo! (*Update: the tutorial is up! You can find it here.*)

Supplies Needed: Appliqued Onesies

  • White onesies
  • Fabric for applique
  • Template or pattern for applique
  • Double stick tape
  • Sharp scissors
  • Iron-on hem tape (fusible webbing)
  • Sewing machine
  • Thread

As far as materials go, I bought a four-pack of white size 6-month onesies (Carters "bodysuits" from Target - similar to these). Gosh, I can't get over how tiny these things are - and therefore how tiny the bodies are that go in them!


For fabric, I picked out two sets of flannel receiving blankets from Walmart. I can't find a link to these particular ones online, unfortunately. The fabric is super soft, and the patterns are adorable and very baby-appropriate without being too baby - you know what I mean?

I washed, dried and ironed everything before starting to avoid any possible shrinkage later on and of course, to make sure they were clean.

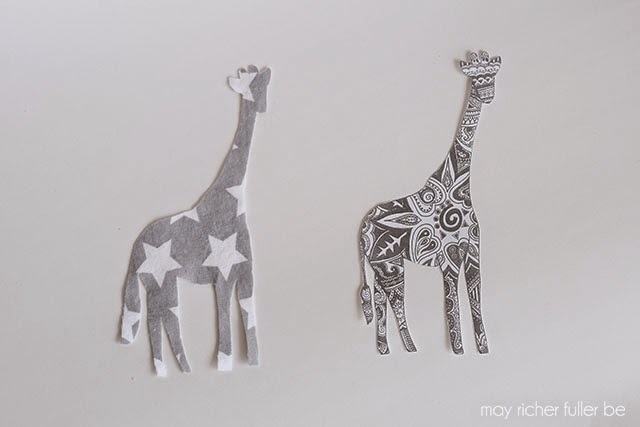
I chose a giraffe for the applique and found a template using Google image search. Try searching either "giraffe coloring book page" or "giraffe clip art" for best results. The key is to find a simple shape, even if your shape is inherently complicated (hello spindly giraffe legs). A giraffe was rather ambitious for a first-time applique-er like myself, but I found a simplified one that ended up working out nicely.

Once you find your shape, print it out at an appropriate size and cut it out. This will be your template. Take your fabric (I chose this gray one with white stars) and cut off a piece that's just a tad larger than the template. It'll be easier to work with than a large piece.

Put a couple of pieces of double stick tape on the backside of the template and stick it to the fabric. This will keep the template in place while you cut the shape out of the fabric.


Use sharp scissors to cut the fabric out along the lines of the template. (You could also trace the outline of the template onto the fabric first and then cut it out. Whatever works best for you.)

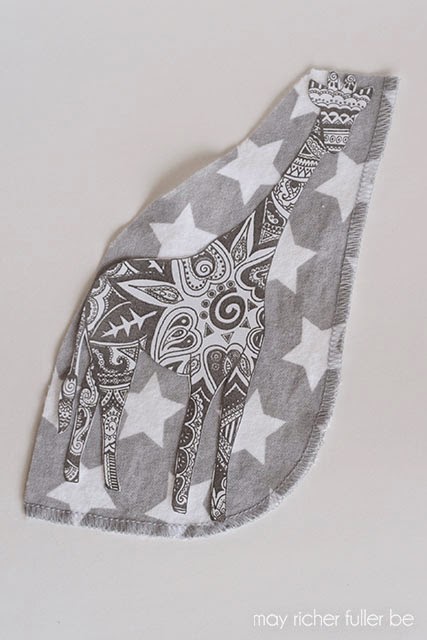
Here's my fabric giraffe next to the template after I finished cutting it out:


Line your fabric shape up on the center of the onesie. You can measure this out, but I just eyeballed it since a giraffe isn't symmetrical anyway.

Take some iron-on hem tape (or fusible webbing) and cut small pieces to fit the lines of your shape. I used light duty hem tape, which is practically invisible because it's so light - and I don't have any photos of this step because of that! It doesn't show up well. The light duty stuff worked fine because I knew it wasn't going to be the only thing adhering the giraffe to the onesie. It's really just a way to keep it in place while sewing. Place the pieces between the fabric and the onesie by holding down one area of the shape and lifting up another area to keep it in the right position (i.e. hold the body down while lifting the neck of the giraffe). Following the manufacturer's instructions, iron on the hem tape.

Then comes the fun part - sewing!! Actually, this is the trickiest part, but once you get the hang of it, it goes pretty quickly. You do need some basic sewing skills here, so if you're a beginner, I'd suggest starting with an easier shape than a giraffe. Not that I don't think you could do it, but I'm just trying to prevent potential frustration :).

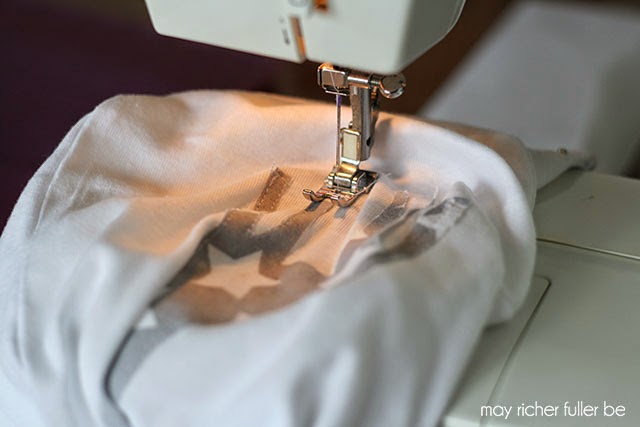
First off, the goal here is to sew along each edge of the shape as closely as you can so that it's securely attached to the onesie. For the giraffe, I sewed up and down each leg and around the rest of the body. You'll be able to see the thread clearly the next couple of photos.

As I was sewing, I came up with three tips to help this step go as smoothly as possible:
  1. Make sure you DO NOT sew the front and back of the onesie together. This would make it very difficult for a baby to wear :).
  2. Sew continuously around the entire shape. This will provide the most "finished" look.
  3. The easiest way to turn corners is to keep the needle in the down position (inserted into the fabric), lift the foot, turn the fabric, put the foot back down again and continue sewing normally. 


After about 15 minutes of careful sewing, my onesie looked like this:
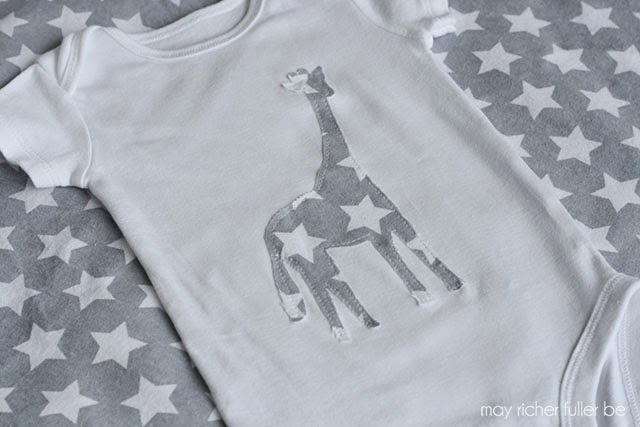


Success!

I made a total of two onesies and two matching burp cloths this weekend. All in, I'd say it took me about three hours total, not including the prewashing/ironing step. Definitely worth it for this adorable outcome!

Here's the set made from the gray and white star fabric...


And the one made from the blue and white chevron fabric...


I can't wait to give these as gifts!

Like I said at the beginning, the tutorial for the burp cloths is coming tomorrow (*update: the tutorial is up! You can find it here.*). These are WAY easier than the onesies. If you can sew a straight line, you can sew these. Promise.

Let me know if you have any questions or if I can clarify anything!

---------

featured on:


Pin It!

6.03.2013

May Project Round-Up


I feel like I say this every month, but man, May flew by in a flash. Welcome, June! I'm excited summer is here - are you?

Before May is a distant memory, let's take a few minutes to look back at the projects I posted about on the ole blog this past month, starting with this fun way to display printed Instagrams using pants hangers. (I print my Instagrams to Walgreen's One Hour Photo using an app called Printicular. It's so easy and inexpensive.)


My favorite project of the month (and the most popular one with y'all as well) was the wood shim pendant light. Though it ended up being a little more challenging than I anticipated, I love how it came together in the end, and seeing it hanging over our dining room table really makes me happy. If you missed any of the posts about it, you can catch up here: one, two, three.


I revamped the every-other-Friday Creative Bits Series a bit, and shared a really pretty office space and a beautiful living room this month. This has been a fun way to connect with other bloggers, so if you have a space you think has a few Creative Bits of its own, send a photo of it my way and I might use it in a future post!


Operation {Re}Organization continued this month. This time I tamed the chaos of the front hall closet in a series of three posts (inspiration, before/strategy and after). What was a disaster area is now sooo much more functional and even has secret storage for sporting equipment. Did any of y'all tackle an organizational project this month?


And of course you can't have "function" without "fun" (bad pun, sorry), so I added these blue watercolor-y/painterly labels to make sure things are easy to find and are returned to their proper homes. There's a link to download a free set of blank labels too if you need some!


I also took on a new cleaning plan in Operation {Re}Organization this month. The first week has gone pretty well so far. Since I technically implemented this plan last Tuesday, I technically have one more day to do my last weekly task...clean the bathroom...ugh. At least once it's done I'll have the satisfaction of checking that box once I'm done though - thanks to my handy list here :).


Are you a Kate Spade fan? If so, you'll want to check out the Kate Spade Style Soiree hosted by Jenna and others last month. I joined their party and created a Kate Spade-inspired gold zig zag pitcher. Who doesn't need a little gold in their lives?


To celebrate my mom this month on Mother's Day, I took some photos with my brother, Instagrammed them, and created a photo strip style card for her. It was a fun project for me, and she loved it! Win win.


Another one of my favorite projects this month was this DIY iPhone speaker made out of...a toilet paper roll. Talk about doing a project "on the cheap" :). I use it all the time!


Last but not least, I shared a recipe for banana avocado bread. Head on over to the post to see why I used avocados, of all things, in this delicious quick bread.


That about wraps it up for May! Thanks, as always, for reading. I'm so grateful to each of you for stopping by my little corner of the blogging world.

And thanks to these wonderful blogs for featuring my posts this month:


Come on back tomorrow for a fun project I did over the weekend. Want to know what it is? Go back to this post from last week for a hint!

Pin It!
Related Posts Plugin for WordPress, Blogger...
Blogging tips