Showing posts with label desk. Show all posts

6.18.2014

How to Add Greek Key Trim Using Washi Tape


Happy hump day, y'all! First of all, thanks for joining in with me on the excitement of finding our new home in Philly! I can't wait to get there and start making it our own next month.

Today I wanted to show you a quick and easy project I did over the weekend to give my DIY upholstered sawhorse desk a little more visual interest. I've been happily working at this desk for about six months now and since I'm the only one who uses it, I've been thinking about ways to jazz it up a bit. I've always loved washi tape and thought that using it to add a little Greek Key trim would be a simple and sophisticated touch.


Pin It!

11.11.2013

Office Nook Mini-Makeover

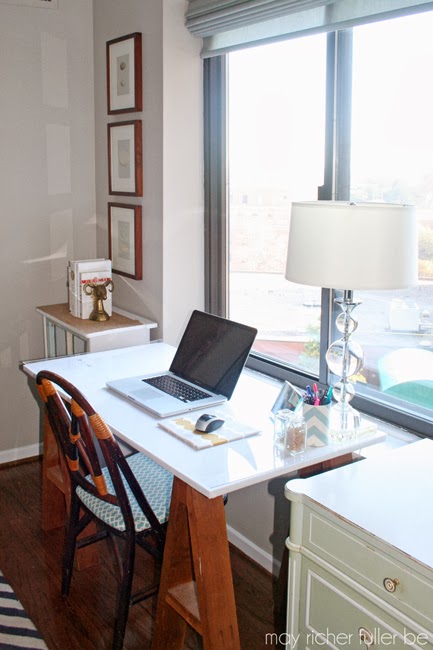
DIY sawhorse desk with upholstered top

Good morning friends! I'm excited to share my mini-makeover for the office nook in our little apartment. If you missed the introduction for why I'm giving this area a refresh, head on over to this post and then come back and read this one :).

After the work I did on this area over the past week, I feel much more prepared to start working from home next month. It's feeling a lot more like an office area and less like a dumping ground for random stuff, which is certainly an improvement! I haven't received any of the equipment for my new job yet (like a scanner/printer, computer, etc.), so I'm sure that I'll need to make some adjustments once that stuff arrives, but for now, I'm really pleased with how things are looking.

Let's take a tour, shall we?

The desk is a piece that I DIY'd in January year using some of my grandparents' old sawhorses and a piece of plywood I upholstered with an old shower curtain. You can see lots of photos of it in this post and read about how I made the upholstered desk top in this post. It's continues to be one of my favorite projects because I could customize it to fit our needs and it was inexpensive to do.

DIY sawhorse desk with upholstered top

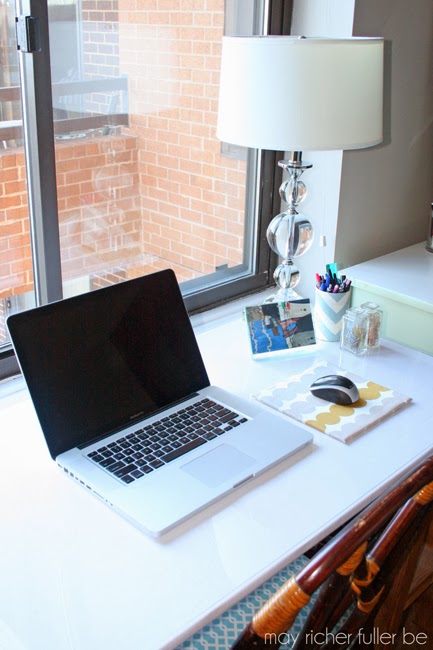
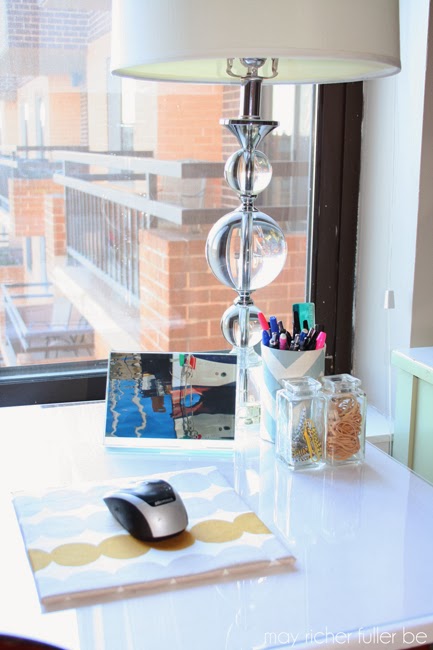
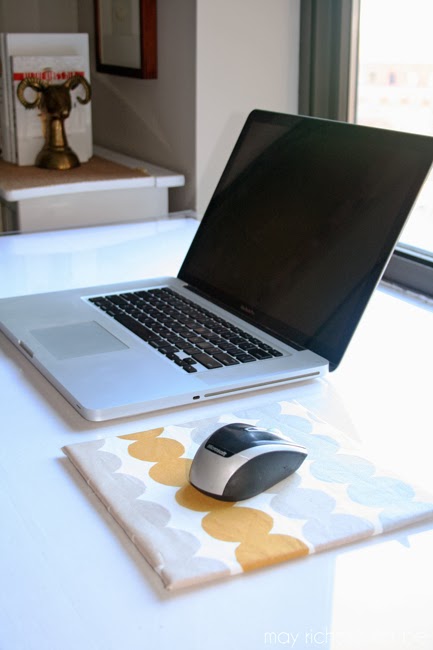
I didn't do a whole lot to the desk, but I did make a happy-looking silver and gold mouse pad (tutorial coming later this week!) and added a few office organization items.

Desk vignette


Desk with DIY Mousepad

A new addition to this area is that small piece in the corner, which is something that my amazingly talented father-in-law built for us using an old window last year.

Old window turned side table with books

I found that old window near our old apartment in Richmond. I was at a loss on what to do with it, so he took it and said he'd make something for us out of it. He ended up building this cool side table and I LOVE it - the light colors of the chippy paint are so pretty to me, and the top makes for a perfect bookshelf next to the desk.


And yes, that's a piece of shellacked-on burlap on the tabletop. Such a creative touch.

I borrowed a couple of books from our living room to act as placeholders until I bring my genetic counseling reference books home from my current job because I wanted to show off these awesome brass ram's head bookends I took from my parents' house(!). My mom was planning on selling them in the yard sale we had a month or so ago, but I claimed them instead. Aren't they cool?

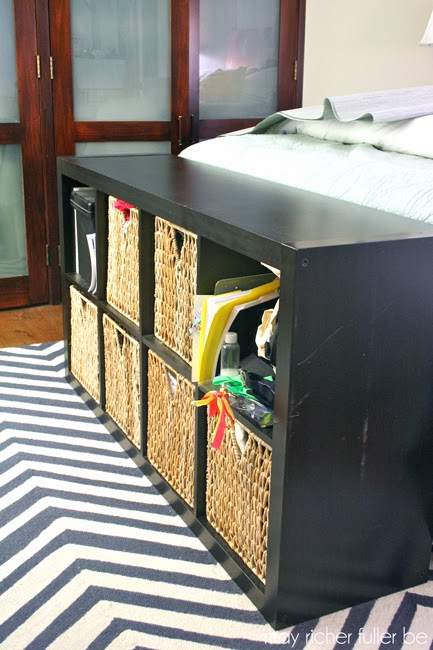
The best part of this office update though is the new look of our Expedit bookshelf. I took it from heavy and dark to light and bright. Before, it was very functional and had great storage, but it was a bit of an eyesore and was no longer in great condition...

Expedit panel curtain makeover - before

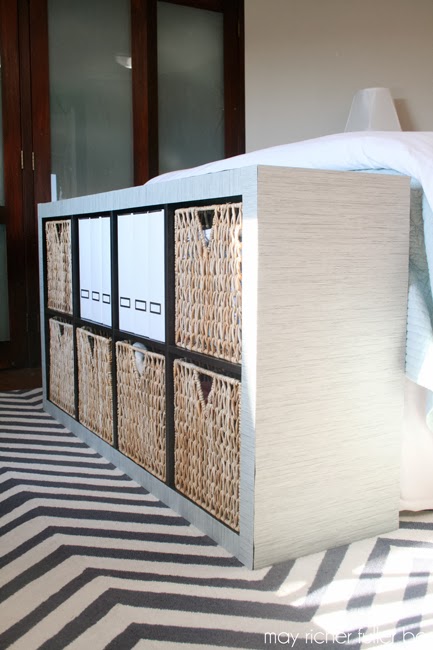
Now that I've updated it, it's not just functional, it's functional and pretty! It fits much better with the "light and bright" look I am going for with this update. And I'll bet you'll never guess what I used to update it - a grasscloth-esque panel curtain from IKEA!


Expedit panel curtain makeover

Much better now, huh? Not only did I "upholster" this piece with a panel curtain to give it a new look, I also took some time to reorganize those baskets in the cubbies to make some room for more office items. I'm going to leave you in suspense on details though today - a longer post with specifics on this whole makeover is coming tomorrow! :) {UPDATE: Here's the post!}

That wraps up the office nook mini-makeover tour. If you have any questions about what you've seen so far, please leave me a comment and I'll get back to you!


Pin It!

2.01.2013

January Project Round-Up

Well hello February! And hello dear readers!

Last night, I was looking back at my January posts and noticed that I did a lot of projects this month. Hooray for accomplishing things! So today, I figured I'd do a nice little project round-up so that you can easily go back and take a look at anything you may have missed. Let's begin, shall we?


I started off the new year with a wood wreath I made with my father-in-law and sister-in-law. I had a blast using power tools to create this guy.


Operation {Re}Organization commenced in our house, starting with the office "nook." If I'm as successful at hitting all the other problem areas as I was with the office, I'll be pretty happy! Now the key is to keep the motivation going...

The first project involved our office supplies. What used to live in about eight different containers all over our house now lives in three, and because of that we now have several empty drawers and boxes. Consolidation, baby. I'm so into that. Can't wait to utilize some of those storage containers for other projects.


Our gallery wall got some special attention this month. I made a little art for it in the form of this (free!) art print...

...and this ampersand. They make me smile every time I see them. 


Some old frames got a new home on the gallery wall once painted white.


I finally got fed up with the disaster that was our junk drawer, and gave it a good clean-out and organized it.


The major project this month was finally finishing our desk for the office nook. I am so, so happy with the results.


After the desk reveal, I showed you how I made the top since it's a bit out of the box - it's upholstered! Yes, upholstered. I'm glad I took a chance on that because I think it turned out great.


For the final office project of the month, I corralled and filed our important papers. To add a little "pretty" to this rather mundane area, I used a happy green file box and made some washi tape labels. Gold polka dots? Yes please.


And that'll wrap up my January projects. Can't wait to see what February brings.

Hope y'all have a great weekend!

Pin It!

1.28.2013

Operation {Re}Organization: The Desk Reveal

If you're visiting from IHeart Organizing, welcome! I'm honored that Jen chose to feature my desk on her blog! I'm so glad you're here. Say hello and stay awhile :). 

I am super excited to share our newly finished office desk today. This project has haunted me since we moved to DC this past summer and I'm happy to say that it's finally finished! As I've mentioned before, we don't have an office, per se, in our apartment - it's more of a corner. In our bedroom.

In our old place in Richmond, we had more space (thanks to cheaper rent there!) and room for a whole office area in our spare bedroom. Without that extra room here, we had to carve out an office "nook" as I like to call it. We needed a desk in that room for a variety of reasons, but I didn't want to spend a lot on a new piece of furniture, so I came up with an inexpensive solution...plywood on sawhorses. Remember this picture I showed you a couple of weeks ago?


Functional, but not pretty. (The mess around it is a whole separate issue...)

Now take a look at our newly finished desk!


I'm loving how it turned out. The style is a mix of rustic and modern, clean-lined and rough-hewn - which is a  pretty good representation of my overall style. I little eclectic, but with plenty of traditional elements as well. 


The legs of the desk are a pair of sawhorses that used to live in my grandparents' garage. I snatched them up a couple of years ago with an idea in my head that they would make an awesome desk or table foundation one day. I'm so excited that I finally got to make that idea a reality.


The desk top is a piece of plywood (yep, the same one from the "before" photo) upholstered in a white cotton duck fabric. A piece of acrylic sits on top of the fabric to create a smooth, glassy surface. I'll be back to share more details on how I made the desk top tomorrow. (*1.29.13 update: the how-to post is up! Check it out here.*)


I couldn't resist accessorizing the desk a little bit, even though I probably won't be using it much (it's mostly a work space for my husband). The lamp was a gift from my mom a few years ago (not sure of the source, sorry!), silver owl came from Target (half-price after Christmas), the spools of baker's twine were a gift from my in-laws (from Etsy, I think), and the pen cup was a DIY project from a couple of years ago.


I wish I could work here all the time! 

Here's the "after" one more time for good measure...


I'll be back tomorrow with some more details for you! Have a great Monday!

--------

This post is a part of the series "Operation {Re}Organization." To see other posts in the series, click the tab at the top of the page.

Pin It!

1.14.2013

Operation {Re}Organization: The Office


Oh the office. Or should I say "office." (I clarified the need for quotes last week, in case you missed it.) I spent some quality time with it yesterday so I've got a few updates for you. I'm thinking this process needs its own mini-series - complete with a love triangle and plenty of drama. Ok, maybe not. But this is definitely going to need more than one post. I'll just get started today and we'll see how far we get!

Here are a couple of before pictures so you can get a better idea what kind of space we're talking about:


And yes, I know, the quality of these images is yucky. Technical issues. Our apartment is really hard to shoot because of the lighting situation we've got. But hey, before pictures aren't supposed to be pretty, right? The worse the before, the better the after will look in comparison.

Now, using these as before pictures is a little deceiving as well because we actually don't use the desk area to store our office supplies - plot twist! Betcha didn't see that coming. We've actually been keeping them all over the apartment due to storage issues and to meet our specific needs. What you see here in the plastic drawers and other containers are actually our craft supplies and tools. Those are a whoooole other organization project. I didn't even touch those yesterday.

Onto the task at hand. I attempted to follow my own steps in my approach to organizing our office. That means I started by asking myself questions about my goals for the space. I realized that I want:

  • A clean desk top. No clutter. It's small, so I want to make sure we can use every square inch we have.
  • Easy access to supplies. For us, this actually means keeping them in one drawer in the living room, which is where we end up working most of the time. This will likely be different for other people, but that's why everyone needs to think about their individual space and needs.
  • An inventory of our extra supplies. This is so that we know what we have on hand and don't spend money needlessly on things we already have, but can't find!
  • A new filing system. That's a big task in and of itself, but it definitely falls into the realm of office organization. I plan on tackling that soon.
  • To spend nothing. I wanted to spend zero, or close to zero dollars. By reusing what we have, even if it doesn't end up looking exactly like my inspiration photos, we will save money for other, more important things. Like the Nester says, "It doesn't have to be perfect to be beautiful."
Next, I gathered everything office-related from around our apartment. I ended up with this:


Not so so bad. Messy, scattered and disorganized, but not as bad as I thought. I did find things in just about every area of our apartment though (closets, under our dresser, in drawers). There was definitely a need for consolidation.

I then started cleaning out the drawers and assessing what I had (aka "purging")...


Quickly, the stuff seemed to grow and take over all kinds of surfaces. Chairs, dining room table, floor...oy. This is when I started feeling a bit overwhelmed, but I pressed on, making sure I emptied all the necessary containers.

Love the empty here:

Through this process, I did realize that I had a couple of systems already in place that were working including 1) a basket of all of our extra printer paper, large notebooks and legal pads and 2) two sets of small, plastic drawers that hold extra cords, buttons, command strips, etc. Small victories in the fight against disorganization!

I then grouped our office supplies in a couple of different ways. First, I grouped "like with like." Anything used up or broken was thrown out. I even tried every pen to make sure it worked. And we had a lot of pens. You can see some of this sorting process in the photos below. For instance, the white chair below has all of our "stationery" supplies including note cards, stamps, return address labels, and mailing envelopes. Second, I took all items I classified as extra supplies and put them aside to be stored in a separate container from the "now" supplies. 


What I ended up with was a single drawer of all the supplies we use on a daily basis (instead of several, scattered drawers and containers), and a single box of extra supplies that will live in the top of our closet since we won't need them every day.

Here's the drawer of supplies we'll use on a daily basis. I used two smaller cardboard boxes and a can (Yes, you read that right. It does have some pretty fabric on it though.) to corral different supplies.


It has:
  • All of our stationery
  • A few mailing envelopes
  • A selection of "good pens" and a highlighter
  • Scissors
  • Tape (one double stick, one regular scotch)
  • Ruler
  • One set of post-its
  • Whiteout
  • A small notepad (for quick, short notes)
  • A larger notepad (for list-making or longer notes)

And here's our box of extra supplies:


It has:
  • Notecards (three sizes)
  • Note pads of various sizes
  • Pens (probably won't need to buy more of those for about twenty years)
  • Tape (both double stick and regular scotch)
  • Printer ink
  • Staples
  • Colored dot labels
  • Whiteout
  • Post-its
  • Ruler
I even made a little inventory card so that I can see what we have at  a glance instead of digging through the extra supplies box.


In this process, I could see that I don't need to purchase any more office supplies any time soon - a great realization that saves us money!

By consolidating all this stuff, I only ended up using one drawer and one box, and we actually ended up with a lot of empty drawers and boxes. I'm excited about that. Yay space!

I think I'll stop here for today. (I'll bet you're ready for a break too if you've read all the way to the end!) I've got more plans for this "office" space, so I'll be back soon with more updates!

------------

*** Update 1/29/13: I finished our office "nook!" Come on over here to see the results and here for the how-to on our little DIY desk - I'm thrilled with how it turned out!


--------

This post is a part of the series "Operation {Re}Organization." To see other posts in the series, click the tab at the top of the page.


Pin It!
Related Posts Plugin for WordPress, Blogger...
Blogging tips