2.29.2016

Small Bathroom Makeover: Before & After with Modern Masters Paint


{Note: Modern Masters provided the lovely matte metallic brass paint for this project, but as always, opinions are 100% mine.}

Oh, how far we've come! 

When we purchased this house, its only bathroom was painted not one, but two shades of purple (yikes). It had good bones though, so I knew all it needed was a little paint to freshen it up. In December, I got rid of the purple, but was at a bit of a loss for what to do next. Here's where we stood once the walls and beadboard got a few coats of Benjamin Moore Winter White and Behr Ultra Pure White, respectively.


A little bland, but much better than purple!

Then, in January, I got an email from Regina at Modern Masters asking if I was interested in reviewing a couple of their paint products. Of course! I said immediately :). I had heard about Modern Masters several times through reading posts from other bloggers, so I was excited to try some of their paint myself. Though I had several projects in mind, I ended up zeroing in on the bathroom - this paint was just what I needed to start tackling this space!

I requested some of their Matte Metallic paint in Brass and boy, is this stuff awesome. I decided to paint the bathroom medicine cabinet mirror to make it the focal point of this small bathroom. I'm really loving mixed metal finishes in spaces like kitchens and bathrooms, so introducing a brass mirror to a bathroom with chrome fixtures was a great opportunity to add that idea to our home.

The mirror can't be detached from the medicine cabinet so I painted it in place. After a light sanding, I used a regular angled paint brush (this one from Purdy* is my favorite) to paint three coats onto the white mirror (I followed the directions on the container regarding drying time between coats).


Here it is after one coat...


Two coats...


And three coats...


This paint goes on like butter and after three coats, it looked like a solid brass mirror - no one would know it's actually dinky plastic under there (shh!). I was really amazed at the coverage and that there were no visible brushstrokes. Thin, even coats are the way to go. I'm also a huge fan of the matte finish. It's timeless and won't ever be mistaken for bad shiny lacquered brass from the '80s. ;)

Here's the finished product!


You might have noticed that I got a bit of paint on parts of the mirror as I went along, but not to worry - that was easily remedied after it dried. I just scraped it off with my fingernail or a flat piece of plastic like a credit card.

I am thoroughly impressed with this paint and can't wait to use it on some other projects! I want to #mattebrasseverything. We can make that hashtag a thing, right?

Here's a wider shot of the whole bathroom. It might be pretty tiny, but it's becoming quite mighty!


Once I finished painting the mirror, I was thrilled with how much that changed the whole look of the bathroom, but I knew I could take it up another notch. As you saw from the photo at the beginning of this post, the upper part of the wall didn't stay plain ole Winter White - I brought in some more paint and made one other small change to the sconces. These updates, plus the newly brassed-out mirror have absolutely transformed this bathroom, but I'll save the details of that for later this week. For now, I'll leave you with a teaser photo!


A couple more note notes on the Modern Masters paints before I sign off for today: the kind folks over there also sent me a container of Pale Gold from the Metallic Paint Collection that I didn't use with this project, but did in another that I can't wait to show you soon. Thank you, Modern Masters!

If you'd like to try some of the Brass Matte Metallics Paint (that I've now fallen in love with) or any of their other products, head over their website where you can look up retailers in your area or order online. You can also find them on social media to check out other projects folks have done using their paint. Here are the links to their FacebookPinterest and Instagram accounts for starters.

Have a great start to your week, y'all!


*affiliate link (That means I get a tiny cut of the price of the item if you buy the product using my link. I appreciate your support of this little blog!)


Enjoy what you read today?  Enter your email address below to subscribe to May Richer Fuller Be!  Delivered by FeedBurner

Pin It!

2.26.2016

Thoughts on Slow Decorating and Enjoying the Process


Right now I've got a million ideas swirling around in my head for our home. There's a running list of projects I'd like to do, furniture I'd like to purchase, spaces I'd like to organize...it's really hard to resist wanting to have it all done and done right now. 

Does anyone else feel this way? I know I can't be alone in this.

Embracing patience while putting together our new home is slightly maddening to me, yet I also know it's the right thing for us. This idea of "slow decorating" might not lead to a magazine-worthy (or Pinterest-worthy) home overnight, but you know what it does do? It gives me time to live in a space, understand how it works (and doesn't work) for our family, be creative about pieces I add or subtract, and learn to enjoy the process itself. The reality is that we don't have the time or budget to transform our house into something magnificent overnight à la HGTV, and I'm learning to be ok with that.
It's also important to remember how far we've come in the four months we've owned this place. Remember this real estate photo of the living room?


Here's where we are now (and actually, this room deserves an update post because things have even changed since this photo was taken!):


Or how about this photo of the previous owners' master bedroom?


It's seen a few happy changes since then as well:


People often ask how the reno/decorating process is going and if the house is done. My answer is usually something along the lines of, "Well, I'd say 'phase one' of the reno is done. We have new floors, paint and light fixtures, a wall came down, and we rearranged the kitchen...but we're planning a full kitchen reno, and I'm still on the hunt for a few key pieces of furniture like a dining room table. If you walked into our house now, you'd probably call it done, but really it's got a ways to go..." The reality is that sometimes I'm really happy with much we've accomplished and how the road ahead looks, and sometimes I'm frustrated at how much we still have to do.

For this home to truly become a place that we love - a place that's welcoming to others and reflects us - I want to be intentional and thoughtful about what we do. I want to be intentional about what I bring into it and how we decorate it. Embracing this idea does have the potential to devolve into plain old indecision, but I'm hoping to avoid that part :).

So what's your part in this? You, my friends, are along for that ride if you're regular readers here. I'll continue to brainstorm and obsess over ideas on the blog, post updates as they happen (if you've learned anything today, you'll know it'll happen slowly!), and hopefully inspire y'all to embrace some slow decorating principles into your own home.


*If you need help making your home into a place you love, take a look at my e-design services: Mix and Match Design Company. I'm passionate about helping folks make thoughtful, intentional decisions about choosing pieces for their spaces!


Enjoy what you read today?  Enter your email address below to subscribe to May Richer Fuller Be!  Delivered by FeedBurner

Pin It!

2.22.2016

Favorite Find {Organization}: IKEA TRONES

If you've been around this blog for any length of time, you know I love me some good organization. When we moved into our new house around Thanksgiving, we were suddenly faced with something we had never had before: tons of storage space! Since we have fairly large closets in each bedroom, a linen closet in the bathroom, an unfinished basement and a garage, we haven't been very efficient or thoughtful about storage organization. We were desperate to get everything out of boxes and out of sight when we moved in, so we haphazardly threw things in closets upstairs and whatever didn't have a home there got demoted to the basement - not so good! All this disorganization been starting to bug me lately, and I'm hoping to get on the organization train soon. I figure if I write about it here, y'all might help keep me accountable :).

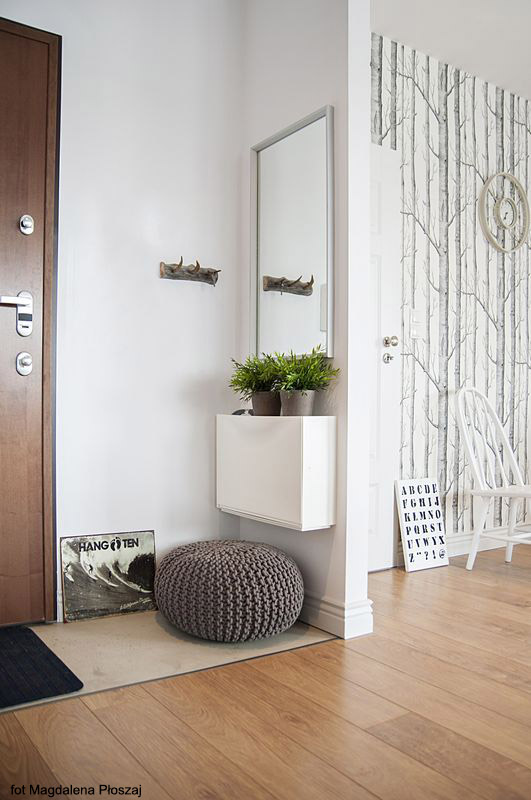
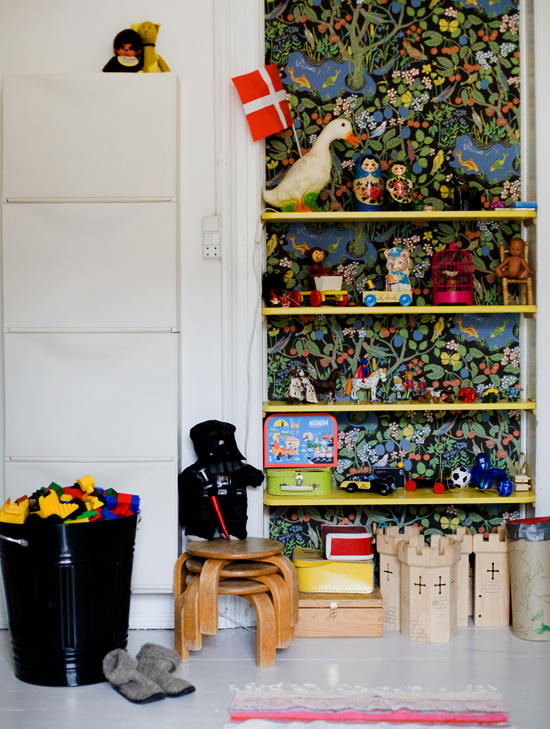
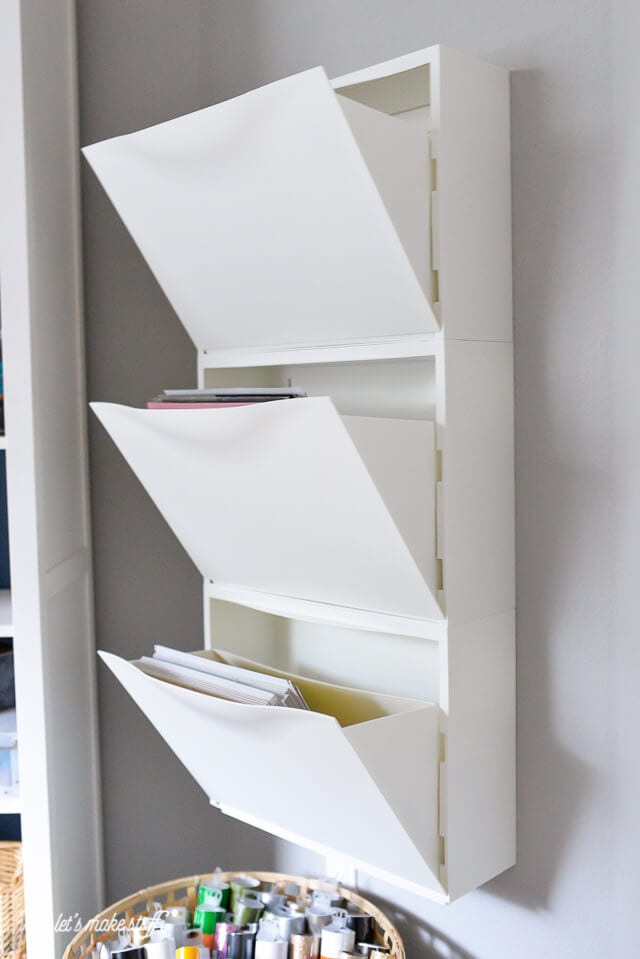
One place we've struggled with since day one in this house has been shoe storage, so I did what any normal human on the hunt for organization inspiration would do - headed to Pinterest. There I found my new love: the IKEA TRONES. I had noticed it in store before, but after seeing them in real folks' homes, I've become a big fan. It's a versatile little guy that provides great storage for shoes, but can also be used to store a variety of other small items as well. It blends in nicely with many decor styles.

Let's take a look at a few examples, shall we?

Entryway:

 {Stadshem via Elvira Spekulerar}
{Nalle's House}

Bedroom:

{Decor8}
{Dos Family}

Bathroom:

{IKEA}
{Bright Nest}

Office:

{Hey, Let's Make Stuff}

Gosh, the possibilities are endless! I can see these being used in so many ways other than shoes. Also, did I mention the price? $39.99 for a set of three boxes. Unbeatable! 

Do you have any of these in your house? If so, what do you use them for?

Enjoy what you read today?  Enter your email address below to subscribe to May Richer Fuller Be!  Delivered by FeedBurner

Pin It!

2.19.2016

Lovely Links

Happy Friday, y'all! Man, it's been too long since I shared a Lovely Links post. I decided to take a break in the fall and, whoops!, ended up taking a longer-than-expected one. I've got a backlog of awesomeness from around the web and I'll share six of my favorites today. Enjoy!

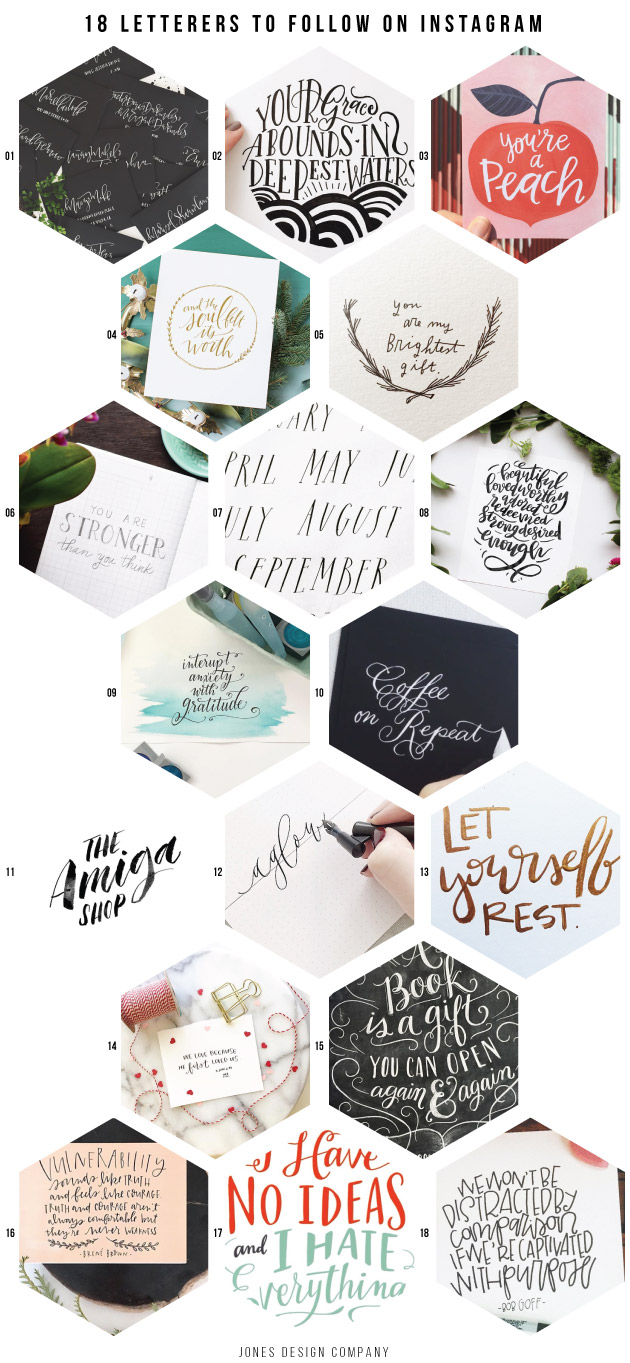
1 | Jones Design Company launched a course called Simplified Handwriting this week and based on the fact that her handwriting is amazing, I'm sure the class will be too! She also shared this group of really fun hand letterers to follow on Instagram - get ready to hit that heart button a ton when you check them them out.
{Jones Design Company}

2 | I so identified with Emily's post on living big after living small. Though our new house is on the smaller side (1200 square feet of finished space plus an unfinished basement), it's the biggest place we've ever lived in and I can't imagine going bigger right now! Does anyone else feel this way?
{Go Haus Go}

3 | This side table is a DIY! Can you believe it? I love the modern lines and warm wood tones.
{Annabode via Home Made by Carmona}

4 | Have y'all heard about the Limetown podcast? It's like Serial crossed with the X-Files and it'll keep you on the edge of your seat. I finished listening to it the other day and whoa, it was good.


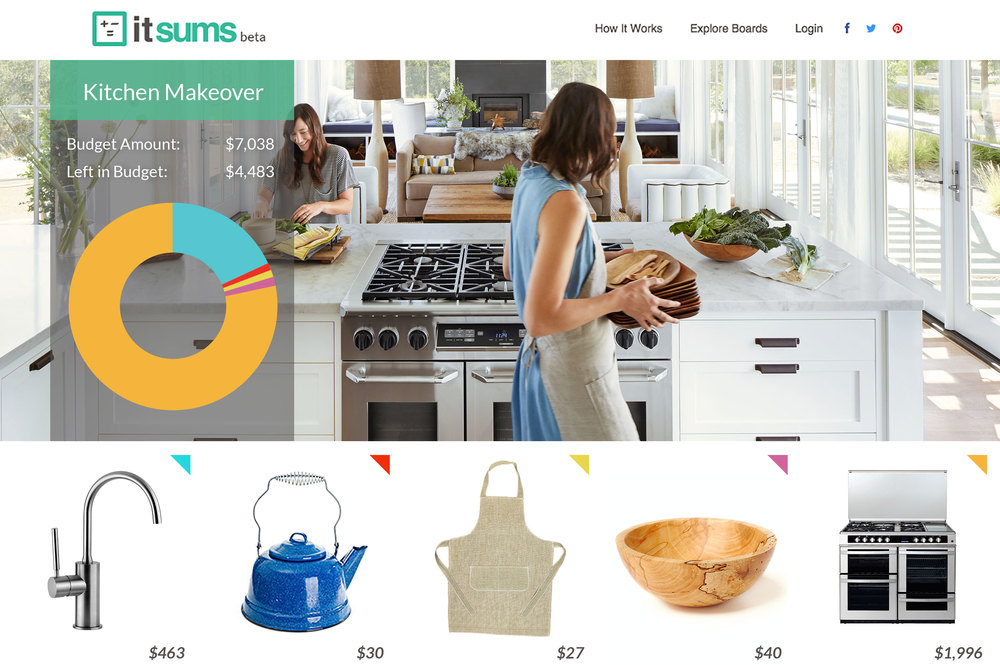
5 | I've been playing with a new online tool called itsums for the past few days and am really loving it - it's a Pinterest-like tool for planning projects. You can enter your budget for the project and then add items to project boards with their prices and it will automatically deduct that amount from the total. Once you purchase an item, you can check it off and itsums will keep track of how much you've spent so far and how much you have left of the budget. Pretty cool!


6 | We're in the very early stages of planning a kitchen reno and I've been inspiration-shopping like crazy. There's one thing I know I want so far: white, shaker-style cabinetry. I love this farmhouse meets midcentury meets modern kitchen. It definitely feels like the vibe I'm going for!
{Style Files}
I hope y'all have awesome weekends. For those of you local to the Philly area, I'll be teaching a Make It Take It workshop at the Philly Home Show at 3pm on Saturday - I'd love to see you there!

Enjoy what you read today?  Enter your email address below to subscribe to May Richer Fuller Be!  Delivered by FeedBurner

Pin It!

2.11.2016

Five Ideas For Large Scale DIY Art {That Don't Look DIY'd}

If you caught my last post about my thrifted china cabinet makeover, you might have read that I'm in the market for some large scale art to flank either side of it. In an effort to keep costs down, I'm strongly considering DIY'ing a couple of pieces. I find that if you're purchasing art, most large scale stuff is either a) expensive if it's original work or b) cheesy if it's inexpensive. (Those two are the extremes of course - I know there's some great, reasonably priced large scale art out there.)

DIY art, on the other hand, can be more wallet-friendly, but I find that the problem with DIY'ing art is that it often looks DIY'd - do you know what I mean? (Hint: not the good kind of DIY.) It can be challenging to make it look really good - at least, that's my opinion.

There IS hope though! 

I found some really great examples of large scale DIY art that I think most anybody can recreate and can be confident that it will look awesome. I've split them up into five categories and have an example or two of each to give you (and myself) some inspiration. Let's get to it!

ABSTRACTS: 

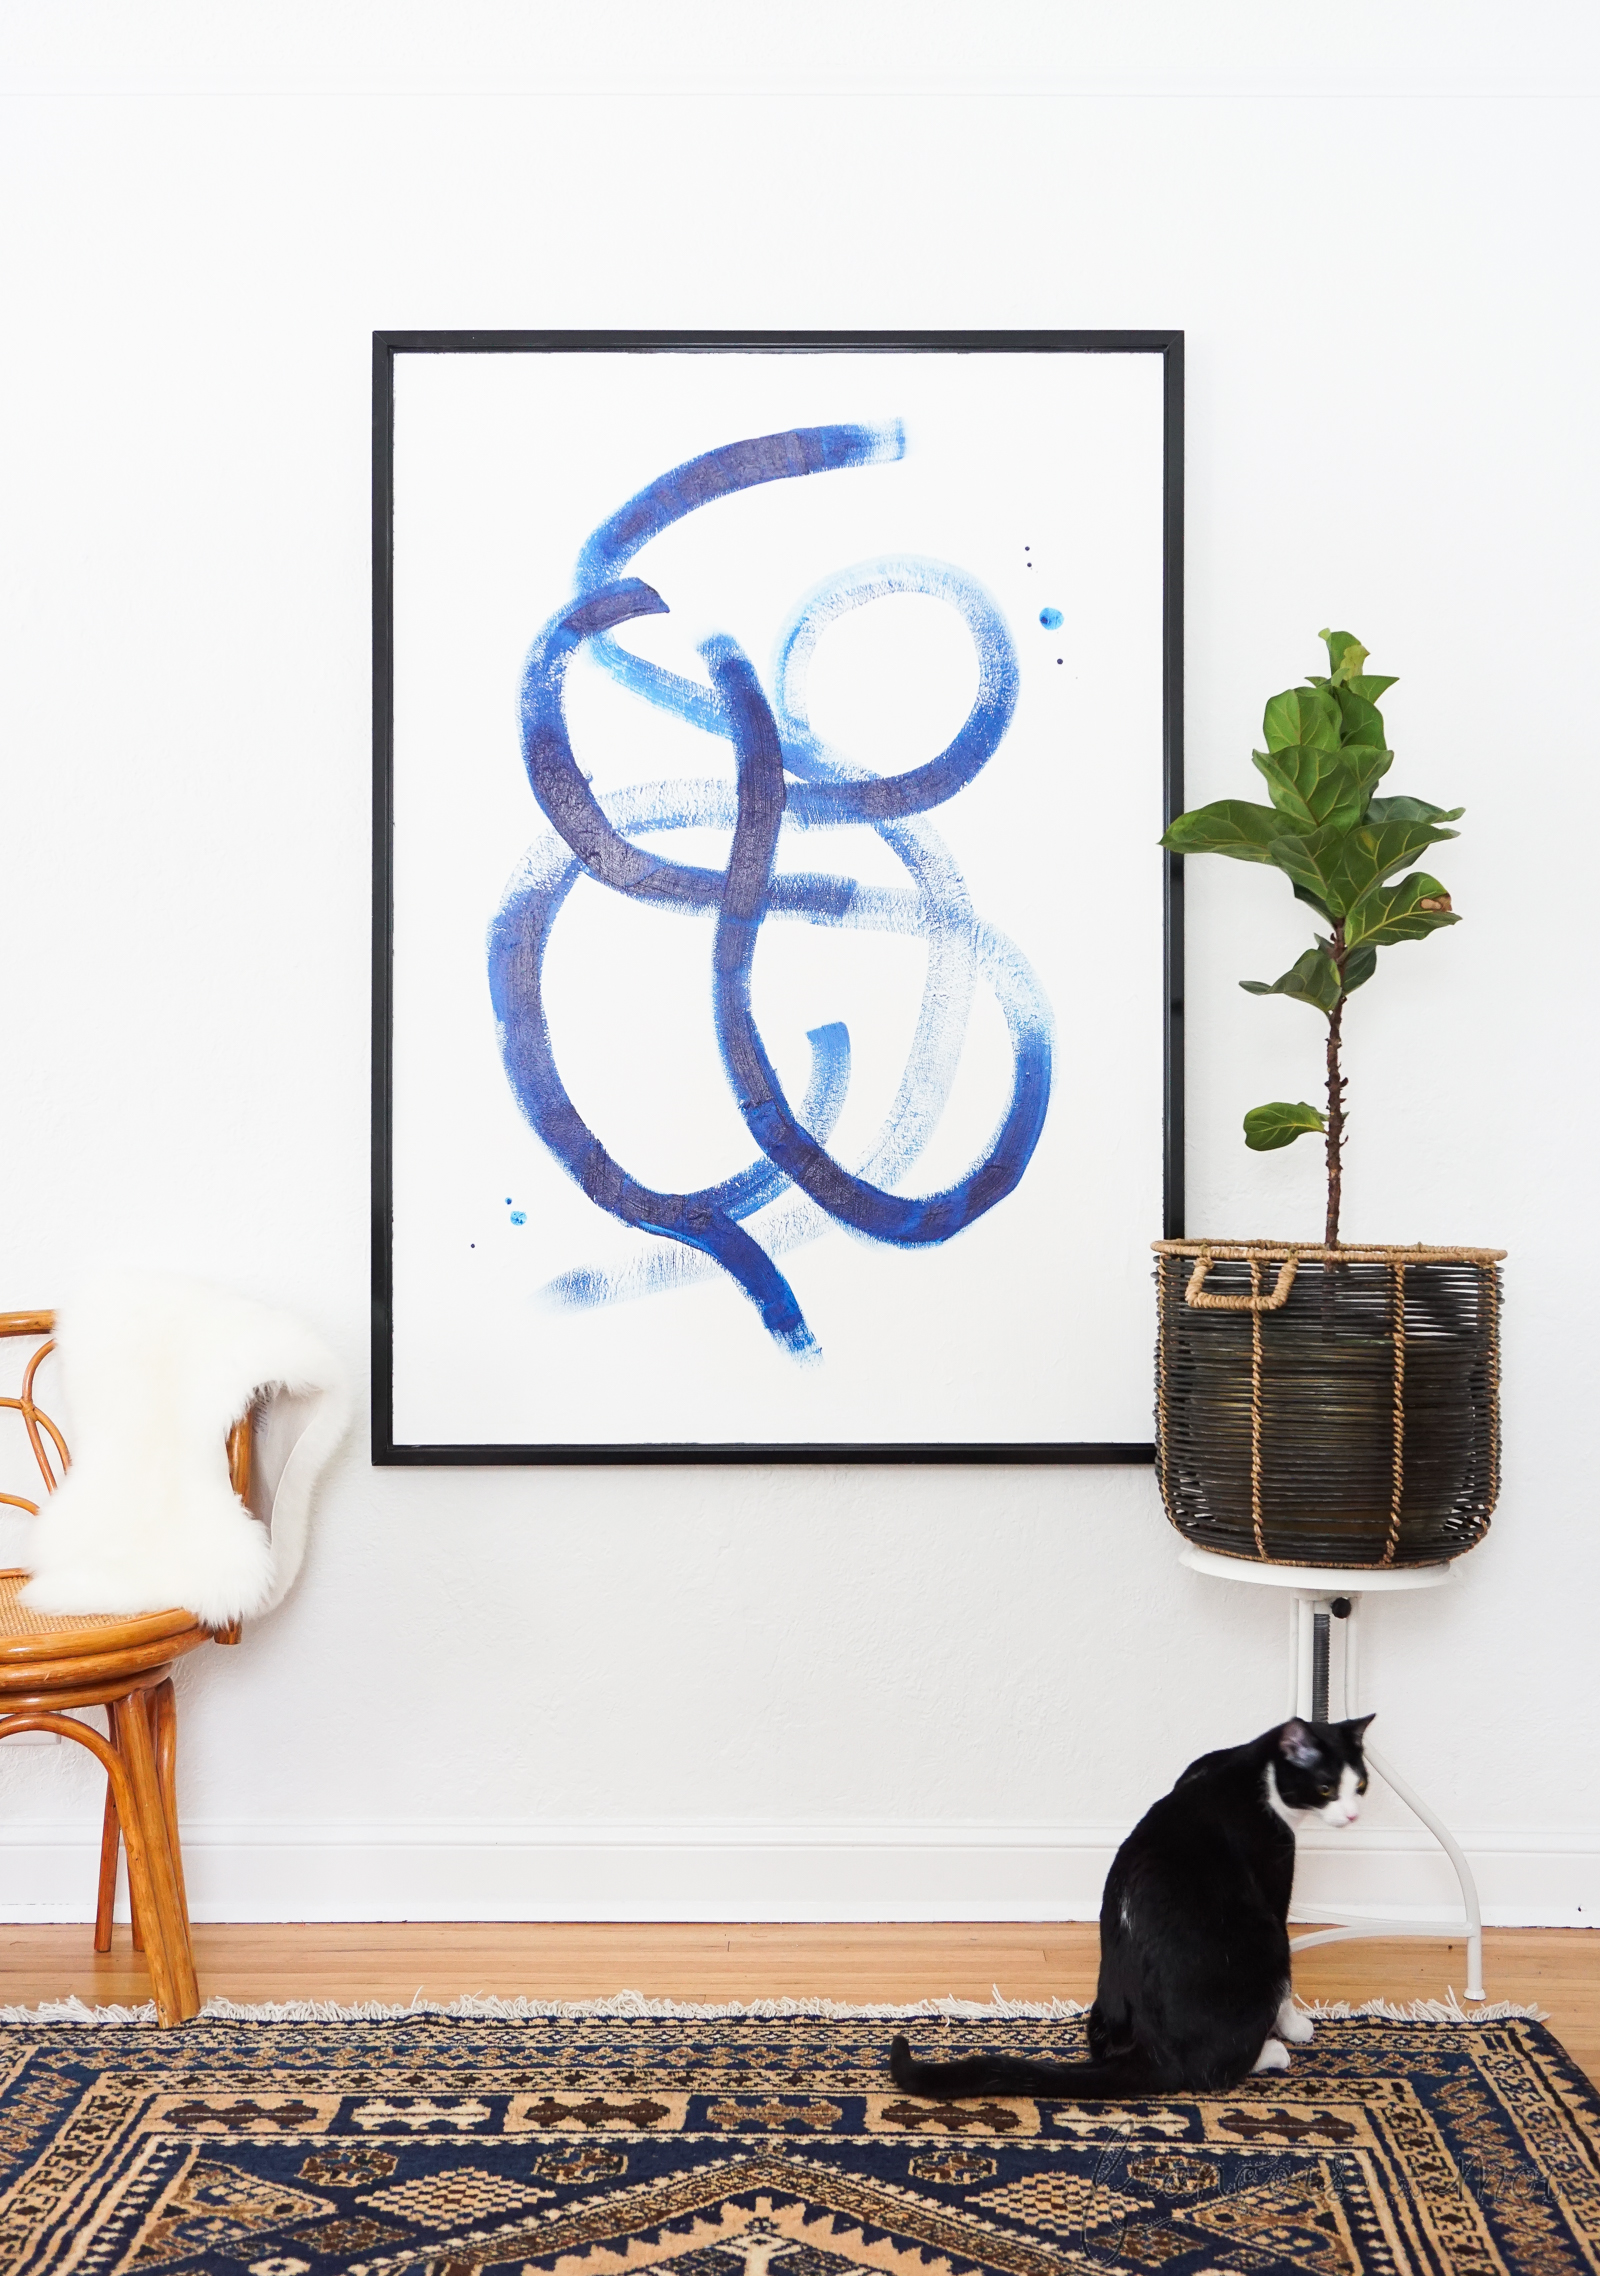
Oh abstracts - how tricky you can be! I painted one that's currently hanging in our living room and am pretty happy with the way it turned out. I'm no artist - I just experimented until it looked the way I wanted it. I'd like to try my hand again soon! There are many, many kinds of abstract art that range from very simple (like the brushstroke art below) to more complex (like the series of three below). Try your hand at both!

Simple Example | Francois et Moi 
{Francois et Moi}
Complex Example | Dans Le Townhouse
{Dans Le Townhouse}

ENGINEERING PRINTS:

Engineering prints are simply large scale copies printed economically on lower quality paper (think blueprints). Black and white ones are super inexpensive, but color ones are also available and are pretty affordable considering the size (the example below was $23). You can have these printed at office supply stores like Staples and then frame them (or don't - your choice!). If you're in the market for a simple, large frame, try the RIBBA from IKEA.

Black and White Example | House By Hoff

{House By Hoff}
Color Example | Mountain Modern Life

{Mountain Modern Life}

FRAMED WALLPAPER OR GIFT WRAP:

There are so many beautiful wallpapers and gift wraps out there these days. Wallpapers can get pricey, but you can search Etsy for remnants that are much more affordable. Wrapping paper on the other hand is more budget-friendly, and its easy to find in small sheets from places like Paper Source and Rifle Paper Co.

Example | Nalle's House

{Nalle's House}
Example | Mint Design Blog
{Mint Design Blog}

SCULPTURAL WALL HANGING:

The Nester has a fantastic step-by-step tutorial showing you how to make one of these, which starts as - you'll never guess - a mop as its base!

{The Nester}

OVERSIZED TYPOGRAPHY:

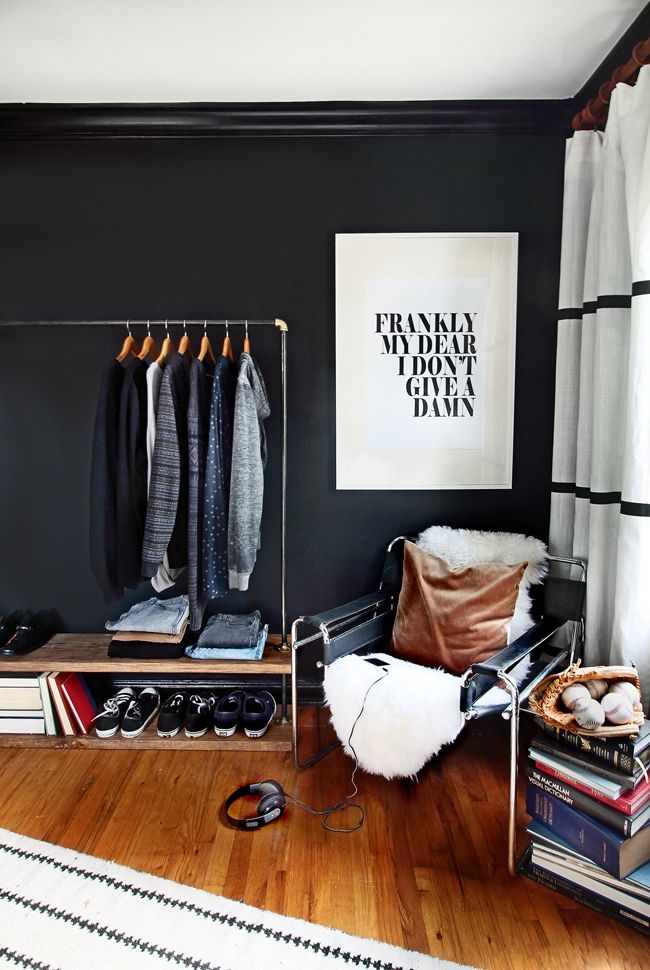
If you have Microsoft Word, Powerpoint, or just good handwriting you can do this! Choose your favorite phrase, type it out and have it printed at your local copy place, or write it straight onto a canvas. My best advice? Keep it simple for the biggest impact.

Example | The Hunted Interior

Kristen purchased this print with the iconic phrase from Gone With The Wind from Letters on Love (a shop that doesn't seem to exist anymore, unfortunately!), but you could certainly recreate something like this yourself.

{The Hunted Interior}
Example | Katalina Mayorga via Refinery29

{Refinery29}

Well! My creative wheels are definitely spinning now with all this research I've done, and I'm thinking it might be time to create something for my dining room. How about you? Are you ready to make some art? Do you have other DIY ideas you think I should try?

Enjoy what you read today?  Enter your email address below to subscribe to May Richer Fuller Be!  Delivered by FeedBurner


Pin It!

2.08.2016

Thrifted China Cabinet Update

Remember that vintage mid-century modern-ish china cabinet I picked up a few weeks ago for a song at my favorite second-hand furniture store? 


Well, she received a simple makeover last week and I'm excited to share this super simple project with you today! Can you see what changed? 

Yep, it's the inside of the glass cabinet area!


It went from wood to white by using one simple material: contact paper. No mess, no fuss, hardly any cleanup, and I was done in an hour. Told you it was simple!

I had some Whitewood Matte Wood Grain contact paper left over from this project in our rental house and it was perfect for this application.

All I did was:
  • Measured and cut lengths of contact paper to fit the area I wanted to cover
  • Removed a small section of the backing to expose the sticky side
  • Lined up the contact paper so it would lay straight on the wood (leaving a little extra sticking up along the edges to trim off later)
  • Smoothed down the contact paper with a plastic smoother tool while being careful to avoid bubbles (I pulled the paper backing off as I went along - I found that worked best for a smooth application)
  • Used a utility knife/razor blade to trim off the overhang so that the edges were sharp and clean
That's it! Unfortunately I did this project by myself, so I couldn't take any process photos, but I think applying contact paper to a smooth surface is pretty self explanatory! :)

I love how the white background makes all the glassware, serving pieces, china, barware etc. pop rather than recede into the background.


I can't believe how much storage space this hutch gives us - I still have space in the bottom cabinets that I haven't filled!  One thing I'm particularly excited about is that I finally have a place to display the "fancy china" I inherited from my grandparents.

The next step for this dining room is to add some art on either side of the hutch. I'm not sure what that will be yet, but I want to it be large, but inexpensive. I'm open to ideas!


Enjoy what you read today?  Enter your email address below to subscribe to May Richer Fuller Be!  Delivered by FeedBurner

Pin It!

2.03.2016

Small Bathroom Inspiration: Wallpaper


We have one little bathroom in our new house, which has already seen a nice transformation thanks to the power of paint, but I have big dreams for that small space. Though the size won't change, I'm hoping to find ways to make it a little more functional and add some pretty along the way. Thankfully, the previous owner chose some pretty classic fixtures and finishes that we can definitely live with, but  I'm hoping to change a few things over time to make it more "us."

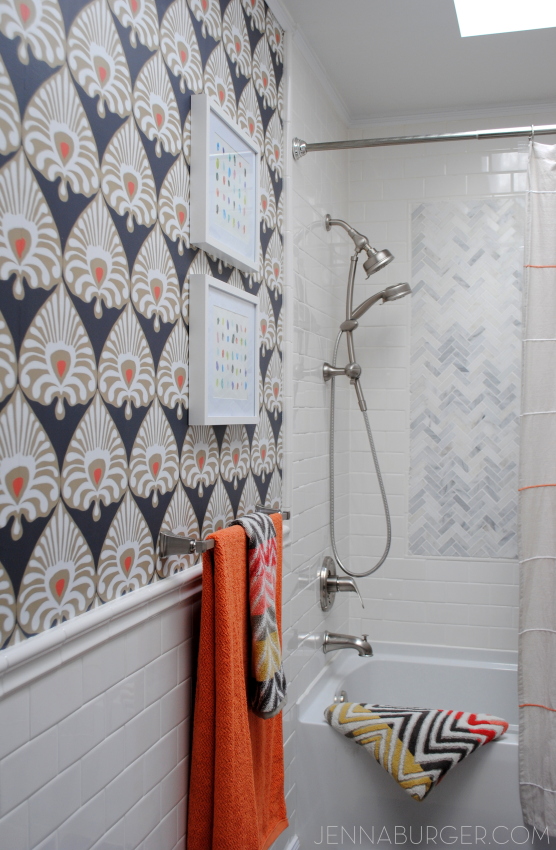
One thing I'm considering is adding wallpaper on the top half of the walls. The bottom half is classic headboard, which I like a lot, so I'm thinking that'll stay. I've been scouring the internet (ahem, Pinterest) for bathroom wallpaper inspiration, and I've been pinning quite a few good ones that I'd love to share with y'all today. Wallpaper sure adds some style!

{Domino}
{Decorpad}

{BHG}

{Decorpad}
{Domaine}
{Jenna Burger}
{Amber Interiors}
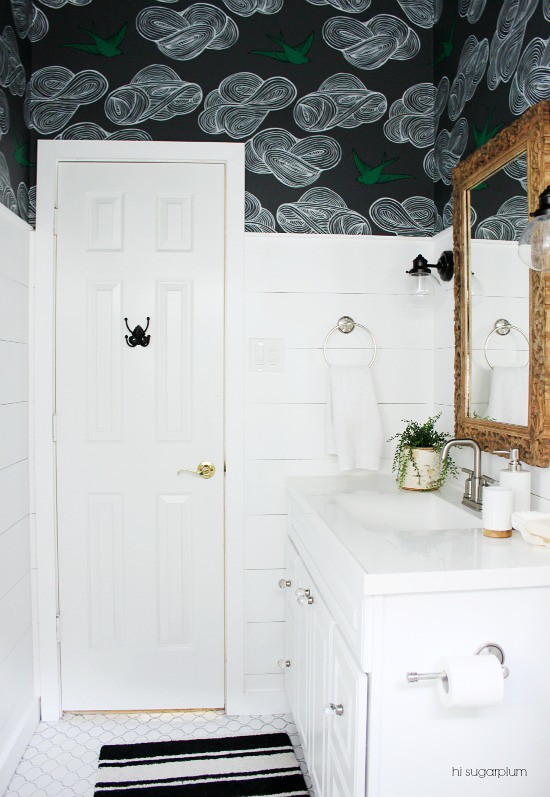
{Hi Sugarplum}
{Ashley Whittaker Design}
I could certainly go on and on about these pretty spaces, but let's recap why I like the above images for a sec. One common theme I'm seeing is that for the most part, I gravitate toward modern graphic/geometric paper in a single color (plus white). Navy and neutrals have my heart, but how fun are some of these other ones like the last one? I think there's an opportunity to have some fun in this bathroom of ours.

What do you think? Would you go with wallpaper in a small bathroom? I'd love to hear why or why not!


Enjoy what you read today?  Enter your email address below to subscribe to May Richer Fuller Be!  Delivered by FeedBurner

Pin It!
Related Posts Plugin for WordPress, Blogger...
Blogging tips