
Ever come up with a design that you needed to transfer from a piece of paper to some other material (i.e. wood), but didn't want to freehand it for fear of messing it up, or not achieving the "exactness" you're looking for? Think typography or a design you've printed out from your computer. I have very few artistic skills, especially when it comes to drawing (I continue to maintain my belief that being "creative" is entirely different from being "artistic"), so this happens to me...a lot.
So when I was Googling something along the lines of "how to transfer a design" for this project I'm planning, I came across a post from a blog called Makely School for Girls, which claimed to have the "Easiest Design Transfer Method You'll Ever Find" (yep, that was the name of the post). Of course I clicked on it. And I think she may be right. Hit the nail right on the head. She used, wait for it, newspaper as transfer paper. Clever clever. And free, if you already get a paper delivered.
{source}
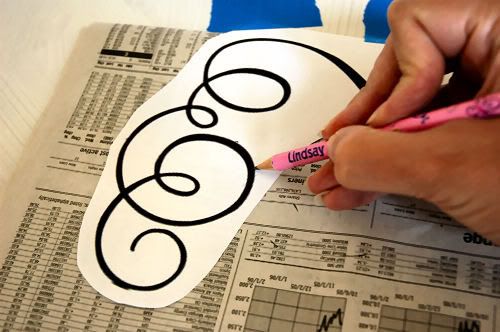
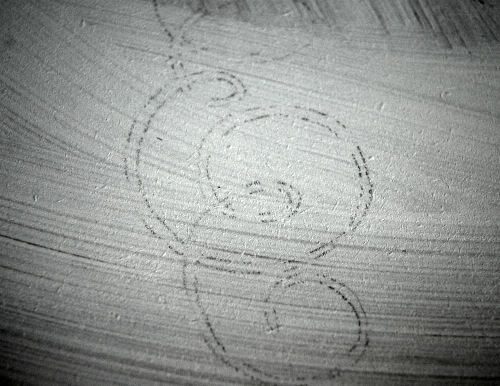
The idea is that you place your design on the newspaper, trace over it so it picks up some of the ink, move the design to the place you're transferring it, trace over it again, and you'll end up with a light version of your design you can paint or do whatever with! Like this:
{source}
This method takes you from needing to have the skills of real artist to the skills of color-by-number artist to be able to create intricate designs. Yessss. That's more like it. Of course, for full details on this technique, head on over to the original post using the source links above.
Now, you might be wondering what my little project is that needs this method, and I'm going to be a tease and not share details with you right now. What I will tell you is that it's a wooden sign with lettering and numbers on it - is that vague enough for you? Stay tuned; I hope to have more to share in the next week or so!
---------
Creative Bits is a semi-regular series here on May Richer Fuller Be where I share little tips, tricks and simple do-it-yourself projects from other creative bloggers' minds. I figure if it makes me say, "wow," it's worth passing along to you! And remember, if you want to pin any images that don't belong to me, please click through and pin from the original source!
Click the "Creative Bits Series" tab at the top of the page to see more posts like this.

What I also like to do is take a soft pencil (4b etc) and colour in the reverse side of the printed image, then trace over the image with a sharper pencil. It does exactly the same thing but with a lot less effort. :)
ReplyDeleteGreat idea! That's perfect. I'll have to try that method on my next project!
DeleteHere's the Million Dollar Question - What is a dust strategy that helps keep dust away from forever? Is this possible? Here's your answer and why you should keep a regular schedule for dust.
ReplyDeleteشركة تنظيف بالدمام
شركة تنظيف بالاحساء
شركة كشف تسربات المياه بالاحساء