5.31.2013

Lovely Links


Happy happy Friday! With the holiday on Monday, this week flew by for me - how 'bout you? Being that it is Friday, it's time for another installment of Lovely Links, an every-other-week series here on May Richer Fuller Be. Here are some of my favorite finds from the past couple of weeks. Hope you enjoy them!

1 | Y'all know I love typography and fonts, but fancy handwriting also really, really makes me happy. Check out these tips for hand-addressing envelopes from Julep. Seeing all these beautifully addressed pieces makes me want to go practice my handwriting...and maybe send a good ole fashioned letter or two :).


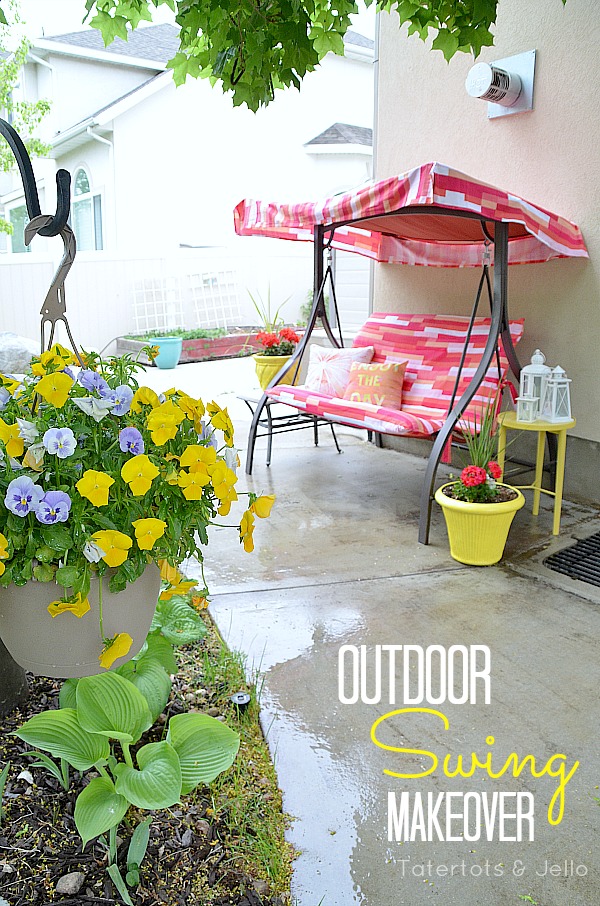
2 | Porch swings are a wonderful thing, and porch swings that are pretty are even better. Jen (from Tatertots and Jello)  madeover her in-not-such-great-shape swing using an outdoor tablecloth from Target and the results are awesome.


3 | More Julep love with this next link. They'll teach you how to make easy watercolor painted chargers that are perfect for an oudoor dinner party this summer. Pretty, huh?


4 | This balsamic chicken salad recipe looks so delicious and easy. Chicken salad is one of my summer faves (it's funny - I don't crave or want it any other time of the year), so I'll have to try this version from Butter with a Side of Bread soon.


5 | Have you heard about Project Organize Your Entire Life (POYEL for short)? I came across it last week and totally got sucked into the series from Modern Parents Messy Kids. I couldn't. stop. reading. I like their approachable organization style, easy tips and realistic goals. Grab your cup of coffee for this one!

6 | I heart Jenna Sue's home (and her art prints). It's so light and airy. Take a tour over at 6th Street Design School.


That'll do it for this installment of Lovely Links. Have a great weekend!

Pin It!

5.30.2013

DIY Onesies {Baby Gifts}


Update: Here's my take on these adorable baby gifts!
Customized Burp Cloths

Or looking for a unique baby gift (that you don't have to make yourself!)? Take a look at my new line of onesies from CSW Designs! Choose your animal, color and pattern (chevron or polka dot). Perfect for the little ones in your life! 

---------

Is everyone you know having babies? So many of my friends are pregnant right now I almost can't keep track of all of them! Seven, count em, SEVEN of my friends are pregnant right now - and that doesn't count the two that delivered last week (congrats to Erin and Taylor on their beautiful baby girls!). Needless to say, I think there's something in the water...

And no, this is not a post announcing that I'm jumping on the bandwagon ;).

I'm so, so excited to welcome each one of these precious little ones into the world, and to celebrate their arrivals, I want to give them each a little gift (spoiler alert to my pregnant friends!). If you've read my About Me page or this blog for any length of time, you know I'd rather DIY something than buy it, so I'm planning to make something.

One of the most adorable ideas I've come across are customized onesies. Whether appliqued with fabric, screen printed, stitched or stenciled, they're just plain cute. The design possibilities are endless, but I wanted to share five that caught my eye and provided some inspiration for designs I'd like to try myself.

1. Appliqued felt onesies from Finley and OliverChevron stripes? Yes please. There's even a template you can download for the chevrons, which makes this project super straightforward.


2. Appliqued tie and bib onesie from The Cottage HomeThese two were made for a set of twins (boy and girl) and the tutorial for this one is fabulous! Lindsay made matching burp cloths too - another adorable baby gift idea.


3. Heat transferred onesies from Bullfrogs and Bulldogs. Amanda used a Silhouette machine to cut out her designs, but I'm pretty sure you could do just as well with scissors and the freezer paper screen printing method :) (I like this tutorial best).


4. Appliqued bulldog sillhouette onesie from Martha Stewart. Oh Martha, I can't leave you out of this post, now can I? The small scale fabric she used works beautifully for a silhouette here.


5. Appliqued monogram onesie from Decor and the Dog. Monograms are always adorable and personal, especially for the preppier/southern crowd, and this one is no exception. I'd probably make a three letter one with the little one's initials out of some some cute fabric.


Now tell me these aren't the cutest little things. The possibilities really are endless. Is your head spinning with ideas yet? These are just a few of my faves. I can't wait to try a few designs out this weekend. The onesies have been purchased...now I just need to figure out what to put on them!


Psst...you might've notice that the blog now has its own domain name: www.mayricherfullerbe.com. Yippee! Nothing's changed - you'll still get here if you type in the blogspot address, you'll just be redirected automatically to the new address! Update your bookmarks!

Pin It!

5.29.2013

Banana Avocado Bread


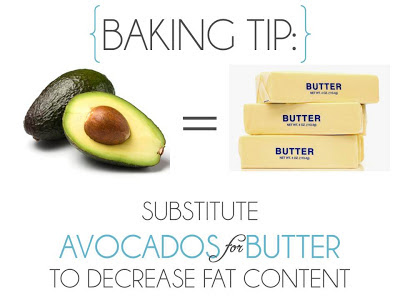
I'm not much for cooking, but man do I love to bake. And while recipes aren't often the subject matter of this little blog, I've got a good one for you today: banana-avocado bread. Yep, you heard right, avocados are a main ingredient in this delicious dessert bread. Now before you scrunch up your nose in disgust, let me explain why avocados are part of this recipe - they're a substitute for butter! So essentially, you're cutting out some of the "bad" fat content and replacing it with "good" fat by using those nubby green guys (without losing any tasty flavor). I'm not a huge fan of trying to make desserts healthier (I figure if I'm going to eat dessert, I'm going to eat dessert...you know what I mean?), but this substitution was so easy and I think it actually added moistness to the bread. Win win win.


I promise I didn't make this up. The Kitchn tells me it's true, so it must be :).

I kind of discovered this recipe by accident because I had four avocados that I needed to use up ASAP and I didn't want to end up with a whole vat of guacamole. A little Googling along the lines of "uses for avocados" (real creative, I know) revealed the banana-avocado bread recipe below. I had some super ripe frozen bananas on hand, so I decided to go for it. It turned out really, really well - I'll definitely be using the recipe again.


Banana-Avocado Bread (recipe originally from A Little Yum)

Ingredients:
  • 3/4 cup sugar
  • 1/4 cup softened butter (half a stick)
  • Half an avocado (approximately 1/4 cup)
  • 2 cups flour
  • 2 eggs
  • 1 tsp baking soda
  • 1/4 tsp salt
  • 1 tsp vanilla extract
  • 3 very ripe bananas (this is not worth making if your bananas aren’t super ripe)
  • 3 TBSP milk
1. Cream together sugar, butter and avocado.
2. Stir in the eggs and vanilla extract and mix well.
3. In a separate bowl, combine the flour, baking soda and salt until well mixed.
4. Fold together the butter and flour mixture until well incorporated.
5. Mash 3 very ripe bananas. Mix in the mashed bananas and milk.
6. Bake at 350 degrees for one hour or until the top springs back when you press it.


Looks yummy, doesn't it? I ended up dividing my batter into two loaf pans. If you do that too, decrease your cooking time to about 40 minutes and check on it.

Hungry yet?

{avocado image from here; butter image from here}


---------


Pin It!

5.28.2013

Operation {Re}Organization: Let's Get Clean!


Confession: I'm lousy at cleaning. There, I said it :). Our house is far from clean 98% of the time. I have no routine, no set schedule, and a really hard time prioritizing scrubbing toilets over things I actually enjoy like spending time with family and friends and this blog. My current "routine" for cleaning includes frantic last-minute vacuuming and sink-wiping before we have guests over. Please tell me I'm not alone on this one.

But here's the thing - I really like having a clean house. The type A part of me has a mini internal freak out when I come home to visible dust bunnies and soap scum in the tub, so I think I've had enough of my current "routine." It's really been driving me nuts lately. 

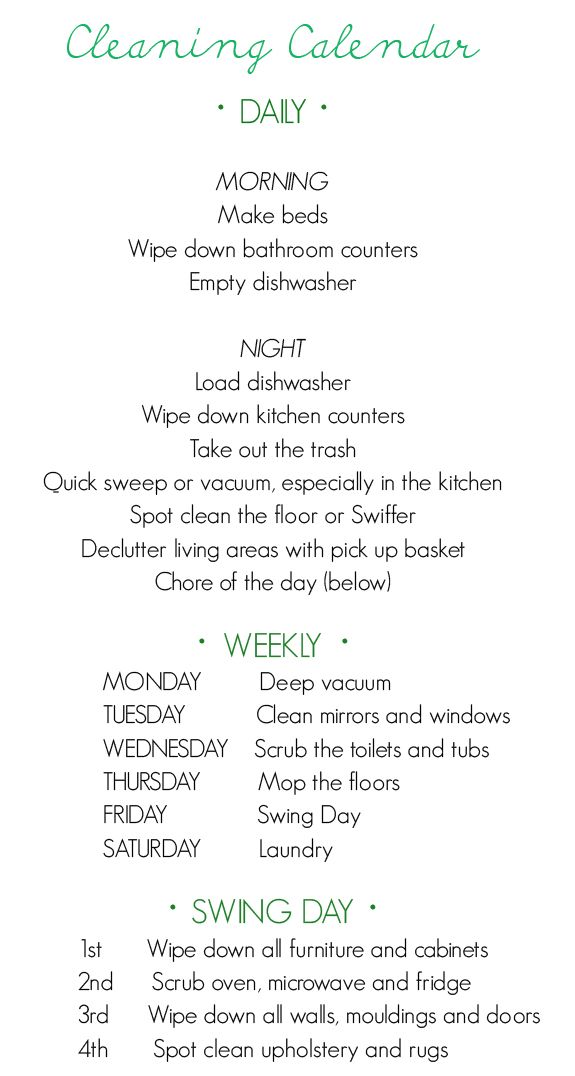
For the past few weeks, I've been thinking about making some changes to the way I approach cleaning. I've discovered that I need a way to hold myself accountable without making things too cumbersome. This involves following a schedule. So I looked to Pinterest, Google and some other bloggers for some help. I found some good ideas and even came across this weekly cleaning schedule quiz from Modern Parents Messy Kids, that, as silly as it is, really helped me figure out what kind of schedule I wanted to have.

I'm a checklist kind of gal, so I wanted something that gave me the satisfaction of crossing an item off a list and getting things done a little at a time, but didn't want to be too strict about it (i.e. Monday is always vacuuming day). For instance, I know myself well enough to know a list like this one wasn't going to be a great fit for me:


More power to you if stick to a schedule like this - I wanted a little more flexibility. It's all about finding what works best for you. 

I ended up dividing up tasks into four categories: daily, weekly, monthly and as needed. No specific days assigned (except for the daily tasks, of course :) ).

Daily tasks:
  • Loading/unloading the dishwasher (no dirty dishes left in the sink!)
  • Make the bed
  • Wipe down the kitchen counters
  • Take out the trash and recycling
Weekly tasks:
  • Sweep the floors and vacuum the carpets
  • Scrub counter tops
  • Scrub the bathroom (toilets, sinks and tub)
  • Clean mirrors and windows
  • Dust surfaces
  • Change sheets (this will probably be a bi-weekly task)
  • Declutter living room and return items to their designated spots
  • Go through the inbox (i.e. incoming mail, coupons, bills, etc.)
Monthly tasks:
  • Spot clean oven and microwave
  • Clean out fridge and freezer (throw away expired items)
  • Clean/dust baseboards and hard to reach corners
As needed tasks:
  • Wash couch slipcovers
  • Self clean oven
  • Wash dog bed

Once I made the list, I decided looking at a plain ole set of bullets isn't much fun, so I made up a pretty-looking checklist to help me stay motivated and organized. If I've gotta do it, why not make it a little fun?
Since I didn't assign a task to a specific day, I made a grid to the right of the task's name so I can write in the date I completed it. That way, I can make sure I get to each task within its designated window of time. This checklist takes me through two months of cleaning.

This plan goes into effect today, so I'll have to update y'all on how it goes in another month or so. Ask me about it, ok? I need y'all to help me out. There's nothing like blurting out your plan to the blogosphere to keep yourself accountable, huh?

What's your cleaning style? Are you a checklister, a strict schedule-follower, or a fly-by-the-seat-of-your-pants cleaner? Any tips or tricks on getting it all done?


--------


Pin It!

5.24.2013

Creative Bits | 20: Living Room from Sarah M. Dorsey Designs

Happy {almost} Memorial Day weekend! I don't know about you, but I'm pumped about having an extra day off this weekend. Before closing up shop for the next few days, I wanted to sneak in the next installment of Creative Bits. Today's comes from one of my favorite daily blog reads: Sarah M. Dorsey Designs. If you haven't checked out her blog before, you should! Sarah was kind enough to let me show off a photo of her lovely living room, point out a few favorite design elements and discuss how you could do something similar in your own home. Take a look:


I love her clean-lined, modern style, and her fearless use of color and pattern. I'm definitely taking notes on how she pulled together her white-framed gallery wall - especially all the typographical elements. This girl's got major design talent. Make sure you check out her blog for tons of awesome DIY projects and how-tos. She's got an Etsy shop too, so if you like the art you see around her home, check that out, because chances are she designed it herself and it's available for purchase!

I hope y'all have a great weekend. I'm taking Monday off off, so I'll be back to the blog on Tuesday!

photo source: Sarah M. Dorsey Designs

Pin It!

5.23.2013

Blue Watercolor Labels {Free Printable}


For the final post in (what's turned into) the Front Hall Closet Mini-Series, (See: Inspiration, Before, After) I want to talk labels. Picture me with a big smile on my face right now because this is one of my favorite topics. I LOVE labeling things - but what I think I love most is actually designing labels. 

For the ones in my front hall closet, I took inspiration from a trend I've seen popping up a lot lately - watercolors. I've really been drawn to abstract and modern watercolor paintings, fabric, and DIY projects, so I figured why not take that idea and run with it for these labels? I love how they turned out. You can see them pretty well in this shot of our closet:


I designed them in Illustrator, printed them on regular ole white printer paper, cut 'em out, and laminated them using my favorite technique using clear packing tape. In my humble opinion, every project needs a little "pretty" and these labels are the pretty part of this one. 

If you're in need of some pretty labels in your life, you're in luck because I'm offering these guys as a free printable! These blank versions of the ones I made are formatted for an 8.5x11 sheet of paper, so all you have to do is download and print on your home printer. Print as many copies as you'd like. If you want to laminate them using the packing tape method, they're made to perfectly fit the height of the tape (with a small border around the edge).

To download them, click here. The link will take you to a high-resolution PDF that you can download and print.

Enjoy!


Pin It!

5.22.2013

Operation {Re}Organization: Front Hall Closet {After}


It's time to reveal the "after" of the front hall closet today! If you read yesterday's post, you saw a little teaser, but you get the whole thing today! I'm excited about checking this trouble spot off the Operation {Re}Organization list. Let's get to it, shall we?

Just to remind you, here's what it looked like before I got my hands on it last weekend:


And after!


I've got lots of details to share, organizational tips, and a couple of creative solutions anyone could use, so let's get started!

First off, an observation. Yes, it looks very full. I realize that. But, the reason for that is mostly the bulky winter coats. They just take up a LOT of space and make the closet look crowded. When you look closely though, everything has a home and is very accessible. If you read my long list of items to store in this closet yesterday, you'll having a home is quite an accomplishment!

Next, let's go to my favorite creative organizing solutions for two items that can be a pain to store: large sports equipment and wrapping paper. If you move those bulky coats, you'll see I utilized some space at the very back of the closet to store these items:


For the sports equipment, I put up a tension rod (you can barely see the end of it on the right side of the photo) and hung some old shower curtain hooks I had on it. This provided a way to hang the equipment up so that it took up as little space as possible and wasn't a bulky mess on the floor. The combination of shower curtain hooks and a tension rod was a perfect, non-permanent solution for organizing this stuff (great for renters like me!). Oh, and P.S. bike helmets hang here too, but aren't in this photo.

For the wrapping paper, the tension rod/shower curtain hook combo came in handy again. I basically made a little storage area for it that I can easily access (there's that phrase again!) when I need to wrap a gift. I tied two pieces of wide, grosgrain ribbon to the existing clothing rod, and tied the other ends to the shower curtain hooks. I placed the hooks on the tension rod in the back, which created a support for the wrapping paper rolls to sit on. Pretty nifty right?

Now to the top of the closet:


I already had these ELFA wire baskets from the Container Store, but they were storing various other things around the house. Since three of them fit perfectly on the closet shelf, they got repurposed for spices, paper products and small sporting goods. Each one is labeled so we can easily find what we need without having to take them down to look at the contents.

The right side of the closet is the most difficult area to access, and needed some sort of shelving to make it functional. I've had this wire shelving unit since college, and it fits perfectly in this space.


It's sitting on top of the bulky toaster oven that we aren't currently using, but want to keep for the future. Placing the shelving unit on top of the toaster oven box made it the perfect height (the bottom shelf wasn't very accessible or useful when it was sitting directly on the ground). Gotta work with what you've got :).

That big green bag above the wire shelving is a cooler. I used another tension rod and shower curtain hook to hang it up there.

Let's take a look at what I decided to store on the wire shelving...


The top shelf has a bunch of miscellaneous home maintenance items like light bulbs, and that little set of clear plastic drawers full of small items like screws and paint brushes. The next shelf down has all of my paint on the right side and games on the left (they're in that white box). The bottom shelf has a clear plastic tub on it with all of Jackson's (the dog) stuff. The little metal bucket has his treats. An umbrella hangs in front of the shelving unit on (yet another) shower curtain hook.

And lastly, let's take a look at the floor space!


The vacuum lives on the left side. It's now fully accessible whenever I need to pull it out - maybe I'll use it more often now?! My grocery cart (yes, city living necessitates having a cart to put your groceries in when you're walking to and from the grocery store) sits on top of the plastic drawers and tucks in behind the coats. The two clear plastic drawers on the right hold gift bags and tools. I use that tool drawer on an almost daily basis, so it's really nice to have right there. It used to be on the floor in our bedroom closet, and I always had to move stuff out of the way to be able to fully pull out the drawer. This is much better!

I think that's it! I'll be back with one more post tomorrow about the labels I used on everything in this closet. If you like them, you're in luck, because I'll be sharing them as a free printable you can use for your own organizational pursuits!

Before I head out, here are a few takeaways from this reorganizing project:

  1. Think creatively about how to store items. As you can probably tell, I now have a love affair with using shower curtain hooks for lots of things other than hanging shower curtains, and that tension rods and I are now BFFs. Fun fact, I found both of those tension rods near the dumpsters behind our building. I'm not shy about dumpster diving (much to my husband's dismay and embarrassment) if it's something I useful!
  2. Use what you have. Shop your house. You don't need a ton of money to organize well. I had everything you see in this closet already except for the coat hangers. I bought a set of those so that they would match and take up as little space as possible (they're those thin felt hangers you see everywhere), but they weren't a necessity.
  3. Do what works for you. I mentioned this yesterday as well, but it's worth saying again. Pull ideas from lots of people, use Pinterest and other blogs (IHeart Organizing is one of my faves) to get you going. It may take a few tries to get it right too. Don't feel like you can't change something once you "finish" organizing it. In fact, that's what Operation {Re}Organization is all about. If it's not working, change things up!
Have a great Wednesday!


Psst! This post is a part of the series "Operation {Re}Organization." To see other posts in the series, click the tab at the top of the page.

Pin It!

5.21.2013

Operation {Re}Organization: Front Hall Closet {Before}


As I mentioned yesterday, on Saturday, I had a nice chunk of time to devote to organizing our front hall closet. It's so rare that I have enough time to clean out, purge, AND organize a whole space all in one day. Talk about a good feeling! My bathroom organization project took several days, and it's pretty much the same size...sheesh. Similar to the way I've posted about my other organizing adventures, I'm going to break up this project into a few separate posts - otherwise this thing is going to turn into a novel.

Today you'll have the pleasure of seeing the "before" state of our closet, and I'll talk about my goals for organizing this space. Before getting started on any project, I always need to remind myself of the basic principles of organization I talked about in this post from way back in January. (Head on over if you're looking for some guidance on your own organization project!)

Without further adieu, here's what our closet looked like before I got my hands on it Saturday morning:


That's from the front. Let's not leave out the area to the right though. It's shoved full of stuff too! See?


Yikes. Oh, and how 'bout a closeup of the poorly utilized shelf at the top of the closet?


What's going on up there?

Lookin' good, front hall closet, lookin' good. Every time I opened that lovely bifold door, I think my blood pressure went up a notch. Needless to say, it was a mess. Since we moved into this apartment, it has always been the default dumping ground for stuff that didn't have a good home. The excuse was always something along the lines of: "Oh, I ran out of space for ____ in the normal storage area, so just put it in the front hall closet - wherever you can find room." I deserve a slap on the wrist for that statement. Go ahead and shake your head.

If I had to go digging for something in here, it turned into a huge time suck. I could hardly ever find what I was looking for, or it was difficult to access. This became a tad (ok, very) frustrating over time. I finally got fed up, and that's when I started plotting my reorganization plans.

As much as I would like for our front hall closet to only store coats and a couple of items like the vacuum, that's just not possible when we live in under 700 square feet. Since this is our only closet outside of the bedroom, it has to work hard and multitask. Every square inch needs to be fully utilized. That doesn't mean every corner is jam-packed, but it does mean I need to be smart about my organizational systems. Since this is a basic builder closet (rectangular with a clothing rod and shelf on top), I knew I would need more shelving, bins and boxes to really make it functional. For reference, this closet measures 48" wide by 28" deep.

I started this project by emptying the closet of all of its contents and cleaning it well - and it was dirty. It's not easy to clean a space when it's jam-packed full of stuff. Dust bunnies had no problem hiding in our closet :).

Hey there clean closet...


All that stuff had to go somewhere though, right? Yep. How about in our kitchen?


Check.

Or the living room?

I spy a Jackson bottom (not to be confused with the ropes to his left).

Check.

It's absolutely amazing to me how much stuff I had in that little closet. It just kept on coming. It looked like moving day for awhile on Saturday.

Alright, enough embarrassment for today. Let's move onto the plan for this space.

Items that need to live in the closet:

  • Coats
  • Tools (like my belt sander, hammer, screwdrivers, etc.)
  • Paint
  • Household maintenance items (light bulbs, etc.)
  • Vacuum
  • Grocery cart
  • Wrapping paper and gift bags
  • Sporting goods (bike helmets, tennis rackets, etc.)
  • Paper products (plastic plates, spoons, bowls and cups) 
  • Spices
  • Jackson's stuff (grooming items, shampoo, treats, etc.)
  • Games
  • Recycling
  • Coolers
  • Toaster oven
Goals for organization:
  • Utilize the space better (duh) by using multiple types of storage items including bins, baskets, shelving, hooks.
  • Make everyday items easily accessible. For example, I need to access spices on a daily basis, but tennis rackets only on a monthly basis.
  • Consolidate "like" items.
  • Labels, labels, labels.
  • Spend as little money as possible by using what I have on hand.

Did I mention this closet needs to multitask? 

One thing I do want to mention is that there is no "wrong" way to organize. You have to do what works for you - so if the idea of keeping spices with sporting equipment is messing with your head because they usually don't go together, have no fear, this is just what works for us. The important thing is to make sure you know where everything is and that others can use the systems you put in place (if it's an area that more than one person uses). 

If you're not sure something is working, bring in a fresh set of eyes to take a look and give you some ideas. If you're the only one who can use your system, that's usually an indicator that it something's not working. That's what was going on with our front closet. I knew where most things were, even though it was a mess, but C couldn't ever find anything. That's when you know it's time to take action!

Alright, I think that's enough for today. If you made it to the bottom of this post, I think you deserve a reward. Here's a sneak preview of the "after" - I'll be back tomorrow with a full post and details about our freshly organized closet!


--------

This post is a part of the series "Operation {Re}Organization." To see other posts in the series, click the tab at the top of the page.


Pin It!

5.20.2013

{Nearly Free!} DIY iPhone Speaker


Well hello there! Good morning! I hope you all had lovely weekends. We (finally!) had some nice down time this weekend to relax and recharge after several busy busy weeks. I tackled organizing the front hall closet and can't wait to share it with you this week, but first, I have a sort of silly, but oh-so-useful DIY to tell you about this morning. It's an iPhone speaker - made out of a few everyday supplies I'll bet you have laying around your house. And don't worry, it doesn't involve any fancy electrical work, wires or even a power source at all. So enough with the intro already, huh? Let's get down to how I put this guy together!

Supplies:
  • Empty toilet paper roll
  • 2 push pins
  • X-acto knife/scissors
  • Pretty paper (optional)
  • Tape (only necessary if you use the pretty paper)

Below are the required supplies...I'll get to the pretty paper part in a bit :).


Step 1: Hold the empty toilet paper roll up to the base of your iPhone and mark the width and depth of it at the center of the toilet paper roll (basically, trace around the base of the iPhone to mark a rectangle - make your marks slightly wider than than the phone itself). The eyeball method works for finding the center, or you can be more exact than me and measure it out.


Step 2: Use your X-acto knife to cut out the rectangle you just marked. Note: hold onto the rectangle after you cut it out - you'll need it later.


Step 3: Place your pushpins on the backside - these are the support mechanism that keep the speaker upright and balanced once you place your phone in it. You can use trial and error to figure out the best placement or, if you find this visual to be helpful, think of the toilet paper roll as a clock with the rectangle cutout being 12 o'clock. Put your pushpins in at about 4 o'clock.


At this point, you're technically done! That's it, folks. You've got yourself a real classy iPhone speaker.

But maybe you, like me, aren't really digging the whole naked toilet paper roll thing. I mean, the brown is soo nice, but do you think it might be nice to make it look just a little prettier? I did, so I grabbed a leftover piece of pretty blue and white scrapbook paper to wrap around the toilet paper roll.

Step 4: Wrap your pretty paper around the toilet paper roll and trim to fit. Leave about a half-inch of excess on either side to mask the edge of the toilet paper roll.


Step 5: Take the little rectangle you cut out earlier (you did hold onto it, didn't you? ;) ) and mark the corners onto the middle backside of your pretty paper. By using it as a template, the hole in your paper will be the same size as the hole in your toilet paper roll.


Step 6: {Refer to the photo below for help! This step's a little hard to describe in words.} Use your X-acto knife to cut a "v-shape" at either end with the points toward the middle of the paper. Connect the points of the v with a line down the middle. By cutting the paper this way, you can easily fold and secure the opening in the paper to the toilet paper roll.


Step 7: Line up the area you just cut on your paper with the opening on the toilet paper roll. Fold the edges of the paper into the toilet paper roll. Secure on the inside with a small piece of tape. Pull the pushpins out of the backside, then wrap the paper around the toilet paper roll and secure with tape. Replace the pushpins in their original holes.


Step 8: Cut a few slits into the excess paper around the edges of your toilet paper roll and tuck those into the inside. Smooth the paper around on the inside and secure interior edges with tape. This won't be perfect, but you really won't notice.


Now you're actually done! Put your iPhone in the slot, crank up some tunes and enjoy your (nearly free) speaker!


As for you skeptics out there, yes, this speaker does actually work :). I know, I was surprised too. No, it's not going to be incredibly loud, but I was impressed at how much it improves the quality and volume of the sound compared to the regular phone speaker. Don't knock it 'til you try it!

Anyone else out there made or used a speaker like this? 

Hope y'all have a wonderful start to the week! I'll be back tomorrow with some updates on the front hall closet organization project :).


Sweet Tooth Tuesdays   Simply Dream & Create

Pin It!
Related Posts Plugin for WordPress, Blogger...
Blogging tips