3.29.2013

Creative Bits | 16: Modern Easter Eggs

Happy Easter weekend everyone! I'll be spending much of this weekend at church - starting tonight with a Good Friday service. Tomorrow night we'll be going to an Easter Vigil and then on Sunday we get to celebrate Jesus rising from the dead - hooray! Easter is always such a joy-filled weekend, and I'm really looking forward to it.

I truly love Easter for the reasons mentioned above, but I also can't help but love some of the adorable decorations and crafts that pop up around this time of year. I'm particularly smitten by the pretty and modern designs I've come across lately on Easter eggs. If you're looking for some last minute ideas, or you're planning to get your egg-decorating on this weekend, here are a few of my favorites to get you going.


Have a lovely Easter, y'all!


---------

Creative Bits is a semi-regular series here on May Richer Fuller Be where I share little tips, tricks and simple do-it-yourself projects from other creative bloggers' minds. I figure if it makes me say, "wow," it's worth passing along to you! And remember, if you want to pin any images that don't belong to me, please click through and pin from the original source!

Click the "Creative Bits Series" tab at the top of the page to see more posts like this.

Pin It!

3.28.2013

How To: Make a Hand-Painted Sign


Yesterday's post was surprisingly emotional for me to write. I really wasn't anticipating that! I don't always get so personal here on the blog, but I felt like it was important to share the story behind this house sign before telling you how I did it. If you missed the introduction and are curious about the story, you may want to go back and read it here. If you're just looking for a tutorial on how to hand-paint a sign, no problem - read on! Get ready for LOTS of details about the project and some tips/suggestions based on what I learned. As I mentioned yesterday, I had never done anything like this before, so it was certainly a learning process!

Supplies needed:
  • Piece of wood
  • Sandpaper (150 and 220 grit)
  • Wood stain
  • Gloves
  • Paintbrush/foam brush (cheapo ones are fine)
  • Cotton rag (pieces of old t-shirts or socks work well)
  • Sign template/design
  • Painter's tape
  • Ballpoint pen
  • White paint
  • Short, stiff-bristled paintbrush
  • Polyacrylic sealer (optional)

The very first thing you'll need to do for this project is put on your patience pants. (Yep, just made that one up. I'm lame, I know.) This project is pretty involved and does take awhile, so be prepared for that. 

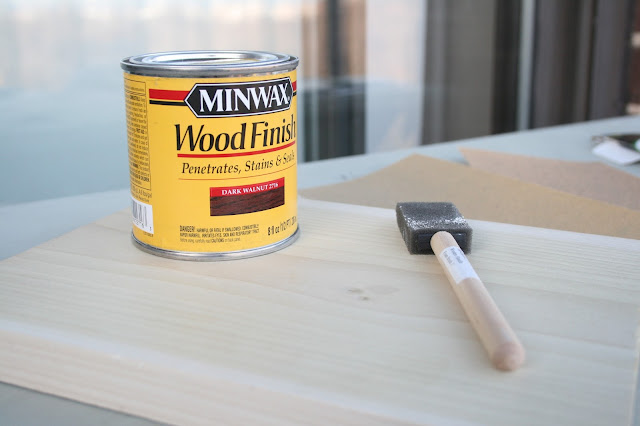
After putting on your patience pants, you'll stain your wood. I used Minwax Wood Finish in Dark Walnut. You can use whatever color you like best. This sign will be living outside by the water, so I chose an oil-based stain for durability. When using an oil-based stain, unless you want to mess with mineral spirits and have to deal with messy clean-up, I'd suggest applying it with disposable materials. I chose a foam brush to apply it and an old sock to wipe off the excess (not pictured - who wants to see an old sock anyway?). 


This was my first try at staining wood, so before I got started, I consulted with my resident carpenter (my father-in-law) who gave me a couple of great tips. If you're a staining pro, this may seem like, duh, but if you're new at this like I am, I think you'll appreciate them!

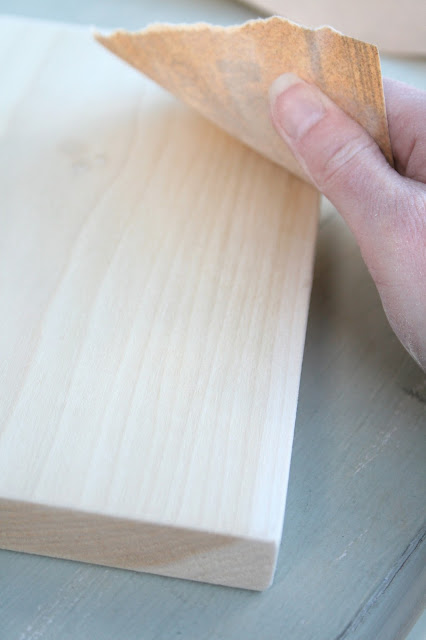
1. Sand all edges and surfaces of the wood using high-grit sand-paper WITH THE GRAIN. 

I used 150 first, then 220. Going with the grain will help stain apply evenly. If you have any stray sanding marks or divots, the stain will absorb more heavily in those. So unless you're going for a rustic look, make sure your surface is very smooth. 

Since my sign is going to live outside, he also suggested I sand down the edges so they're more rounded. The rounded surfaces will help it weather and endure the elements better than squared, sharp edges. Hard edges and harsh weather don't mix apparently. Clean any sanding dust off the board.


 2.  Wet the wood with a damp cloth. This opens the pores of the wood so the stain will apply more evenly.

After I completed these steps, I was ready to get started staining.

First things first: when dealing with oil-based stain, you'll want to wear gloves and protect your clothing. This stuff won't come out easily if it gets on skin or clothes. It's also stinky, so you'll want to do this project outside. Follow the directions for your particular stain. For mine, I applied the stain to the whole board with a foam brush and wiped excess off immediately to get the color I wanted. Allow it to dry for the allotted time (mine said 6-8 hours - I let it go overnight).

Now you'll need to transfer your design to the board (you didn't think I free-handed this completely did you? No way I was going to try to do that!) I researched a few different methods, but ultimately decided on this one using a ballpoint pen and a paper template. It seemed to be the most straightforward and didn't require any special supplies.

Go ahead and print out your sign template. I designed mine in Illustrator and sized it to my board, then printed it on a regular sheet of white paper. You could do this easily in Word or PowerPoint too.


Position the template on your board so that it's straight and centered. I placed a border around the outer edge of my template so I could line it up easily.


Fold/crease the edges down around your board so that your template will stay in the right position.


Use a few pieces of painter's tape to secure the template to your board on the backside.


Take a ballpoint pen and trace the letters/design on your template. Press hard so that you make a slight indentation in the wood. Your design will "transfer" to the wood and give you outlines to guide the painting process. If you look really closely at the wood in the photo below, you can see some faint outlines from the indentations. For more details on this process, check out the tutorial from That's My Letter.


Finally, go to town painting your letters using the indentations/outlines as your guide. Like I said at the beginning, put your patience pants on for this - it does take awhile if you're being careful to stay inside the lines! My biggest tip for this part is use a STIFF-bristled brush. I started out with a not-so-still brush and it was really challenging to stay within the outlines and get crisp edges. Once I switched to a stiff-bristled, angled brush, the process was much easier.

I used two coats of white latex paint to cover the dark stain. If you paint is too thick (mine was) to easily paint with, water it down a little.

Eventually, you'll end up with a sign like this! Love.


And that's how you make a hand-painted sign (from a total non-expert's experience).

For being a first-timer at this stuff (and not an artist), I think it turned out really well. It definitely has that hand-painted look, which is pretty charming, if you ask me. I still have one more step to finish it up - sealing. I'm planning to use some spray polyacrylic in a satin finish to protect it. This should hold up well outdoors and I can always re-coat it in the future when necessary.

Has anyone else ever hand-painted a sign? What was your experience like? Any tips or tricks? (Or corrections! I'm open to that :).)


---------


Pin It!

3.27.2013

Hand-Painted House Sign

I'm really excited to share this project with you because it's personal one. One that's been in the works for awhile, but is finally (nearly) complete.  It's a hand-painted house sign for my parents' river house. It's perfectly imperfect, and I kind of love that about it. Take a look:

{note: I photoshopped out the house number to maintain a little privacy for my parents, so pardon the fact that the numbers look a little funny!}

This sign is a belated Christmas present to my dad (see what I mean about being "in the works" for awhile?) - to both of my parents, really - for the river house they bought nearly two years ago. Though this house is a new part of my family's life, it has already become a really special gathering place for us. It's a true retreat, and a place my parents love inviting others to share with them. They see this house as a long-term type of thing. You know, the kind of place their grandkids visit and grow up coming to for vacations and holidays. A place to make memories. (Sounds cheesy, I know, but it's true.)

The reason I'm giving you some of this background and emphasizing the family part of things is because it'll help give some context to the meaning behind "Clairmont Green," which is the name of the house. When my parents were coming up with the name, they wanted it to be something special - something with meaning. They came up with Clairmont Green because it integrates the names of two special places in my parents' lives. Clairmont Springs is the place my where my maternal grandmother grew up, and was a big part of my mom's life when she was younger. Wintergreen is the place my paternal grandparents bought a house and retired before my grandfather suddenly passed away. So they combined the two places and came up with Clairmont Green. If it's not already obvious to you, family is pretty important to us. Naming the house for two amazing families only seemed fitting, and once the house was named, I thought it would be neat to hand-paint a sign for it with the name.

Ok, now that you have a little history, let's get back to the sign itself. This project involved a lot of "firsts" for me and stretched me to be creative in carrying out the vision I had in my brain. After a little brainstorming, I decided darkly stained wood with white letters would be pretty and classic, so I mocked up a few different designs to show my parents:


They decided the rectangular one (#3) was their favorite, so we went with that one. Simple and timeless.

Then the fun part started: how do I actually make this? Like I said before, there were a lot of firsts involved here. It was my first staining project, so I got some advice from my handy father-in-law (thank you!). It was also my first time hand-painting something so intricate, so I turned to Pinterest and good-ole Google for hints on that (more detail to come on how I did that in another post!). I am definitely not an artist, so needless to say, I was a little nervous about how this was all going to turn out. Was it going to be a bust? Would I have to try multiple times? 

While I may have fumbled my way through it was a bit of a challenge, I did get it right the first time (hooray!). I'm really happy with how it turned out. Hand-painted anything isn't supposed to look perfect. If perfect is what I was going for, I would've just had the letters (or the whole sign) manufactured somewhere by some pros. Like the Nester says, "It doesn't have to be perfect to be beautiful."


It's completely unique. My parents love it, and that's the important part (hey mom and dad!). I can't wait to see it hanging up in its proper place at the river.

I think this is where I'll end today since this post is getting a little long and wordy. I'm planning a post with lots of "how to" details and lessons I learned along the way. One thing I'll mention is that having the right equipment and supplies proved to be crucial to this project's success. How's that for a cliff-hanger? Ha!

Be back tomorrow with more! Update: The how-to is up! Come on over to learn how I made the sign.

Pin It!

3.26.2013

Eight Favorite IKEA Hacks

Hey y'all! Sorry about going dark yesterday - the day got the best of me and I totally ran out of time to post. I'm back though (I know you were worried, ha!), and today I've got a fun post full of ideas for you to customize your IKEA furniture ('cause we all have a little bit of that, right?).

There's a reason IKEA furniture is so popular - it's inexpensive, good (enough) quality, functional, and it's easy to find pieces that will fit pretty much anyone's style. Those are all good things, right? But why not take their simple designs a step further and customize them - "hack" them, if you will - to make them a little more you? Custom pieces for a fraction of the normal cost? Yes please! The hacks these bloggers completed are so creative, and I've gotta say, I'm incredibly inspired by the results. Makes me want to break out some paint and tools and take on something like these myself!


These eight pieces are my current faves. Some have been on my Pinterest boards forever, and some are recent additions. Let's go through them, shall we?

1 | This barn light makeover from At Home on the Bay is really simple. Take a $14.99 ready-made pendant, give it a shiny coat of paint in a bright color, and you've got a statement light fixture. (Compare the price to this one and you'll be glad you took some time to DIY.)

2 | You know those library card files that are so popular? While we all wish we could have the real thing, this mini version from The Painted Hive makes for a great substitute.

3 | Meg Made Designs turned this Expedit into a cool printer's cabinet. This is the most "involved" DIY of the group, but if you're handy and have the right tools, I'm sure you could take this kind of project on, no problem.

4 | The Sweet Beast's Svalbo sideboard with dipped legs is such a fresh-looking piece. I love the happy color, and the fact that she felt free to remove the bottom (which didn't prove to be as simple as it sounds!) shelf to make it fit her style and needs.

5 | I love happy-colored lamps and Jessie's painted Bran lamp certainly fits that bill! All she did was swirl a little paint on the inside of the base and she was all set.

6 | This barnboard coffee table was a lesson in persistence and patience for Jen at City Farmhouse. The result is a lovely, rustic table that she loves. She also shared a great tutorial on the homemade stain she used to "age" the boards on top.

7 | The campaign-style furniture trend continues to stick around, and this Hemnes dresser by Lacquer and Linen echoes that style - but with a fun twist. Instead of campaign-style drawer pulls, she used some gold knot pulls. You'll have to head over to her post to see those up close. Love 'em.

8 | This desk with trestle-style legs and a lacquer top by White and Gold Designs (via Little Green Notebook) reminds me of our DIY desk, but with an extra dose of shininess. Look at those legs!

Feeling inspired to hack your own IKEA pieces yet?

One thing you might notice (or maybe I'm just aware if it!) is that I only mentioned one hack of the ever-popular Expedit bookcases...that's because I wrote a whole post on my love for and a couple of awesome uses of that iconic IKEA piece here. Check it out, or follow my Expedit Pinterest board if you're looking for a little more inspiration for those.


P.S. I'm putting the finishing touches on a little project I've been thinking about and working on for awhile, and I'm excited to share it this week! Hint: it involves my first-ever adventure in staining, and some hand-painted letters. Any guesses on what it is?

Pin It!

3.22.2013

How to: Make a Confetti Banner


I got the creative itch this week. You know, the one where you want to make something like, right now? Go ahead and call me a crazy crafts lady, but this happens to me more often than I'd like to admit. (Maybe that's part of why I write this little blog? Gotta get this stuff outta my system.) So I scratched that itch and did something. I whipped up a little banner inspired by a couple of different photos I spotted recently and it was so easy - I'll show you how so you can make one too :). Oh, and there's no messy glue, tape or a sewing machine involved here. Read on to see how I avoided using that stuff!

Supplies needed:
  • Sheet of mailing labels
  • Sheet of pretty paper (scrapbook paper works well)
  • Circle hole punch (similar to this one)
  • String cut to your desired banner length
Step 1: Punch circles out.

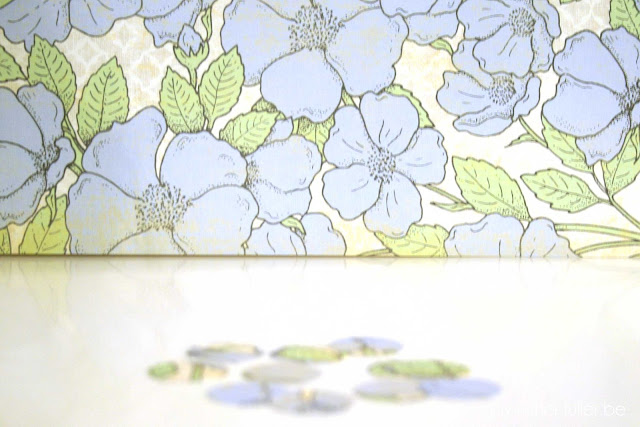
Use your craft punch to cut circles from your sheet of labels and pretty paper. Since my craft punch only reaches so far, I found it easiest to tear the label sheet into three separate sheets along the existing perforations and punch one circle from each side of the label. I didn't count, but I think I punched about 20 or 30 circles for each labels and pretty paper. That's your "confetti"! Fun, huh?


Step 2: Cut string to your banner's desired length (or wait until the end to see how long you want it - it's up to you).

I used some green and white baker's twine for mine, but any string works.


Step 3: Attach the circles to the string using one label circle and one pretty paper circle.


Take one of your label circles and peel the backing off (this can take some patience if you don't have fingernails to help you out!). Stick the center of the label to the string.


Take the pretty paper circle and stick it right onto the label (see? no glue, tape or sewing here!). Think of this as a sandwich. The two circles are the bread and the string is the good stuff in the middle.


Step 4: Repeat step three until you've added enough circles (confetti!) to make your little banner complete.

Hint: To evenly space your circles, use a note card or piece of paper as a spacer. That way there's no measuring - phew! Math has never been my strong suit.

Step 5: Hang up your banner and enjoy it!


I like it doubled or tripled up - so pretty. I think it would be perfect party decor, or you could even hang it as a mobile in a baby's room.


And just in case you'd like some handy, Pinterest-ready shorthand instructions, I made a little step-by-step "how to make a confetti banner" guide with photos. (Hover your mouse over the photo and click the little "P" icon to pin it.)


Anyone else out there have a creative itch? I know I can't be the only one.

Have a great weekend!

---------


Pin It!

3.21.2013

Lovely Links | Spring Edition


Happy second day of spring! I have to keep reminding myself that it's technically spring, even though it felt like it was about 20 degrees outside this morning (brr!). I'm so, so ready for warm weather and the brighter colors that come with this season. I know the warmer weather is on its way because the daffodils and crocuses have started to bloom in the park nearby, but it sure doesn't feel like spring yet.

Looking back at my pins from the past couple of weeks, I noticed I've been drawn to spaces and projects with more pops of bright color than usual...maybe it's a subconscious longing for spring? So today I thought I'd share a little springy eye candy with y'all. Maybe it'll help me (and you?) get through this last little bit of lingering winter!

1 | This adorable boys' room comes from a home tour A Cup of Jo posted yesterday. The apartment is only 500 square feet (!), but looks much bigger. I keep going back to this tour and saying, "There's NO WAY this is only 500 square feet." Maybe I shouldn't whine about our little 600 square foot apartment if this is what you can do with 500. How the heck are there two bedrooms in that place?


2 | Wish I knew the original source of this photo Milk and Honey Home posted, but in any case, I'm loving this collection of bowls. Maybe they'd let me steal borrow a few? 

{source - couldn't find the original! sorry!}

3 | These flowers. They're made of paper. How's that for awesome? Front & Main (West Elm's blog) posted about these beauties and more yesterday. I'm seeing a spring DIY project in my future...


4 | I'm dreading my next visit to Target after seeing the new products from the Threshold Collection (via The Handmade Home) because I'm going to want to load up my cart with sooo many things, like these painted jars and other vessels. Someone blindfold me now...before I get myself into trouble.


5 | I'm new to the Julep shop from Minted, but after seeing this little project, I'm thinking I need to spend a little more time there in the future. This is a perfect project for Easter (can't believe it's next Sunday!), but I have to say, I'm more about the Jesus part of it than the decorating part.


6 | Lastly, I'm loving this white and gold credenza against those pink walls. Well done, Kate, well done. The deep pink was a great choice.


Ok spring, now you have to do your part and bring on the flowers, singing birds and most importantly, warmer weather!

Pin It!

3.20.2013

Mounted Vintage Printing Press Letters


Almost a month ago, I wrote about my barn sale adventures and the vintage printing press letters that came home with me. At the time, I had no idea how I would display or use them, but knew that they were a cool find. Enter my father-in-law and his creative mind (you know, the one who came up with the wood wreath idea?). He schemed up a plan to mount the letters in a way that would allow them to be used for their original purpose - printing! He also has the power tools and the know-how to make it happen, so when we were visiting my in-laws this past weekend, we got to work on this little project.

This isn't exactly a tutorial or how-to, since I think this is kind of a unique project, but I hope it provides some fun inspiration for working with unusual items. A little creativity and willingness to take a chance is all it takes sometimes. Oh, and a carpenter for a father-in-law helps too :).

So allow me to present to you...adventures in mounting vintage printing press letters!

Let's start with the finished product because that'll help in understanding the "how we did it" process. Below you can see the letters all mounted up on a block of wood. Four wood elements work together here to hold the letters in place: a board with grooves, slats, spacers and end blocks. This will make more sense later on...


My father-in-law and I got to work on slicing and dicing the wood.

You can go ahead and make fun of my "work clothes" and "eye protection" - clearly I wasn't dressed properly for working with power tools. I was too eager to get started to change clothes, and rain was coming, so time was of the essence!

We used a table saw to cut grooves in the base piece. The grooves hold the wood slats in place. Look closely and you'll see two grooves already cut, and I'm working on the third.


My father-in-law cut the four narrow pieces for the slats.


I worked on making the tiny spacers that go between the letters, as well as the slightly larger end pieces that hold the rows in place.

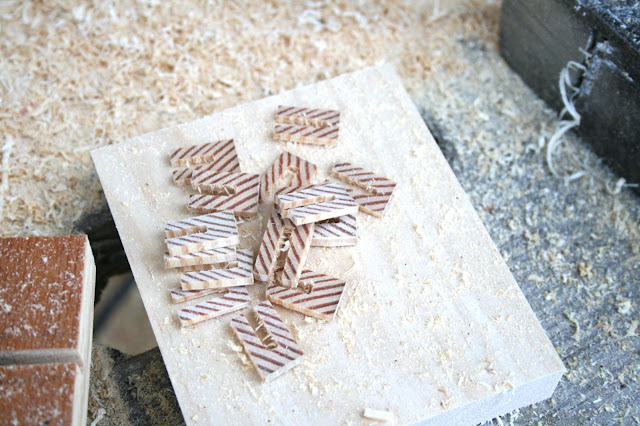
These little darlings are the spacers:


We did a test run with one of the letters and a few wood pieces to make sure everything fit together properly:


Then once we finished cutting out all the wood pieces we needed, we assembled the apparatus.


All lined up and ready for "printing" - the blocks have my and my husband's names and our wedding date.


Then we played around with different methods of printing using different combinations of paper, wood, cardboard...all with varying success.


Nothing worked perfectly, but I'm planning on trying it out with some thicker paper or maybe even some foam board - to use it as more of a letterpress than a printing press. We'll see!

Here's one of our better results. I wouldn't exactly call it successful, but we had fun doing it!


I kind of love the letters just as they are mounted up on the board, so it may just end up on display in our apartment.

Anyone else gone out on a creative limb lately? What were the results?

P.S. Extra special thanks to my sister-in-law and father-in-law, who took many of these photos while I was busy with power tools and getting paint all over my hands :).

Pin It!
Related Posts Plugin for WordPress, Blogger...
Blogging tips