8.30.2013

Lovely Links for Your Labor Day Weekend!


Happy Friday y'all! Hooray for Labor Day weekend! I've decided to change things up and take a bit of a break from my Creative Bits series for awhile. Instead, I'll be giving you an extra dose of lovely links to look at on Fridays. Sound good? If you loved Creative Bits, let me know in the comments, and I'll see what I can do :).

** P.S. (Can you have a P.S. at the beginning of something?) Don't forget to enter the house number sign giveaway I've got going on this week! **

Now off to some lovely links!

1 | I'm totally swamped time-wise right now, but I'd love to take this class on making paper flowers when I free up a little bit!
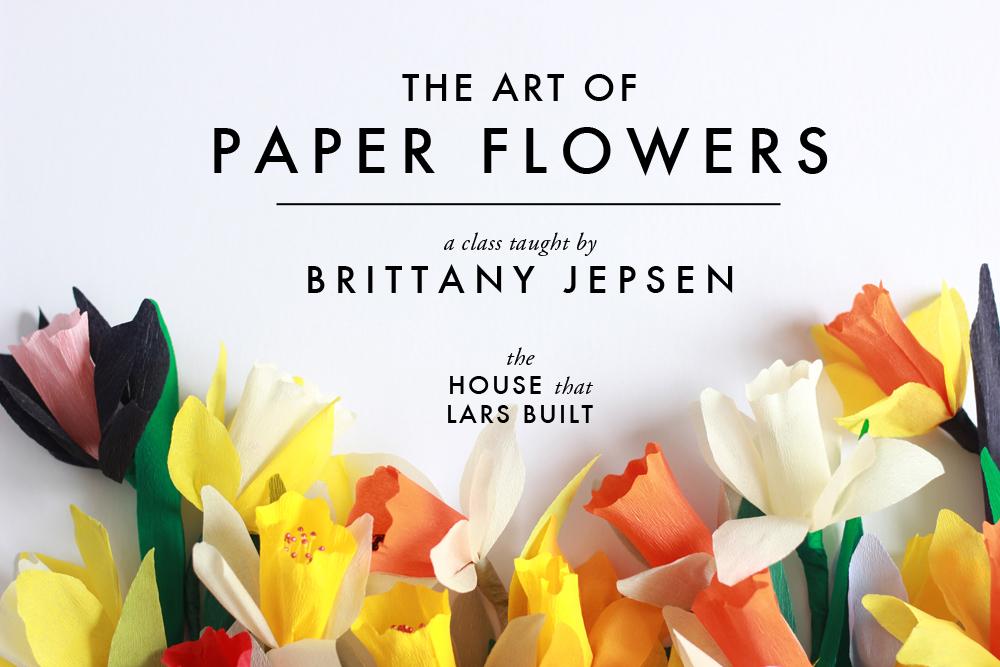
{via Skillshare}

2 | Though my IKEA pendant light kit worked great for our wood shim fixture, I ran across an alternative on The Blissful Bee this week. This converter kit from Lowe's looks like a great option, especially if you don't live near an IKEA. Give this guy a shot if you're looking to hang a drum shade as a pendant light.


3 | I am most definitely going to cover some of our books in kraft paper and put 'em on display somehow. They'd make a great addition to a mantel or on a tabletop. Aren't these pretty?


4 | I truly admire people who can paint. I love these letter watercolors Emily did, and think that maybe, just maybe I could try these and they might turn out ok :). We'll see...


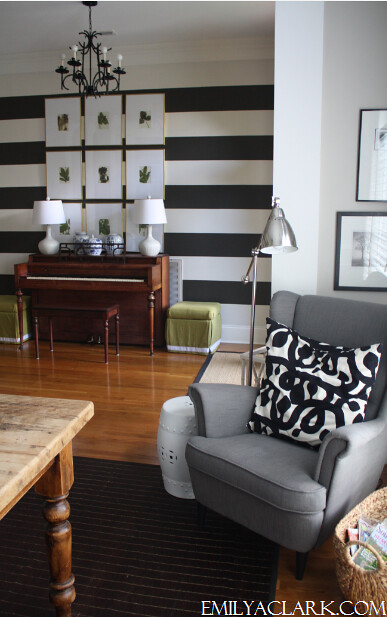
5 | Obsessed with how Young House Love's new house is coming together, especially their foyer. That aqua door and the Moravian star pendant are gorgeous together.


6 | Thinking about subscribing to Spotify's Premium service since I rarely pay for and download songs anymore (sorry music industry!). Do any of you have it? Do you like it? Recommend it? I listen to Pandora mostly right now, but miss being able to make a playlist out of my current faves.

7 | I've been passively thinking about/looking for a side table for the slipper chair in the living room. I love the look of this Target one - especially painted gold!


8 | And lastly, I really liked reading this "behind the scenes" post from Jackie at Teal and Lime about blog photography and finding good natural light. Even though I've improved a lot in this arena, it's something I struggle with, and I dread the short winter days when it's dark before I even get home from work. If you're a blogger or into photography, you know what I mean about the challenges of losing natural light by 4:30pm! It's a lot harder to get projects done during the week in those months. Sigh. I'll try not to lose sleep over it though :).

I hope y'all have wonderfully relaxing Labor Day weekends. I'm planning to soak it up. College football (oh how I love thee) starts this weekend. I love my Auburn Tigers. War Eagle! Maybe that'll get me in the mood to start thinking about fall next week - though I'm not quite ready yet!


Pin It!

8.29.2013

Defining My Style: Bedrooms

*Have you had a chance to enter my birthday giveaway yet? Head to this post to enter to win a house number sign!*

---------

We're moving right along in this series I'm calling Defining My Style. We're heading "upstairs" this time to the bedroom. I've been thinking about this one quite a bit lately since I DIY'd our upholstered headboard a month-ish ago and I find that I'm torn between two styles for bedrooms: neutral, light and serene, or colorful and energizing. 

Here's an example of a neutral bedroom I love from Centsational Girl:


Doesn't that mix of gray, white and cream just make you want to relax, cuddle up and take a nap? Many people think neutral equals boring, but when you mix and match patterns in similar colors, they provide plenty of visual interest while maintaining a calm and inviting feel. You trackin' with me on that one?

Here are a few other (mostly) neutral bedrooms that caught my eye while I was prepping this post:

{BHG}


Lovely. Yes?

I think one other key to doing neutrals in an interesting way is to vary the textures in the room. Even if you've got a 100% white bed, mixing linen, crisp cotton and matelasse (for example) can keep it from becoming boring and cold.

Oh! but what about the fun factor a colorful bedroom brings to the table? I'm also so drawn to something like this from Sarah M. Dorsey Designs, which I've shown you before:


Hello coral, slate gray and gold - nice to meet you. Can we also talk about the brilliant pattern mixing in this room? I think I'm partly drawn to this because the color scheme is pretty similar to what I've got going on right now in our bedroom after installing our upholstered headboard.

Along with that bedroom above, here are some other colorful ones I love:


There's definitely a lot of coral, blue, gray and white going on here! At least I can decide on a color scheme if I go with saturated color in the bedroom :). Did any of these images catch your eye?

I'm still feeling torn on what my "ideal" is, even after pulling the photos for this post. Maybe that means what I'm really craving is a happy medium. Perhaps a white duvet with lots of other color and pattern mixed in with pillows and the headboard?

Where do you stand on bringing color into the bedroom decor?

Pin It!

8.28.2013

Birthday Giveaway: House Number Sign from Ramsign


Today I turn 27. Happy birthday to me! As I was thinking about how to celebrate, I got to thinking why should I have all the fun on my birthday? How about a giveaway for my amazing readers here on the blog? For this special occasion, I've partnered up with Ramsigna small company that specializes in manufacturing classic porcelain enamel signs. They've generously offered up one of their house number signs for me to give away to one of you. Woohoo!

I don't know about you, but I love the look of enamel house numbers. They feel so very charming and European to me. If you're looking for a way to up the curb appeal on your home, this is a great place to start! If we didn't live in an apartment building, I'd snatch one of these signs up for our front porch in a hurry. I fell in love with Ramsign's designs as soon as I saw their classic look. I think they'd fit in quite nicely with some of my favorite home exteriors from the "Defining My Style" series (I'll be back with a new post - on bedrooms! - for that series tomorrow.)

Take a look a how pretty these signs are: 


Now don't you want one? Oh you do? Perfect! Enter below using the Rafflecopter widget for a chance to win a house number sign - a value of  $99! If you win, you can choose any one of their styles and colors with between one and five digits on it. And, good news, they ship worldwide so anyone can enter. Spread the word for more chances to win.

The giveaway ends at midnight ET on September 5th (i.e. enter before 11:59pm on September 4th). Good luck!

a Rafflecopter giveaway

*All house sign images courtesy of Ramsign.


Pin It!

8.27.2013

Top 10 Packing Tips {To Avoid Checked Baggage Fees}


Having recently returned from our eight day vacation to California (read about it here, here, here and here), packing for a long(ish) trip is fresh on my mind. I'd consider myself to be a pretty seasoned traveler, and I've become especially good at packing for trips in carry-on sized luggage over the years. I fly a pretty decent amount each year and make an effort to pack lighter and more efficiently each time. I'm a tad competitive, so this is a fun little game I like to play against myself. :)

{Side note: This is a text heavy post. I'm info-centric today, y'all! Sorry if you were hoping for pretty photos of my carry on bag, ha!}

I have enacted a personal rule that I'm not allowed to check a bag on a flight unless I'm traveling for over a week. A week you say?! Yep, a week. To some of you, this may sound crazy, but let me let you in on a little secret: you don't need to pack as much as you think you do. And even though our California trip was eight days long, I still packed only a carry on bag. Boo yah.

Another reason I've enacted this rule for myself? Avoiding those pesky checked baggage fees (budget conscious traveler here, y'all) and the awful possibility of the airline losing my bag. Not paying the fees is my own little rebellion against paying upwards of $50 round trip in fees that many airlines charge. I'm already paying enough on my ticket alone; I don't need to pay extra when I can just pack efficiently and leave a few non-essentials at home.

It also saves time in the airport. No more waiting in line to check a bag on the front end, and you don't have to waste your time at the baggage carousel once you get to your destination, or when you're tired from a trip and just. want. to. go. home.

So how do I do it? I've come up with a list of my top packing tips to share with you today. I hope this will help you avoid some of those annoying checked bag fees too, which really start to add up if you're traveling as a family!

Top 10 Packing Tips:

1. Before you open a drawer or closet door, make a list of what you need based on the number of days you're traveling, activities planned, and the weather report.

2. Pull out everything you need, and then put back anything unnecessary. 

Make your clothing multitask. For example, you probably don't need a different pair of pants/shorts/skirt for each day. Instead, decide on a couple of go-with-anything bottoms and mix them with a selection of tops. Dresses are also great for travel if appropriate for the climate and activities because they don't take up much space! Mix and match people.

And one of the best parts about traveling? No one, except the people you're traveling with, will notice if you wear the same items multiple times. I promise. Sorry to burst your bubble, but they also probably don't care all that much :).

3. Use accessories to change up the look of an outfit. 

If you're worried about variety, bring a few colorful scarves or pieces of fun jewelry to vary your look. This way, you'll get the variety you crave without the bulk of extra clothing.

4. Be picky about what shoes you actually need. 

I took four pairs of shoes on our California trip, and you know what? I only actually needed two. Shoes are often bulky and hard to pack. Quick tip: if you're taking running shoes, stuff your socks into their insides to utilize that "dead space." Plus, you also won't have to go digging for them later.

5. Find out if you'll have access to a washer/dryer where you're going. 

This can obviously be a game-changer. You can pack even lighter!

6. Don't bring a hair dryer. 

For me, this is a hard-and-fast rule unless I know absolutely that I won't have access to one, and know I'll have to blow dry my hair. Hotels always have them. If it's not in your room, ask the front desk. I do often travel with my flat iron since it's much less bulky and I get the same effect of blow drying once my hair air dries.

7. Keep a quart size bag filled up with travel size toiletries handy at home. 

That way, you'll always have those things ready to go and you can just pop them into the outside pocket of your bag. You'll have to pull them out when you go through security, so keep them accessible. 


8. Use your "personal item" as overflow space and for your in-flight essentials. 

This is the item you can bring on board with you in addition to a larger suitcase. I usually pack a tote-sized bag for my personal item and bring a small purse (which I tuck into my tote during boarding to avoid dirty looks from the security people/gate agents). My laptop or iPad, a couple of magazines, a sweater or jacket, and a snack go in the tote. I try to leave a little bit of extra space in case I decide to buy something in the airport or while we're on our trip. You can push the limits on the size of this bag, but double check with your airline on the maximum size because some can be picky and make you check one of your bags (the horror!).

9. Invest in a quality rolling carry on. 

I don't mean spend hundreds of dollars, but go to a place like TJMaxx or a department store (I've had great luck with huge sales at Macy's) and get a lightweight suitcase that has quality construction. I got a Diane Von Furstenberg suitcase from TJMaxx for around $40 three years ago and it's held up great. If it's made to airline carry-on specifications, you should have no trouble fitting it easily in an overhead bin. That'll save you a few stressful moments on the plane ;). I much prefer a rolling bag to a duffle-style bag. I find it easier to drag than carry one through those long airport terminals (sometimes I wonder if I'll ever get to my gate).

10. If you happen to be flying an airline that doesn't charge for a bag (i.e. Southwest or JetBlue as of the publishing date on this post), feel free to check one if you want!

I still generally chose to carry on even with that option available so I don't lose time on either end, or risk having the airline lose my bag.

And that, my friends, wraps up my top tips for packing a carry on!

So tell me, are you with me on carrying on as often as possible? Or are you firmly in the checked bag camp? No judgment here :). It's all about doing what works for you! Do you have other packing tips that I missed?

Have a great day!

---------


Pin It!

8.26.2013

Twig and Paper Flag Centerpiece


I hope all of you had wonderful weekends. We had a relaxing one at my parents' river house with a bunch of friends from Richmond. We absolutely love going to the river. It's such a treat to have that place available and be able to go often - thanks Mom and Dad! There's really nothing better than getting away for a couple of days with great friends!

I did manage to sneak a project in while we were there and I'm excited to share this simple DIY centerpiece with you today made of twigs and little paper flags. It's a low effort, high impact kind of project, and I'll bet you already have the supplies you need on hand to make it. And though I refuse to even mention that fall is coming (I'm a summer gal all the way) until after Labor Day, I think this little DIY is a perfect transition piece from summer to fall with its neutral color palette.

Supplies needed: 

  • Twigs or short branches without leaves
  • Tall container (I like clear glass)
  • Newspaper or book pages
  • Scissors
  • Double stick tape

Step 1: Gather your supplies. 


The house is surrounded by woods, so I just took a little stroll around outside and gathered some twigs and branches for my project. I grabbed a mix of single twigs and branches. We already had the newspaper, tape and scissors on hand (and I'll bet you do too!).

Step 2: Cut strips of newspaper for the paper flags.


I probably don't need to do much explaining on this step :). I used newspaper, but you could use any paper you'd like. Old book pages would also be great. I've still got tons of leftover pages from my 5 Book Page Crafts series from a couple of weeks ago and I definitely could've used those.

To make the flags, I cut long, thin (about one inch wide) strips of newspaper first and then cut those down into shorter strips of about four inches in length.

Step 3: Make your newspaper strips into flags and attach to the end of a branch.


Place a short piece of double stick tape in the center of a strip of newspaper and then fold it in half around the end of a branch. Press together to make it stick. The tape should be touching the branch and itself so that it doesn't slide around.

Repeat this step until the majority of the branch and twigs have flags on them. I liked the look of leaving a few branches "naked" so the flag placement looked a little random.

Step 4: Cut notches in the flags.


Use your scissors to cut "V"-shaped notches into the flags. How cute are these?

Step 6: Arrange your twigs and branches in a tall vase or container.


I am by no means a pro arranger. I literally just stuck all the branches and twigs into this clear vase and tweaked it until I thought it looked right :). Again, I like the randomness and free-spirited look that the branches naturally have.

It fit right in on my parents' dining table at the river, so that's where I decided to shoot some photos for this little project...


All the neutrals in this room are so lovely. They make for a very calming space, don't you think? My mom has incredible taste and style - I'll have to do a tour of this house at some point. I just love it. And yes, that old farm table is fabulous (did I read your mind?), as is the light fixture. The table is originally from the hotel that my great grandparents owned in Alabama. All that peeling paint is original - the look is from good old-fashioned wear and tear!


So there you have it - a super simple project that cost me $0, very little time, and has a big impact without overwhelming the space! I think this piece would also look really nice on a mantel, sideboard, or entry table as well.

How about you? Have you taken on any simple projects like this one? I'd love to see!

---------


Pin It!

8.23.2013

Lovely Links


Goodness, I feel like I had so much catching up to do in the blog world this week after being gone on vacation for eight days last week. It was so great to be away, but I definitely missed catching up on my favorite reads every day and perusing the all the amazing creativity. So because of that, I loved pulling together this week's list of lovely links that I've found this week. Hope y'all enjoy them!

1 | Emily shared some great tips on how to hang art.


2 | This is the most amazing DIY photo studio. What a brilliant use of a roller shade. If you frequently photograph items for tutorials or a business, you need this. I need this.


3 | This article, titled "You Are Enough," that Beth wrote this week spoke to me in a deep way. Perhaps it will speak to you too?


4 | Loved these 10 ways to clean using vinegar from Live Love DIY. I had no idea vinegar was so versatile (and dirt cheap - cleaning pun intended).


5 | This is such a cute idea for a baby shower. (From Hannah Kate Flora.)


6 | I think I'll have to ask my handy father-in-law (hi Dan!) to help me make one of these wood cake stands during our next visit. It's perfect for fall.


7 | I had no idea it was possible to use your home printer to print words/phrases on paper napkins! I. will. do. this.

printed paper party napkins

8 | I've asked for one of these for my birthday (next week!). Helloooo organization! Now I just have to decide what size and color...


Have a great weekend y'all! I plan to do some serious relaxing this weekend. How is it almost the end of August already?!

Pin It!

8.22.2013

California Trip Part 4 {Napa Valley}


I'm wrapping up the recap and highlights of our vacation today with our day trip up to Napa Valley and Sonoma! Thanks for sticking with me for the past few days and letting me relive our vacation from last week. I know it deviates from the normal kinds of posts around here!

When I was originally planning our trip to California, I had no idea we'd be so close to wine country while we were up in San Francisco. (California was pretty much a foreign land to me before this trip.) Once I figured that out, there was no doubt in my mind that we'd make the quick hour and a half drive up there for at least half a day. I mean, we'd already driven 400 miles from LA to SF, so what was an extra 60?

Napa Valley and Sonoma are probably two of the most famous wine-making areas in the world, and I've always wanted to experience them in person. I'd heard it was a beautiful area, but I had NO IDEA it would be covered - literally covered - in vineyards. For miles and miles all you see are the most gorgeous rolling, green hills packed with rows and rows of grape vines. It's an amazing sight.

{view from Artesa Vineyards and Winery}

There are well over 1000 vineyards in the surrounding area and many, many cute little towns, so how in the world does one choose where to go on a short visit?

Well, thanks to a review from Kate (Centsational Girl), who lives over in Northern California and takes frequent day trips to various parts of Wine Country, I knew I there was one famous little town I wanted to visit: Yountville.


Yep, I took a photo of the post office to mark our visit. I know, I know, I'm cool. You don't have to tell me twice. :)

Yountville was made famous by Thomas Keller, chef extraordinaire (of The French Laundry fame). If you're a foodie (which I am not), you're likely to have heard of it, and if you aren't, you may have still heard of it! Though we only had a chance to breeze through, it is a charming town, and I'd love to go back some day. I'll start saving my pennies now to eat at one of Keller's restaurants there :). Kate does a much better job describing this adorable little town and what to do there than I ever could, so if you want more info, read this post.

We also utilized the friendly visitor's information center in Yountville to try to decide what vineyards to visit in the area. That was when I learned that there are over 400 vineyards along just one short stretch of road heading north from Yountville. Uh, what? Craziness! I felt overwhelmed. We just wanted to taste a few wines and experience some of the natural beauty of that part of the country. How could we possibly choose just two or three?

{Gorgeous grapes. We were told the harvest is only about a week away!}

Oh, and around the same time, I discovered that 99% of the wine tastings aren't free - they aren't even cheap! A tasting alone (not even including a tour or anything) at some vineyards can cost you $20 a person. Ain't nobody got time money for that. At least not us :).

So what did I do? I turned to my trusty iPhone and found an app (Winery Finder and Tasting Pass) that offers free or two-for-one tastings at certain vineyards in exchange for sharing about them on social media. Call us cheap, but hey, if it's there, why not use it?

That's how we found all three of our stops for the day - starting with The Hess Collection. Tucked back in the mountains off of windy back roads, we felt like we had found some sort of secret hideaway. They have a charming little garden area (complete with koi pond), a large art gallery, and a tasting room that has the feel of an old wine cellar. Our favorite wines there was by far were their Cabernet Sauvignons. It sure was fun to be able to taste a $40+ bottles of wine for nearly nothing! We're typically more $10 and under bottles of wine people. Oops, am I not supposed to admit that? Oh well, secret's out!


The second vineyard we visited, Artesa Vineyards and Winery, had the most breathtaking views. It was stunning. The wines were ok (Hess was better in our opinion), again with the Cabernets being the winners, but it was worth the trip for the views alone. (Side note: the first Napa Valley photo at the top of this post is from Artesa.)


You can see for miles from their vantage point up at the top of the hill.

Our last stop was Schug Winery. This one had a small, family-owned vibe, and we loved the friendly, laid-back servers in the tasting room. I thought both their reds and whites were lovely.


After Schug, we headed back to San Francisco across the Golden Gate Bridge. We loved our time up in Napa and Sonoma, and will definitely be making another trip there at some point. I'd love to spend an entire week there for a fuller experience!


Have you been up to wine country? What was your favorite part? What would you recommend we do on our next trip?

That wraps up our trip to California! Hope you enjoyed reliving our trip with me. I'll be back tomorrow with some Lovely Links to kick off the weekend!

Pin It!
Related Posts Plugin for WordPress, Blogger...
Blogging tips