4.30.2013

Equestrian-Inspired Spaces

And they're off!

Nothing gets my heart pounding faster than cheering on my chosen horse in the Kentucky Derby every year. I have an undying love for this event that stems from my years of horseback riding growing up. Fun fact: I really wanted to be a professional jockey for awhile... unfortunately, those career aspirations faded away by about 9th grade, since I was already 5'8". Oh well. :) I did compete on my high school's equestrian team though, so I guess that makes up for it? Ok, maybe not quite the equivalent. I never lost interest in the Derby though, and every year, the first Saturday in May revolves around that two-minute horse race.

In honor of the 139th Run for the Roses, I thought I'd round up a few of my favorite equestrian-inspired spaces. I think of this style as classic with a touch of utilitarian, worn-in/rustic, and comfortable. It leans towards farmhouse, maybe? Let's take a tour of my take on equestrian-inspired decor.


Man, collecting these photos sure made me miss my days of horseback riding. Maybe one day I'll have a chance to get back into it.

Anyone going to or hosting a Derby party this weekend? I'll definitely be making some mint juleps in honor of the race and placing some friendly bets on who I think will be the winning horse!

Pin It!

4.29.2013

Creative Bits | 18: File Cabinets Turned Storage Unit

It's time for another installment of Creative Bits! Today's bit has been circulating all over the blog world over the past week or so, but deservedly so (in my humble opinion). Take a look at these filing cabinets turned storage unit:


This chic industrial storage unit is a part of a house tour from Country Living. I can't help but love the happy yellow paint combined with the darkly stained wood top. This would be so easy for anyone to recreate - even those self-proclaimed non-DIYers. You'd just need to pick up three filing cabinets from your local thrift store, some happy-colored spray paint, and piece of plywood for the top (similar to the one I used for my DIY desk).

Just think about all the storage possibilities for this baby. You wouldn't have to use it for files. It'd make a great buffet in a dining room, a perfect sofa table, or even good storage for a mudroom. Any way you look at it, it's a super creative use of an otherwise boring office necessity.

If you do take on this project, just make sure that your thrifted file cabinets are the same height and have the same style drawer fronts (color doesn't matter, obviously, because you'll be painting them!). Also, before purchasing spray paint, check the label to be sure it's made for metal, otherwise it'll chip.

Hope y'all have a great week!

---------

Creative Bits is a semi-regular series here on May Richer Fuller Be where I share little tips, tricks and simple do-it-yourself projects from other creative bloggers' minds. I figure if it makes me say, "wow," it's worth passing along to you! And remember, if you want to pin any images that don't belong to me, please click through and pin from the original source!

Click the "Creative Bits Series" tab at the top of the page to see more posts like this.

Pin It!

4.26.2013

How To: Make Spoon Flowers


What do you get when you mix plastic spoons, candles and a little craft paint? Why, spoon flowers of course! Ever since stumbling upon this idea at Sharon Berry Design (man, that lady's talented!), I've been itching to make my own and share them with you. Sharon's are really spectacular, so you should definitely take a look. These are reminiscent of those 
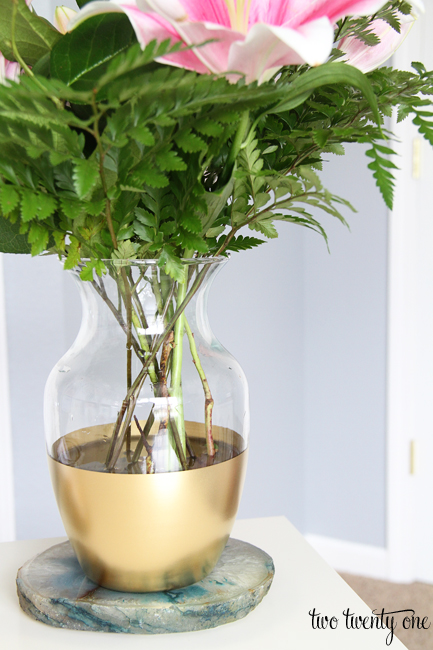
gorgeous Anthropologie vases with ceramic flowers that I love, but don't necessarily want spend my pennies on. This little project is a great alternative and just as pretty!

Today I'll show you how I made mine, and I promise after we're done, you're going to want to make some of your own this weekend! #craftivityalert #warningtheycanbeaddicting

Supplies needed:

  • Plastic spoons
  • Candle
  • Lighter/matches
  • Hot glue gun (optional)
  • Acrylic craft paint or spray paint
  • Paint brush

Step 1: Light your candle and grab a plastic spoon.


Hold the spoon an inch or two above the candle, moving it around so the heat distributes as it warms up and starts to melt the plastic. After a few seconds, you'll notice that it'll start to bend, wrinkle and curl up.


It'll start to resemble a flower petal. While the plastic is still warm, it'll maintain its pliability and you can (CAREFULLY - it's hot!) mold it a little if it's not quite the shape you like.

Step 2: Detach the handle from the bowl of the spoon.


I'm sure there are many ways to do this, but I actually found the easiest way to break off the handle was to melt it. Hold the handle over the candle in the area you want to break it off. Once it starts to bend and melt, twist the handle off. It'll break fairly cleanly and you don't have to worry about cracking the "petal" you just made.

Step 3: Repeat steps 1 and 2 until you have enough petals to make a flower. (I used six petals for each flower.)

Step 4: Attach your petals to one another to form a flower.


You've got two options here to form the flower: melting more plastic, or using a hot glue gun. I used the former method, but the latter is probably easier (ha!). 

I had to use both hands for this part, so I didn't take any photos, but the basic process for attaching the petals to one another is to hold the handle end of the "petal" over the candle until it melts and becomes "sticky." Take a second petal and stick its handle to the end of the one you just melted. The melted plastic acts like glue, and hardens up in a few seconds. Those petals are officially stuck! Continue this process until you've formed a six-petaled flower.

This part took a little bit of artistry and finesse, but I found it worked really well once I got going. There's no wrong way to form the flower - just keep adjusting it until you think it looks right!

Step 5: Paint 'em!


I used yellow and hot pink acrylic craft paint to paint these guys (and left one the original clear). If you want a more polished look, I'd use high gloss spray paint. I liked the matte, imperfect paint look, so I went with that.


It took about three coats of paint to get the coverage I wanted. Make sure you let each coat dry before painting again. I got impatient and tried to paint faster, and it didn't work very well!

Step 6: Attach a flower to a vase.

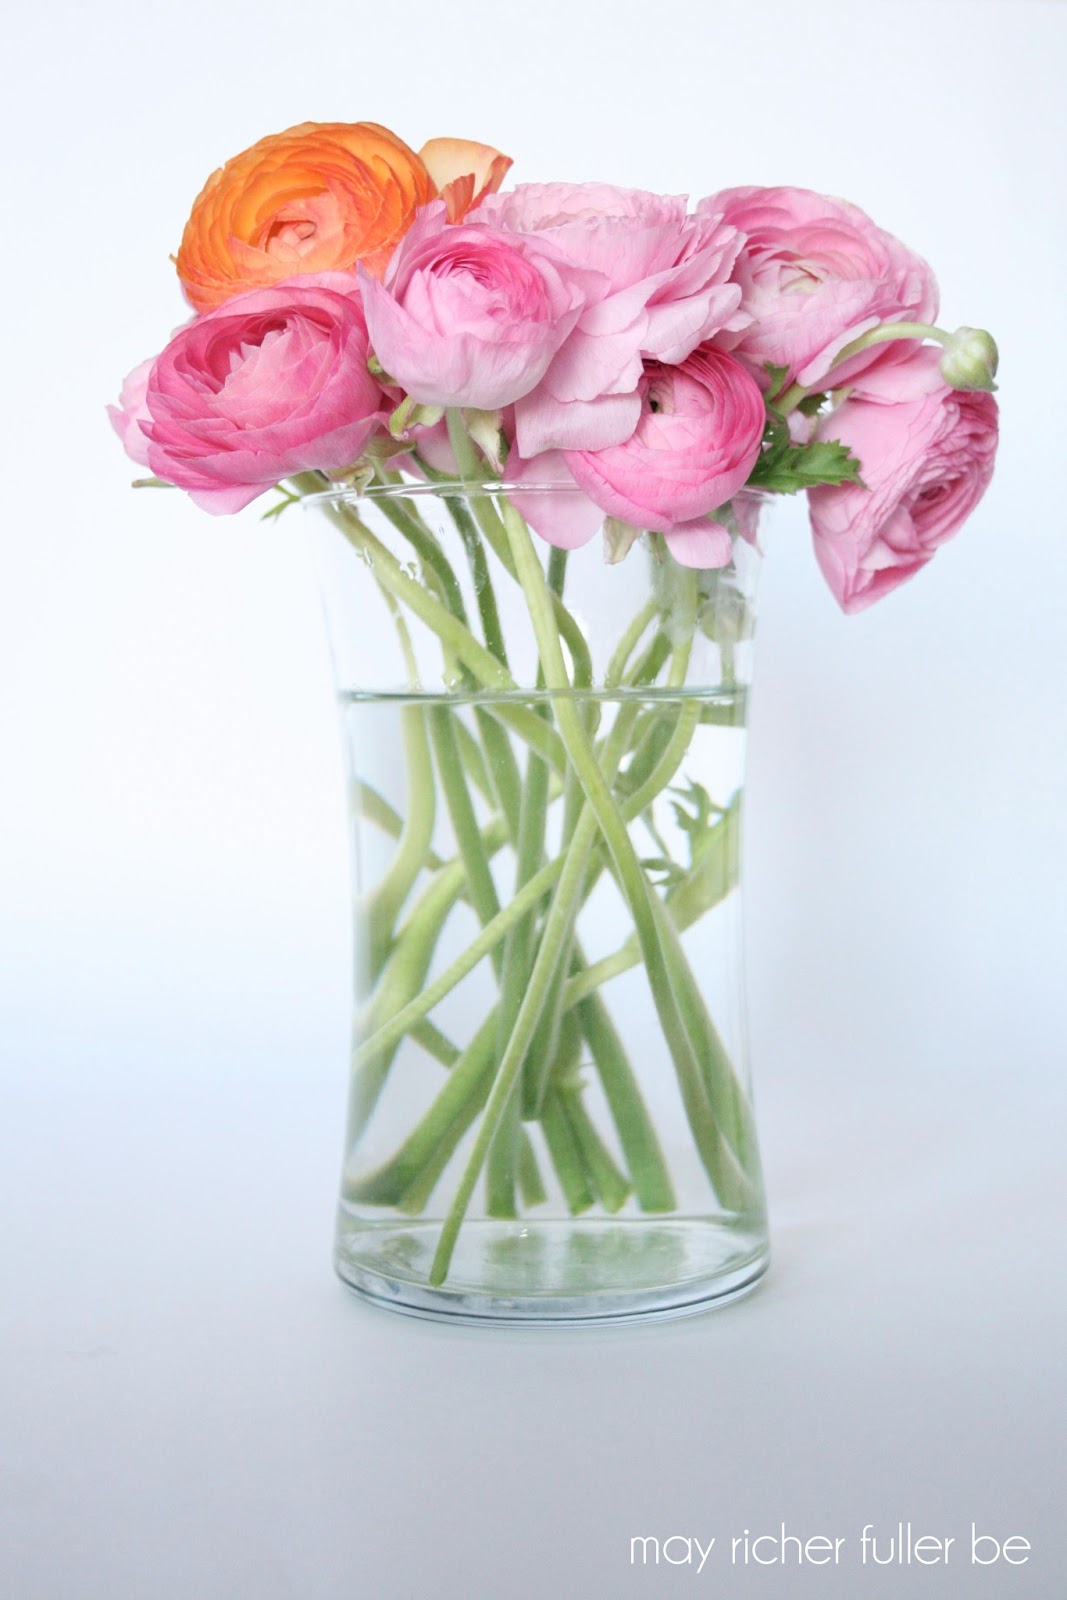
I bought a bunch of beautiful ranunculus at Trader Joe's and put them in a clear vase. Let's just admire the beauty of these flowers for a moment, shall we?


Ok, back to step 6. Attach a flower to the vase using a dot of hot glue. 


All done! Admire your handiwork and pat yourself on the back for a job well done.

Now for a photo explosion...I thought these turned out so well that I couldn't resist having a little spoon flower photo shoot. Here it goes!


Hope you enjoyed this little tutorial and eye candy. Now go get yourself some plastic spoons and get crafting!

If you make some of these spoon flowers yourself, I'd love to know about it. Leave a comment, tweet me a photo, or link to your blog post! Have a great weekend!


---------


DIY Show Off


Pin It!

4.25.2013

German Ceramic Kitchen Canisters

I'm back with another one of my "finds" from my thrifting adventures this past weekend. I spotted this ancient-looking set of ceramic kitchen canisters tucked away in a basement corner of my favorite shop.


There are 13 containers total: six large canisters for flour, sugar, cereal, rice, coffee and tea; and six small spice jars for cloves, nutmeg, cinnamon, pepper, ginger and allspice. Lucky number 13 (the oddball of the group) is the salt box. I realize that it's hard to tell sizes here, but the large canisters are about 8" tall, the spice jars are about 3", and the salt box is around 5".

I was initially attracted to their vintage vibe, and the blue triangle-y (I promise that's a word) border around the lettering. I flipped one of the canisters over to see if there was any manufacturer marking on the bottom, and sure enough, it was marked "Staffel Germany" Dec. 1818.


When I saw the 1818 stamp, I thought - are these really that old? As I started researching, it appears that these ceramic jars were stamped with the month and lot number during production. So I don't think the 1818 refers the year. From what I can tell, these jars were produced sometime between 1900 and 1940 according to Google, Ebay and Etsy (thanks guys!).

Overall, they're in pretty good shape for their age. There are definitely some chips and cracks - especially around the lids, but they'd make a great addition to anybody's kitchen. They'd be charming displayed as a group and super useful for storage.

I'll be adding these to my Etsy shop in the next few days, so consider this a sneak peak at some new additions to the shop. (Yay!) If you're interested in them, let me know and I'll save 'em for you.

Have a great day!

Pin It!

4.24.2013

Instagram Contest from Emily Henderson

Hello my lovely people! I hope y'all are having great weeks so far. I was catching up on Emily Henderson's blog last week and ran across an Instagram contest she's holding. I thought I'd share it with you, along with my entry, in case you want to participate or just follow along in this little competition.


To enter, all you have to do (as the graphic above indicates) is answer the question, "What piece of furniture would you save from a fire?" with an Instagram of the piece along with the hashtag #emilysaveme. The winner doesn't get a prize, per se, but Emily is going to show off 20 of her favorites on her blog. I'd say that's a pretty good prize! Fun, huh? I thought so. So I entered last night. Wanna see what piece I chose?

Here's my Instagram:


It's a jelly cupboard that used to belong to my grandparents. It's an ancient piece and I love it. It adds so much character to our apartment, plus it provides a TON of storage space.

Here's a "real photo" of it too:


Apologies for the glare - the windows to the right cast a funny light on that piece.

And though this contest isn't about styling, I kind of love the vignettes I've got on top of it right now.


The frame holds a tiny watercolor painting of me and my husband from our wedding. The W letter used to be plain black - I spray painted it glossy white and added popsicle sticks to the front for some fun texture. My favorite (and only) plants, the succulents, sit in the bottom half of an apothecary jar. I love that I haven't been able to kill them yet (I've had them for almost a year!). They're sitting on a pretty little cake stand (for sale in my Etsy shop right now!), which sits on top of a few design books. If you've got a good eye, you may have noticed that the confetti banner I made recently found a home strung along the top of the mirror.

If you'd like to read Emily's post on her contest, go here. Entries close on Friday, the 26th, so jump on it if you want to enter!

And yes, to the observant people (like those ones who noticed the confetti banner :) ), I mentioned Emily Henderson in yesterday's post too. She has no idea who I am, or that I'm mentioning this contest- I just think she's super awesome!


Pin It!

4.23.2013

Vintage Roadrunner Glassware

Can I just start by saying I love thrift store shopping? The thrill of the hunt, the possibility of finding a diamond in the rough, the low prices...I love it all. So when I had the opportunity to hit up a couple in small-town Virginia this past weekend, I couldn't wait to get started - especially since one of the places was where I found my vintage milk glass lamps several months ago. And boy did I find a few great things. I haven't had a chance to take photos of everything yet, so I'll start with my favorite find today: some vintage old-fashioned glasses.


When I spotted this set of eight glasses, I was immediately taken by their mid-century vibe and their shiny gold (adorable!) roadrunners. They were in almost perfect shape, and I thought they'd be a fun addition to a bar ware collection.


They have gold rims as well, which didn't photograph well, but they're there. They feel almost Mad Men-esque, don't they? I like that they're a little quirky and a little unexpected. I think they're something Emily Henderson would love. Or maybe Jaime from Furbish.

Besides the thrill of finding something fabulous at a thrift shop, my other favorite thing to do with my finds is to try and look up their manufacturer and era of production. Though these have no markings, I believe these low ball glasses were made by a company called Couroc, which was a popular maker of glassware, trays, etc. from the 1950s to 1990s. I'm going to guess mine are from the 1960s or 1970s? Total guess. I have no idea.

go roadrunner go!

I initially picked them up thinking they'd be a great "fun find" to add to my Etsy shop, but when I showed them to C, he loved them, and asked if we could keep them. So I'm 90% sure they'll stay with us. Now all I have to do is find somewhere to put them in our tiny apartment. Hmm.

I'm thinking we need an awesome bar cart to put these on display. Too bad we don't have the space. A girl can dream, right? Take a look at these lovely examples...


{HGTV}

I clearly have a thing for gold - but I'm thinking those glasses would fit right in with any of these guys.

I'll be putting a couple more of my fun finds from this weekend up in my Etsy shop this week (once I have a chance to photograph them). Can't wait to show you!

Pin It!

4.22.2013

Bloglovin vs. Feedly - An RSS Reader Showdown

{Bloglovin' vs. feedly}

As you may be aware, Google announced a month or so ago it's retiring Reader in July. My reaction to that was, "What?! Noooooo. You can't take that away from me! It's my blog-reading lifeline!"

Ok, maybe it wasn't quite that dramatic, but I was pretty sad.

Once I got over my shock and sadness, I decided it was time to move on and see what else was out there. I found two good, potential RSS reader options - you might've come across them too - Bloglovin' and feedly. I've been trying them out over the past couple of weeks to see which one I liked best. I figure some of you are in the same boat as me, wondering what you'll use after Reader is gone. So I thought we'd kick this week off with good old-fashioned showdown. Who'll it be...Bloglovin? or feedly?

First up: Bloglovin'.


What is it? An RSS feed reader very similar to Google Reader. You can follow your favorite blogs, see what's popular, and discover new blogs. *Note: when I logged in on Sunday, I noticed they're launching a new version, which is what my screenshot shows. It's still in test mode, so if you don't see this when you try it out, know that it'll be coming to your computer soon!

What devices can I use it on? Internet browser and iPhone. No iPad/tablet or Android app right now, but there is a mobile site that acts sort of like the iPhone app.

Pros:
  • Easily sign up using your email address or your Facebook credentials.
  • Simple user interface (the way it looks).
  • Site navigates similarly to Google Reader, making it easy to switch.
  • Easy to import your Google Reader blog list.
  • Has a like button acts like the starred button in Reader to keep track of your favorite posts.
  • Clicking a post takes you to the blog's full site, but has a navigation bar at the top so you can go directly to your next unread post without having to go back to the Bloglovin' site.
  • You can log into Bloglovin' from any computer and catch up on your blogs.
  • Generates traffic for blogs (a definite plus for tracking your blogging stats).
  • Can "claim" your blog and track the number of people who have added your blog to their feed (followers).
  • Easy to add a button to your blog so others can use Bloglovin' to follow you (see that plus button on my sidebar under connect? That's for Bloglovin'.).
  • Commenting on blog posts is easy since you read the post from the site itself.
Cons:
  • Can't read the post directly from the Bloglovin' site when reading on a desktop (you can in the iPhone app though). I don't love clicking through to read each new post.
  • No iPad/tablet/Android app.
  • Doesn't sync with Google Reader (that won't matter though once Google Reader is gone).
  • No options to customize the layout or appearance of the site/app.

Second up: feedly.


What is it? An RSS feed reader also very similar to Google Reader, but with more flexibility and options. It's a browser extension too. Once you install the extension, you'll see a small gray diamond in the bottom, right-hand corner of your browser window. This allows you to easily add a site to your reader or share a post via social media.

What devices can I use it on? Internet browser, iPhone, iPad/tablet and Android.

Pros:
  • It has a beautifully simple user interface.
  • Easy to sign up and transition over from Reader. You can log in using your Google credentials.
  • Lots of flexibility for viewing your reading list so you can customize it to fit your the look you like.
  • The app version has lots of tricks like swiping across a title to mark as read or unread and holding down a title to bookmark it.
  • Import your Google Reader list right as you sign up from the homepage.
  • Syncs with Google Reader when you've read or starred a post.
  • Can read posts directly in the reader without having to open a new browser window.
  • The browser extension makes it easy to add new blogs to your list.
  • Update (4/23)! I discovered today that you can PIN directly from the post in feedly! Major bonus points.
Cons:
  • You can't claim your blog on feedly.
  • For bloggers, there's no way to track how many followers you have, and readers on feedly don't count towards pageviews/stats as far as I can tell. 
  • Have to click through to leave a comment on a post (not a con for me, but likely could be for others).
The winner in my book is definitely feedly. I love the clean interface, the ability to customize the view, and all the tricks in the on the iPhone app. It really comes down to personal preference though - both really are good alternatives to Google Reader! As a disclaimer to this pro/con list, you may disagree with me on some of these points, and that's fine. I just wanted to throw some things out there for people to think about as they make the switch to a new RSS reader come July 1st. 

You can follow me on feedly here or Bloglovin' here if you'd like.

What do you think? Have you tried either of these and found you liked one better? What did I miss in this little review?

Pin It!

4.19.2013

Lovely Links


Happy Friday y'all! Let's kick off the weekend right with a little weekend reading and eye candy for you. I can't resist sharing some of the lovely things I've run across over the past couple of weeks. Hope you enjoy them!

1 | Centsational Girl shared a pro photographer trick for fixing blown out windows in interior shots. I'm definitely pinning that one for later to use myself! Note to self: must sharpen my Photoshop skills.


2 | Emily (of jones design company fame) completed a fun series of pleated projects last week. I'm a big fan. She inspired me to make my own pleated paper wreath, which I shared earlier this week. She did a different project each day, so make sure you take a look at all of them! {day 1, day 2, day 3, day 4, day 5}


3 | I have a minor obsession with outdoor globe string lights. Minted's blog, Julep, wrote about them this week and I think I need some for our little balcony...Like I mentioned yesterday, I've got big ideas for the tiny space.


4 | This cottage-style bathroom from 12 Oaks is my new favorite - and they did all the work themselves. It sure comes in handy to have a contractor husband when it comes to major renovations :). Impressive. I'll definitely need some tongue and groove walls (oh, and that shower curtain) in a future bathroom.


5 | Centsational Girl is at it again - this time with some awesome DIY/crafty mother's day gifts. Don't forget this one - it's Sunday, May 12th!


6 | I love how Kristin from Bliss at Home worked with what she had when she updated and customized her desk. Why replace when you can redo something and make it look as cool as this?


7 | The "dipped" look might be trendy, but I'm thinking of jumping on the bandwagon after seeing Chelsea's gold-dipped vase over at Two Twenty One. Shiny things? Yes please.


8 | I cannot wait to follow the transformation of this 1905 cottage. Jen, from Tatertots & Jello, introduced us to her newest BIG project this week, and I'm really loving it so far. You can read her introduction here, and follow along too!


Have a lovely weekend!

Pin It!
Related Posts Plugin for WordPress, Blogger...
Blogging tips